It’s hard to imagine a summer garden without a garlic bed. Garlic is deservedly known as a natural antibiotic, antifungal agent, and folk healer. And garlic care doesn’t take away much of the gardener’s energy or the golden summer days.
Garlic belongs to the perennial flora of the Chrysanthemum family. The scientific common name for garlic sounds “sowing onions,” “growing garlic,” Garlic (Allium sativum), and more rarely – “onion-garlic.” In general, this vegetable crop is simply called garlic.
According to various references, the cultivation of garlic began more than 5,000 years ago in Egypt, where the crop was first used for medical purposes. Garlic was part of the daily diet of the workers who built the Egyptian pyramids. For Greek athletes, participants in the early Olympic Games, garlic was a steroid and, for Greek soldiers, a stimulant of courage. Early works by Louis Pasteur identified 23 species of bacteria, including Staphylococcus, Salmonella, whose relentless killer was garlic.
After mankind first learned the secret of curing many diseases of garlic preparations, it did not abandon the crop.
BIOLOGICAL CHARACTERISTICS OF GARLIC
The root system of garlic is taprooted, but individual roots can reach a depth of 40inch (1 meter). The tall stems are pseudostems formed by the leaf sheaths of the leaves. As the plant develops, the lower part of the leaves thicken and form fleshy scales. Some of the outer scales, which become mature, turn into the covering scales of the bulb. Because the internodes are very short, the actual garlic stem is compressed into a thin base. It grows fleshy, toothed scales that are covered by the covering scales. The cotyledons contain a bud with one or two growing points and immature leaves. After resting, the gears germinate and become a new plant. Garlic cloves are used as food and as material for asexual reproduction.
The inflorescence of garlic is a simple umbel located on a 20-60inch (0.5-1.5 m) tall flowering branch known as an arrowhead. The inflorescence bears sterile flowers and aerial bulbs (corms) ranging in number from 10 to 500, depending on the variety. The entire garlic inflorescence is covered with a dense sheath before flowering. The inflorescence of garlic forms seeds only under strong UV light. Under normal conditions, airy bulbs are formed. Mature garlic bulb pods fall off and germinate into single-toothed bulbs (unicotyledonous bulbs). Sowing single-toothed bulbs will produce the usual multi-toothed garlic bulbs. When propagated by bulbs, the crop is considered a biennial, which means that in the first year, monodentate bulbs are produced, and in the second year, when sown, the usual multi-toothed garlic bulbs are produced.
TYPES OF ABOVE-GROUND PARTS OF GARLIC
Garlic forms two types of above-ground masses.
- Flowering or sprouting. They form a bud with an inflorescence (arrow).
- Non-flowering or non-flowering. This type forms only one leaf cluster during the growing season.
Garlic with arrows does not linger. The upright peduncle (arrow) and leaves turn yellow at the end of the growing season. Commonly the sheath of the inflorescence is opened at the arrow, and small beads fall to the ground.
In garlic without stalks, the leaves lose their dampness at maturity, turn yellow, fall to the ground, and then wither.
TYPES OF GARLIC
There are 2 types of garlic, which differ in the time of planting and the size of the bulb to be formed. In the fall, winter garlic cloves are planted. In spring, spring garlic cloves are planted. Winter garlic is available in both capable and non-capable forms, while spring garlic is only available in non-capable forms.
It is best to plant both forms on your large property. Winter garlic forms an earlier harvest with larger heads and higher yields. However, it is characterized by low storability. By January-February, the winter garlic cloves have dried out, and extra measures are needed to preserve the seeds. Cultivation of shootable winter garlic varieties is also better.
Differences between winter and spring garlic
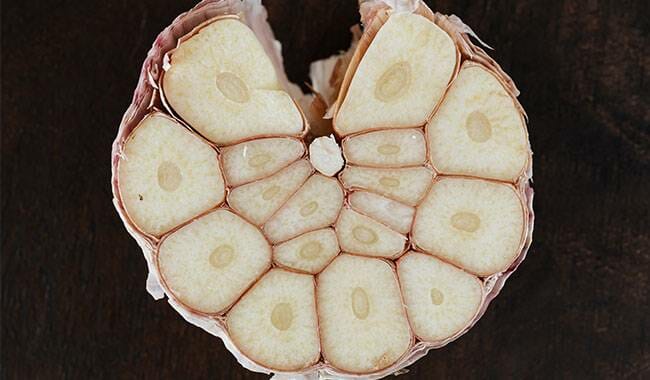
Winter garlic forms cloves around the main trunk located in the center of the bulb. When the cloves are separated, the trunk remains bare.
Spring garlic does not have such a trunk. The garlic cloves are more curved due to the close fit between each other in the garlic bulb. The largest clove is located in the outer row and the smaller ones in the middle.
For eating, these two garlic varieties are absolutely identical. Biologically, they differ in the time of planting. Spring garlic forms a crop only when it is sown in the spring. When planted in the fall, winter garlic forms the largest and healthiest crop, maturing by July. When planting cloves in spring, even if it forms a crop, it is not qualitative and does not bear fruit.

WINTER GARLIC CULTIVATION TECHNOLOGY
Sowing time of winter garlic
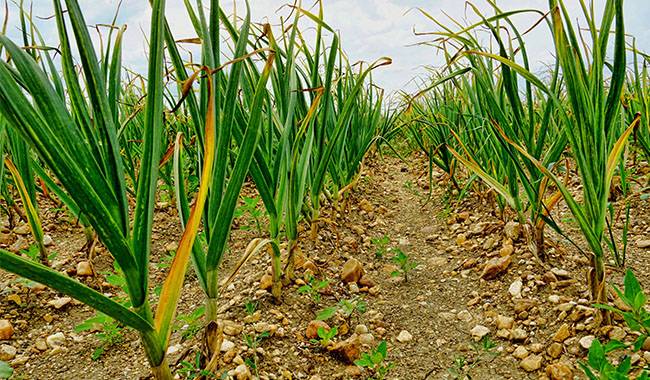
Winter garlic is planted in the fall. In the South, there is long warm autumn, and planting can be delayed until late October or even November-December. in 2016, I sowed winter garlic in the first decade of December (early December, to be exact). The teeth took root and slightly greened the tops of the future leaves. This development was a nice transition to the winter break. If sown early, when warm weather in the south often returns to 50-53°F (10-12°C), garlic manages to form leaves up to 2-2.4inch (5-6cm) tall, and with the arrival of cold frosts, the plants encounter spring damage that subsequently leads to crushed heads.
In the central region, the second half of September to mid-October is considered the best date. Currently, the best time for fall sowing has moved to mid-October. Planting starts when the evening temperature approaches 46-50 °F (8-10 °С). Garlic will have time to form a well-developed root system without green above-ground shoots. Therefore, it is very important to determine most clearly the time of sowing and propagation of cloves and bulbs. If the cotyledons and bulbs form leaves in the fall, they may die when the frost returns in the spring or be constantly sick throughout the growing season.
Lighting of garlic
The next condition for a good crop is the intensity of lighting. If the garlic bed is shaded by a higher crop, then the garlic will be crushed. Growing garlic in semi-mountainous areas will not form large heads either.
Precursors
To prevent excessive infection of garlic with infectious diseases, send the culture back to the previous planting site after 4-5 years. An equally important condition is the preceding crop. The best precursors are eggplant crops (tomatoes, peppers, eggplant), squash (pumpkins, cucumbers, zucchini), and cruciferous (cabbage, salad).
Winter garlic is a good neighbor of some fruit bushes: blackcurrant, raspberry, gooseberry, strawberry. He is good for the growth and development of cucumbers and potatoes. Protects them, as well as roses, gladioli, tulips from slugs, moths, caterpillars. The smell of garlic is intolerable to moles. Garlic planted next to roses reduces the likelihood of the crop being affected by black spots.
Soil disinfection
The level of infection background is very important for garlic. The higher it is, the less hope there is for the formation of healthy garlic heads. Therefore, it is always necessary to carry out disinfection measures before planting garlic.
The most important of these can be said to be the sowing of green phacelia. Fagus – a great green fertilizer that makes the soil healthy and free from almost all types of fungal diseases (phylloxera, root rot), eliminates pests (nematodes, locusts). Fagus successfully deoxygenates the soil. Suppression of weed growth (woodlice, etc.).
The well removes nematodes from the site and makes mineral fertilizers in the form of ammonium, including ammonia, ammonium sulfate, and potassium sulfate.
If the bed of garlic does not occupy a large area, you can sprinkle the plot with a solution of manganese.
Preparing the soil for growing garlic
Garlic prefers light soil with neutral acidity. If the soil is acidic, apply 1 cup of lime or dolomite powder every 11 square feet. Garlic does not tolerate waterlogging or fresh organic matter. When you make fresh organic matter directly under planted garlic, there is a strong affection for fungal diseases that reduce the quality of garlic bulbs. Therefore, when loose and thick soil is needed, humus and manure are best applied under the previous crop and under garlic – top peat, sand, sawdust from deciduous trees (conifers acidify the soil).
Under autumn digging, 10-12inch (25-30 cm) use a complex mineral fertilizer – 35-50 g/11 sq. ft. or use a mixture of a cup of ash and phosphorus-potassium fertilizer – 30 and 20 g/11 sq. ft. respectively. The soil was carefully leveled. Planting was started 1-2 weeks later to allow the soil that had been fluffed by digging to settle. A 15 g/11 sq. ft. ammonium nitrate was applied, or a rooting solution was sprinkled in the furrow 1-2 days before planting. This procedure is especially desirable in the case of delayed sowing to accelerate root formation.
Preparation of planting material
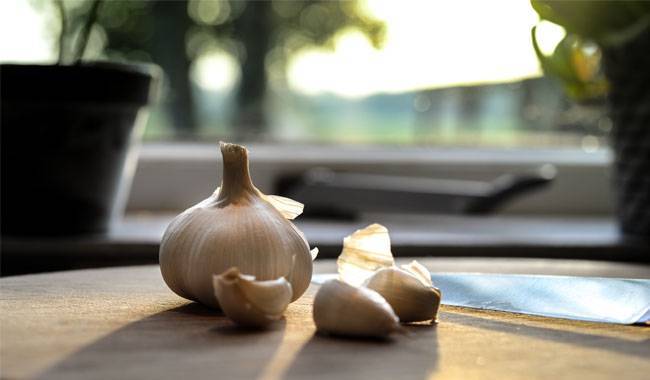
Planting material can be purchased at specialty stores, but it is best to use samples of the current year’s planted crop. When planting, select the largest heads and cut them into individual one-size cloves on the day of planting. If the cloves are harvested early, the base of the cloves will dry out, and therefore germination energy will be reduced. If the separated cloves are stored for a long time, they may not germinate.
Cloves are sterilized in a manganese solution (30-40 minutes) and then planted. Disinfection of cloves can be done in a 1% copper sulfate solution. The gear should be kept in the solution for no more than 1 minute. Some experienced gardeners recommend first clean the teeth with a salt solution (40-50 g/1.3 Gal water) for 1-2 minutes. Then immediately drop them into a 1% copper sulfate solution for 1 minute and start planting seedlings without cleaning.
If these materials are not available, the planting material can be disinfected with an alkaline solution. Pour 400 g of ash into 0.5 Gal (2 liters) of water, boil for 0.5 hours, and cool. Strain the cold solution and incubate the teeth in the prepared concentrate for 1.5-2 hours. Rinse and plant with boiled cold water.
Planting winter garlic
The best solution for planting garlic is in rows or double rows (double rows). The width between rows is 4-4.5inch (10-12 cm), and the width between rows is 10inch (25 cm), or the width of the hoe blade. Row spacing is 3-4inch (8-10 cm) or the length of a standard matchbox. When planted at high densities, cotyledons and bulbs are very shallow. The embedding depth is 2 teeth high or no less than 2-2.8inch (5-7 cm). With shallow planting, rapid warming of the upper soil layer in spring will result in crushing heads and cloves. If the soil is dry, pre-water the bottom of the furrow with a watering can. Close and flatten the soil. However, garlic is sufficiently frost resistant -13 to -0.4°F (-25 to -18°C) in winter, be sure to plant with any fine mulch. To prevent crow, you can mulch the bed with dry branches.
CARE FOR GARLIC PLANT
Loosen the soil
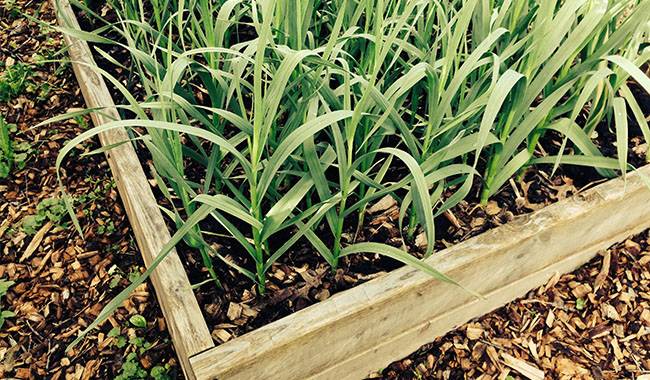
Garlic should be planted loosely in the spring after the snow melts. Loosening removes soil crusts, removes weed infestations, and increases the oxygen supply to the plant roots. The presence of soil crusts delays the development of garlic bulbs. They grow sluggishly and form broken heads.
Watering
Active growth of the above-ground parts of garlic takes place in May, June, and the first half of July. Under normal weather conditions, water three times a month. During the hot summer months, watering frequency increases to 5-6 times per month. If the summer is very humid, garlic is not watered. Plants need high humidity during active growth periods, but the coincidence of rain and heavy watering leads to fungal and bacterial diseases such as root rot and leaf rust. To reduce the frequency of watering and to keep the soil moist for a longer period of time, it is necessary to loosen the soil and mulch after each watering. During the hot summer months, when the soil dries out quickly, you will not be able to get large heads of garlic without mulching.
From about the first decade of July, when the pre-harvest ripening period of garlic heads begins, switch to maintaining soil moisture or eliminate watering. Do not allow the soil to dry out so that the dry soil does not take moisture away from the ripening cloves.
Fertilizing garlic
To make fertilization more effective, they are combined with irrigation. Garlic heads can accumulate nitrogen, so extra supplies of culture solutions should be treated with care. During the growing season, garlic should be fertilized 2-3 times and no more.
The first fertilization of winter garlic is done on moist soil, at the stage of 3-4 leaves of urea solution (20-25 g/2.5 Gal of water with a flowing intensity of 0.8 Gal (3 liters) of solution 11 sq. ft. of area.
The second application of garlic is made 2 weeks later, using a nitro phosphate fertilizer, nitroamine fertilizer, or other fertilizer at a rate of 2 tablespoons per 11 square feet. Fertilizer can be applied in dry form or as a solution (2 tablespoons per 2.5 Gal of water for 22 sq. ft.).
Fertile soils may be left out of the third top dressing. On sandy loam and light soils, fertilize with calcium superphosphate at the head formation and growth stage (second decade of June) – 30-40 g/11 sq. ft.
If you find that the above-ground parts of the plants are growing slowly, additional foliar sprays can be made by injecting ash or poultry manure, water-soluble fertilizer, and a group of trace elements.
Prepare a solution of the following concentrations.
- Dilute 1 cup of ash or bird droppings per 2.5 Gal (10 liters) of water, filter, and spray the plants.
- You can use one scoop of crystals with a trace element set (purchased at the store) per 2-2.5 Gal (8-10 liters) of water.
Foliar feeding of garlic can be done in any combination, but in low concentrations, as it supplements, not replaces, the main feeding. If the plant is overfed, the taste and quality of the bulb will deteriorate significantly.
Garlic is capable of spoiling. From years of selection, it is no longer possible to obtain large heads over time. Therefore, the material must be renewed after 3-4 years. To do this, remove mature inflorescences, select large bulbs and sow them around September or in early October. The following year, you will get single-toothed bulbs that will form large, healthy heads of full length when sown in the fall and can shoot garlic in the winter.
If the arrows are pulled in time for the garlic to emerge in the winter, the garlic will produce large heads. Shoots are removed at 4inch (10cm) tall. They are broken or cut off, leaving 0.8-1.2inch (2-3cm) posts.

PROTECTION OF GARLIC AGAINST PESTS AND DISEASES
Garlic Diseases
As with all vegetable crops, winter garlic is susceptible to fungal, microbial, and viral diseases. The use of chemicals to prevent disease and pests on garlic is not recommended. The most practical and non-threatening to the health of cottage owners, children, and animals is the use of bio fungicides. They can be used to treat plants from the first days of their life until harvest, which will give you a healthy product.
If garlic discolors in winter, spots, dots, and arrows appear on the leaves, and growth stops. This means that the plant is infected. The most common diseases are leaf rust, root rot, fusarium, powdery mildew, basal white rot, and others. It is necessary to start treating plants and soil with Alirin, Gamair, Phytosporin, Gliocladin, Planriz immediately. The preparation of the work program and its application are given in the recommendations. You can not deviate from them. Self-raising concentrations and spraying at low temperatures will not produce the expected positive effects on the plant.
Garlic pests
Among the pests, the most harmful are: onion fly, whose larvae eat the dental pulp, stem nematodes, onion aphids, thrips, mites, hidden sprays, and others.
The basic methods of fighting include mandatory treatment of planting material, treatment of plants and soil with biopesticides. Due to a natural biological basis, biopesticides do not negatively affect human health and do not cause addiction to pests.
Planting marigolds and marigolds along the edges of the beds and between wide rows of garlic is an effective preventive measure. Nematode larvae, which crawl to the scent of flower crops, use their root sap as food, which is toxic to nematodes and leads to the death of the pest.
HOW TO GROW SPRING GARLIC
Unlike winter garlic, spring garlic is sown in the spring when the temperature in the upper 6inch (15cm) of the soil rises to 41-46°F (5-8°C). The difference in spring garlic is the formation of small heads. To obtain larger heads, sow as early as possible. Cultures are quite freeze-tolerant and develop better at lower temperatures. Therefore, if there is no way to measure the temperature, vegetable growers usually start sowing early in the morning or mid-April, depending on the region and climate.
Spring garlic plants do not fear spring frosts, which occur at 37-39°F (3-4°C).
Soil for spring garlic is prepared in the fall so that you don’t have to dig in the cold semi-frozen soil in the spring.
The agrotechnical requirements for environmental conditions, soil preparation, and planting material are no different from winter garlic.
TEMPERATURE REQUIREMENTS FOR SPRING GARLIC
Spring garlic has different temperature requirements during the growing season. This can be adjusted by planting the cloves deeper into the soil. For optimum temperatures of 41-50°F (5-10°C) in the root development zone, plant cloves at a depth of 2-2.4inch (5-6 cm) and cover with mulch at planting time so that the soil at that layer warms up more slowly. At lower soil temperatures, cotyledons grow more actively, and roots develop more quickly. For one month (from the stage of laying garlic bulbs), the best air temperature is 59-68°F (15-20°C) and later, when the bulbs are mature, 68-77°F (20-25°C).
Air and soil temperatures can be regulated (relatively, of course) by mulching and light misting. Use a dark mulch (top peat) in cold weather and a light mulch (sawdust, shavings) in hot weather. You can mulch the mowed hay. The loose layer allows air to pass through and prevents the soil from warming up. A layer of mulch should be no less than 1.5-2inch (4-5 cm). This method will reduce the temperature on the soil from 33-37°F (1-3°C) or even higher.
FERTILIZING SPRING GARLIC
Spring garlic should be fertilized 2 times during the growing season. As with winter garlic, do not overfeed. When cloves are overfed to accumulate nitrogen compounds in the form of nitrites (toxic to humans), the quality of the teeth decreases rapidly. To fertilize spring garlic, if the soil has been well fertilized with manure during basic preparation, use nitroglycerin or inject 1 cup of fresh cowpea or poultry manure with 2 cups of straw ash into 2.5-3 Gal (10-12 L) of water. Stir the solution well, strain, and apply to the rows for irrigation, then mulch.
SPRING GARLIC CARE
Spring garlic care (loosening the soil, watering, preventing pests and diseases) is no different from that of winter garlic.
GARLIC HARVESTING
Harvesting starts in late July or early August. The dug-up plants are left to dry in the shade for 3-5 days. Then cut off the above-ground parts, leaving a 2-2.4inch (5-6cm) column. It should be noted that almost all winter varieties of garlic are distinguished by their large bulbs.
By August, the leaves turn yellow and lodged, and the culture is ready for harvest. The garlic is swept up, shaken from the ground, dried, and tied into braids. In this form, garlic is stored in a cool, dry place. Dry-resistant garlic bulbs have a shelf life of up to 1.5-2 years. The vast majority of varieties can be stored for as long as 10 months.
How do you grow garlic? Share your tried and tested tips and tricks in the comments.
More related information about growing garlic plants