Winter has rolled down the hill. However, spring persistently knocks on the door and reminds: now is the time to prepare for planting. Raising seedlings provides a good reserve for heat-loving vegetable crops in the south that do not tolerate cold temperatures. Planting seedlings in open or protected areas allow you to grow very early, early maturing crops in the south and to obtain mature crops when planted in open fields in colder regions, where fall chills begin in August. The fruits of long-growing vegetable crops do not have time to ripen. All the pre-work, sowing, seedling growth, and care of seedlings are almost the same, but its cultivation remains a complex process that requires attention, accuracy, and patience. Violation of the plant’s requirements for growth and development conditions can bring a cascade of problems that need to be solved immediately.
To raise healthy seedlings, it is important not to make mistakes and, if they occur, to quickly find the right solution. The article suggests becoming familiar with the main problems encountered during seedling raising and how to solve them.
SEEDS DID NOT GERMINATE, SINGLE SHOOTS WERE OBTAINED
What is the reason for this?
The reason could be poor seed quality. The germination energy of the seeds is reduced, and the friendliness of the buds is reduced. The sowing depth of the seeds is damaged.
How can I prevent it?
To avoid poor quality sprouts, you should always use high-quality seeds for sowing, with all the necessary indicators marked on the bag: number of seeds, period of appearance of sprouts, percentage, and energy of germination, shelf life, and other data.
If the seeds are prepared by yourself, they must be calibrated, and light and heavy seeds must be separated. Make sure that the complete seeds are sterilized. Before sowing, check the germination of the seeds.
It is best to use a stimulating solution and to sow with watered (germinated) seeds.
SEEDS GERMINATE SLOWLY AND UNEVENLY
What is the cause of this?
Poor seed sowing. Seeds of different cultures are of different sizes. Accordingly, seeds are sown at different depths.
Uneven or deep sowing in a hurry can also lead to uneven or slow germination.
Poor quality of the substrate. The substrate plays an important role in obtaining friendly and timely germination. It can be caused by improperly selected and prepared soil mixtures (heavy clay from the garden, unsterilized soil, and other causes).
Violation of soil temperature and moisture conditions. Seeds are sown in cold, over-watered soil, where the watered (germinated) seeds suffocate due to lack of oxygen, and the root shoots rot due to low temperatures. If it is overheated, the seeds have steamed in soil that is too warm and moist.
Water can stagnate at the bottom of the planting container. If you forgot to make drainage holes at the bottom or the drainage holes are clogged with dense soil, check!
How can I prevent it?
When sowing seedlings, all agricultural technical requirements must be carefully observed.
If you are confused about the depth of sowing, you can be guided by the following signs: the seeds sink to the height of the seeds or no more than twice their diameter.
It is very important to observe the uniformity of seed encapsulation to obtain friendly seedling germination. Tomatoes, bell peppers, bitter peppers, and eggplants are embedded no more than 0.4-0.6inch (1-1.5 cm) deep.
Very fine, dust-like seeds (celery, parsley, lettuce) are mixed with sifted fine sand, powdered chalk, and sown on the surface of the prepared substrate. The top of the sown seeds is covered with a thin layer of sand, humus, and the same dry substrate as when the seeds were sown.
Regarding the quality substrate used for sowing seedlings, it is necessary to handle it in advance. For beginners, it is more practical to buy ready-made seedling substrate in the store. Then, with some experience, prepare yourself the recommended soil mix with sufficient light, permeable and breathable, containing humus and fertilized with mineral fertilizers.
To ensure that the seeds form friendly sprouts in time, it is necessary to water the soil thoroughly before sowing, and the excess water should be drained into the tray. After watering, allow the soil to mature and warm up to 64-68°F (18-20°C) and then stand for a few days to be ready.
Mature soil should not be wet but moist. It tends to crumble when forming furrows for seeding. The air temperature at which friendly germination occurs should be 68-77°F (20-25°C) and should be reduced to 60-64°F (16-18°C) immediately after substantial germination. After sowing and before germination, it is best not to water the soil but to spray it to avoid the formation of soil sludge.
If the measures taken do not solve the problem of obtaining friendly germination in time and all conditions have passed, it is reasonable to reseed the seeds into another substrate if all necessary procedures are observed (especially if the germination period is 4-8 days).
SEEDLING BLIGHT
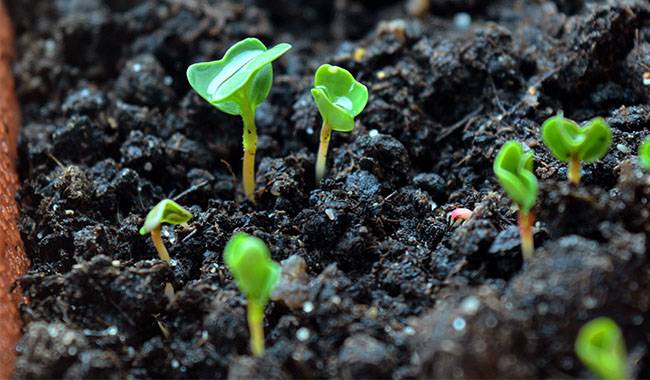
The next big problem after receiving the sprouts is seedling bedding. Everything seemed to be fine. We got dense seedlings. We took the aluminum foil off the mini-greenhouse, put the container with the seedlings in the window, and… Suddenly, the seedlings started to twist and persist.
What is the cause of this?
The reason may be too high a seeding rate. Sometimes (especially for beginners), to be complacent, they sow 1.5-2 normative seeds. This method is more often used when sowing large areas (seedlings sown for sale or other needs). With quality seeds, friendly, dense seedlings will begin to compete for light, water, and nutrients and crush weaker and stunted seedlings. Seedlings will begin to develop unevenly. The taller and stronger ones will bend in the direction of more light (one-sided accommodation).
How to prevent this?
Always sow seeds at the prescribed rate. The seed rate can be more than 5-10%, but not more than 5-10%. The best method is to sow the seeds in boxes, peat pots, or polyethylene cups. With this type of cultivation, the seeding density can be easily maintained, and the seedlings are practically immune to fungal and bacterial infections.
What should I do?
If seedlings develop very densely, they should be pruned immediately. Carefully, at the soil level, pull out (without plucking) the weaker shoots. Leave a distance of 0.6-0.8inch (1.5-2 cm) between seedlings in a row if sowing in rows and if sowing scattered – leave about the same area around the perimeter. This method will provide greater fresh air flow, improved light, and nutrition for each seedling.
If sowing in individual pots or cups, then sow 2-3 seeds, and after germination, the weak seedlings are removed (by pinching), leaving one of the most developed.
AFTER SEEDLING PULLING
Before germination, future seedlings do not need light, so seedlings are removed from light and covered with light-proof material. Sometimes after germination, plants exposed to light begin to stretch strongly, and the stems thin and fall into the soil.
What is the cause of this?
The main cause may be a lack of light. In the struggle for the amount of light, the seedlings begin to pull up one-sidedly. Lack of light can be caused by dirty window glass, increased watering, and seedlings that are too dense. Thin stems bend toward the light. No, stay upright, accommodation. During this period, seedlings have a high probability of disease.
Another cause may be too high air temperature and soil moisture. Watering too often and too heavily is the reason for pulling out seedlings after they emerge.
How to prevent this?
To do this, after the first germination (about the first 3 days), move the container to a windowsill, closer to natural light. In this regard, the best in the southern position of the window. The windowpanes of the greenhouse should be cleaned of dust and dirt beforehand. Provide additional lighting.
Keep the soil under the seedlings moderately moist. When watering for the first 2 weeks, you need to protect the plants from getting water. It is best to water before 12:00 pm. Irrigation water should be heated to 64-68°F (18-20°C). The watering sequence is 1-2 times per week. The next watering is required when a thin crust forms on the dry soil. When growing at home, sprouts should be watered along the edges of the container and in the greenhouse along the furrows.
What to do?
For proper growth and development, seedlings need 12-14 hours of light per day. In February and March, the light days are shorter, and the light intensity is lower. As a result, plants only get about 50% of the light they need. If the light intensity is low, the plants will shrivel, stretch and bend toward the light source.
Additional lighting can be provided by plant lights, fluorescent lights, and LED lights. Seedlings are usually raised with heavy light from 7 a.m. to 8 p.m. To increase the brightness of artificial light when growing seedlings at home, a reflective screen of aluminum foil can be installed on one side of the window.
To stop seedlings from being pulled out, soil moisture should be reduced. To do this, gently lift the stagnant seedlings and dry the soil under them with dry fine sand (best practice). Later, it is more practical to water the plants with a tray and spray them finely with a sprayer.
Excessive moisture in the air and soil can promote the development of fungal diseases. For the seedlings to be healthy, not to be pulled out, and grow thick stems with stable growth, you need to keep the room at an optimal humidity of 70-75%. To reduce humidity, the room should be ventilated but without drafts.
WITHERING AND DEATH OF SEEDLINGS
Growing young seedlings requires constant attention. All measures were taken, the plants were green and fresh, unfurling the first true leaves, and suddenly, both in large containers and some small ones, the young plants began to wilt, curl, and in some places, sparse small shoots of dead seedlings appeared. And the number of dead plants is increasing.
What is the cause of this?
Wilt is caused by dry soil and violation of water balance of seedling leaves or violation of air and moisture regime of cultivation.
Over-fertilization is also a possibility.
If aphids and other pests appear, the leaves not only wilt but also curl.
An increase in the number and appearance of new dead plants may indicate lesions with fungal and bacterial diseases.
How can I prevent it?
Check the moisture level of the soil frequently and water the plants properly. If a dry crust forms on the surface and if the soil underneath feels dry to the touch, you should take steps to water properly.
Fertilize properly with chemical fertilizers.
Suppose the plants wilt due to pests, aphids, or mites. Constant monitoring is necessary to pre-empt the reproduction and spread of pests that have emerged. Seedlings need protective measures.
The death of a single sprout is not terrible, but the appearance of a large number of dead plants with gaps and death, even when grown in individual pots and cups, is a clear sign of disease. Confirmation is a pinkish tinge at the base of the stem, a black overstretch at the root neck, and the lower part of the seedling soiled with mucus.
What to do?
If there is a lack of water, it will wilt from the lower leaves, which are slightly funnel-shaped or boat-shaped. It is necessary to loosen the soil around the plant and water it with a small amount of warm water. The main watering should be done through trays. Spray the plants with a sprayer and thereafter carefully monitor and observe the watering requirements. If no fertilizer is applied and the soil mixture is not sufficiently fertilized before sowing, perhaps the seedlings will be “hungry.” In such cases, the plants need to be fertilized.
Recently, more and more gardeners are engaged in growing seedlings inboxes. This is very convenient. The seedlings do not need to be picked. There is a feeding area, lighting, and enough oxygen flowing to each seedling. But given the small capacity of the cassettes, any seedlings that are raised need nutrition. Without nutrition, the plants will stretch, look pale, and look sickly.
In the early stages of seedling formation, seedlings need nitrogen. Nitrogen fertilizer can be prepared from poultry manure. Mix poultry manure with water in the ratio of 1:2. After fermentation for 2-3 days, dilute it in 2.5 Gal (10 liters) of water and irrigate the soil under the plants.
During hardening of seedlings, prepare an infusion of ashes – 1 tablespoon of ashes in 0.5 Gal (2 liters) of hot water). Hold for one day. Filter and water the soil under the plants. You can buy ready-made preparations of trace elements and spray them when the plants form 3-4 leaves or within a week after harvesting. Other mineral or organic fertilizers and combinations can also be used for fertilization. The main thing is that the fertilizing solution should be of low concentration. Before fertilizing, the plants should be watered so that the nutrient solution does not burn the young roots.
Carefully examine the leaves of the seedlings from above and below. Leaf curling may be a natural process of leaf plate growth and development. However, if there are tiny white or red marks on the leaves, they may be signs of pests. Seedlings can be treated with tobacco or tobacco smoke (making censors).
Treatment can be carried out with modern preparation Sherpa – contact intestinal acting pyrethroids against a wide range of pests of any age. After 1-2 hours, the pests will die. A single treatment of seedlings is sufficient. If you are raising seedlings at home, it is better to use biological insecticides (they are harmless to people and animals) – Bitoxybacillin, etc. Consider: biological agents are effective after several treatments, as recommended.
Localized death of seedlings and more mature seedlings is often associated with fungal diseases. Immediate protective measures are necessary if the plant is easily pulled out of the soil and overstretching, rotting, fine traces of mildew can be seen on the root neck, the lower part of the stem. The disease is capable of destroying young seedlings within 1-2 days. If the disease begins to appear only in the form of individual plant deaths, it is necessary to transplant healthy seedlings into other containers, pre-disinfecting the soil again with manganese, Trichodermin.
If plants become sick in the first or second week after germination – it is better to reseed in a new, more thoroughly disinfected soil mixture and to treat plants regularly with phytosporin, trichodermin, and other bio fungicides.
In this article, we have considered only some of the most common problems in seedling cultivation. There are many more, especially if the agricultural techniques of seedling cultivation are not followed. The most important fact will remind us – only careful preparation, prevention, and meeting all requirements for plant growth can guarantee healthy seedlings.
More related information about planting & growing seedling


