For some people, it takes time to sow seedlings. It’s a long-awaited and pleasant hassle. For others, it’s a heavy responsibility. It’s easier to buy ready-made seedlings at the market or from acquaintances.
Nonetheless, even if you refuse to grow vegetables, there are probably some things you’ll want to sow. These include flowers, perennials, conifers, and many other plants. No matter what crop you’re sowing, seedlings are still seedlings.
Therefore, the rules for obtaining good quality, strong, healthy seedlings with well-developed above- and below-ground parts are largely the same.
Good quality seeds
Good seeds are essential for good seedlings. Therefore, either buy seeds from established producers who have had good results in previous years or use recommendations from friends and neighboring gardeners.
Recently, the practice of ordering seeds in China, especially of some new exotic plants and varieties, has spread quite widely. My practice has shown that the germination rate of such seeds is very low if not zero.
It seems that many suppliers “from there” take advantage of their impunity and send shipments knowingly unsuitable (late) or even wrong plant varieties. Needless to say, you can run into such suppliers on our online site.
For those who collect and prepare their own seeds for seedlings, I will give advice: sow only large, high-quality, mature seeds, which will be of little use in unqualified triple soil (consisting of lime, clay, or crushed brick, gravel, and fine sand).
However, this does not apply to the situation whereby some miracle you get one-two seeds of the crop or variety you want. Here, we sow the seeds that are, without the need for selection.
Don’t forget to check the shelf life on the seed package. In case of doubt, do a trial sowing (if their quantity allows). Sow the seeds in advance in a wet cloth and wait patiently for a few weeks. If 50% of the seeds have emerged, you can safely sow the seeds, but consider that only half of them will emerge.
Prepare a good soil mixture
When sowing seedlings, use a good quality potting soil mixture. Why this is so important?
- A light and loose soil mixture will make it easier for small roots to grow.
- Plants will quickly use up the nutrients they get from seeds, so the mixture should have a moderate amount of nutrients.
- The mixture is free of pathogens, insect eggs, and insect larvae, which will allow you to grow healthy seedlings without much trouble and with a high percentage of yield.
For many people, the most acceptable option is to buy ready-made seedling mixes. But even here be careful – unscrupulous manufacturers can still be found.
Of course, in stores, it is unlikely that you will be allowed to print the package, but at least do it in advance at home. When you open the package, the mixture should be slightly moist to the touch, have a pleasant odor (not putrid), and not contain mold and inclusions that are too large (small ones are acceptable).
For those who plan to raise a large number of seedlings, therefore, and soil mixture will need more, acceptable options – to compose these mixtures themselves.
Usually, for this purpose it is necessary to mix peat, sand, garden soil in the appropriate proportions, adding fully digested manure. It makes no sense to give recipes, each gardener has his own, and they vary from culture to culture.
But whatever you do not make up any mixture for seedlings, if you take the ingredients in the natural environment, know that they must be pre-treated to get rid of pathogens, larvae, and eggs of insect pests and weed seeds.
You can do it the “traditional way”, keeping it in a strainer over a pot of boiling water for 30-40 minutes (steaming). Another option – process in the microwave oven at full power for 20 minutes.
You can also use the oven, setting the temperature above 212°F (100°C). These methods are good, but for small portions of the soil mixture used for germination, the smell from these operations is not to everyone’s liking at home.
What to do if you need to handle several buckets of soil for seedlings? I propose a method suggested by nature itself.
The buckets containing the mixture are taken out and put in frost, allowed to freeze completely, then taken to a warm place and kept warm for 10 days. Many of the things inside wake up, come to life, germinate, and you put them back on the frost.
Cycle like this a few times and you’ll basically get rid of all the spoilers for your sprouts. Of course, this takes time and you need to start the process of preparing the soil mix for sowing ahead of time.
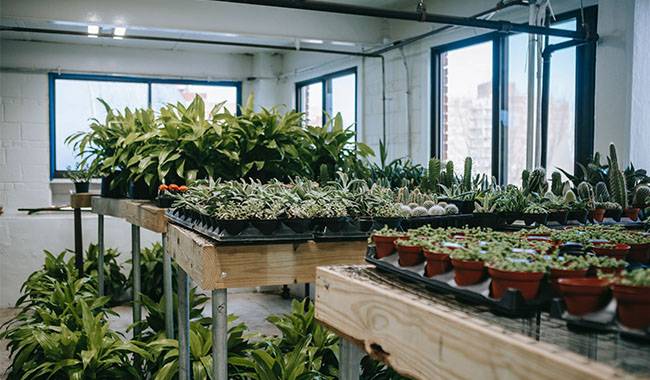
Containers suitable for seedlings

For the very inexperienced gardener, it is worth recalling that there must be a hole in the bottom of the container in which the seedlings are placed, not made with an awl, and larger.
These holes are necessary to drain excess water during irrigation and for air to flow to the roots – the roots are “breathing”. If the water stagnates and the air cannot reach it, then at worst the seedlings will rot, at best – it will be painful and of little use.
Often, seeds are sown in a common container, and then the undeveloped seedlings are sown in individual “apartments”. Keep in mind that at this stage you need to consider the root requirements and development of each crop. It is also important to maintain a balance between the volume requirements of the root system and the size of your windowsill or shelf.
For example, for tomato seedlings, you should use a 0.5-liter container, for cabbage and petunias 0.2 liters will be sufficient. For pine seedlings, it is best to take a narrow and long container (whose roots go directly into the depths), while for seedlings of perennials in the soil, the opposite is true: wide and shallow.
Just as we fight pathogens in the soil mixture, it is also worth fighting them on the surface of the container or box. New and different containers adapted to seedlings (tetra packs, plastic bottles, fast food packaging) should be washed briefly with detergent.
Reused containers and tapes should be cleaned and treated with any fungicide (it can be mild: hydrogen peroxide or manganese).
Preparing seeds for sowing
Basically, this rule applies to self-harvested seeds. After all, you are likely to collect them from diseased plants (vegetable gardens), or by lifting them from the ground (parks, forests).
Traditionally, disinfection before sowing is done with pink manganese solution (if you sell it), but you can and any available fungicide (though you should remember that many modern fungicides cannot be used at home).
A good option is to treat the seeds with hydrogen peroxide, or even better, with aloe vera juice. Squeeze the juice from a leaf, dilute it about 1:1 with water, and soak the seeds for a day.
For those who sow seeds at the seedling stage, not only for vegetable crops, it is worth knowing that the seeds of some plants need to be pretreated with cold and moisture (stratification) or partially disrupt the integrity of the outer shell (scarification).
And for each crop, these procedures can be quite different. For example, lavender requires a 30-day treatment, magnolia requires a 90-day treatment, and hawthorn takes a year and a half to germinate.
There are many ways to treat seeds ahead of time. Research ahead of time what your seeds will need to get the desired results.
I will also give advice to those who buy seeds in stores. Study the packaging carefully; many manufacturers use seeds for a variety of beneficial treatments. Don’t try to do this work again.
Our people are wired to do this, “to be sure.” You shouldn’t. Either you will completely ruin the seeds, or you will waste your time, or all the benefits of the factory treatment will be nullified. Follow the instructions and do everything.
Keeping the seeding date
Of course, I’m familiar with it – it’s the middle of winter and gardeners are “itching” to sow seeds. But it is very important to sow at the right time (there are some crops that are sown in January).
Sow too early and the plants will grow by the moment they are planted in the ground – this is bad. Sowing too late – is a waste of time.
The easiest way to determine when to sow your crop is to know the usual date of the last possible frost in your area because it is after them that most and planted seedlings in the open ground.
Eggplants, for example, should grow for 50-55 days from germination to planting in the ground. You know that your plot is likely to have its last frost before the first of May.
Counting back 55 days from this date, we get March 5 – the date when shoots should appear. Add another 10 days for seed germination and you will get eggplant seedlings on February 20.
But remember, each crop has these terms, so study them. However, there are fans who determine the sowing time by the condition of other plants. I won’t argue, everyone has their own method.
Optimal sowing depth
Each seed has its optimal sowing depth. If you sow your seeds too deep, it will take a lot of time and effort to germinate them, or they may not reach the surface at all. Usually, “burying” to a depth of 2-3 seed diameters is considered normal.
But even here, it is not that simple. It turns out that some seeds need light to germinate. They only need to be sprinkled on the surface of the soil mixture or germinated in water.
Therefore, I have repeatedly urged you to learn what you are sowing and how to do it properly. In the case of marketable seeds, a conscientious grower will include all these details on the package.
Respect the distance between seeds
This rule applies when sowing seeds in ordinary containers. If seeds are sown too closely together, they will germinate against each other, competing for food and light. As a result, the seedlings stretch out and become weak. Yes, and diseases (blackleg) can affect such seedlings with lightning speed and all.
Therefore, it is important to sow the seeds evenly and leave some spacing for the seedlings to develop. If the seeds are very small and it is difficult to keep the interval, thin the seedlings out ruthlessly. It is better to have few seedlings, but strong, than many flimsy ones.
Seedling care system
A young seedling mobilizes and disciplines the gardener and grower. One needs to learn how to keep the soil mixture at the optimum moisture level – not overly dry (drought kills acorns and germinating seeds), and not overly swollen (rapid onset of disease).
Water is best used soft, or at least just standing up, preferably – melted. Its temperature when watered is 71-75°F (22-24°C), which is optimal.
In order to grow and develop properly, small buds need light, lots of it. So where to get it in late winter and early spring? We will have to install an artificial lighting system. Fortunately, modern energy-saving lamps do not cost much in electricity, but you need a measure.
It is believed that plants and seedlings need 12-14 hours of sunlight. I think the best option is to use a southern bay window, where seedlings receive artificial lighting in the morning and evening, and natural light during the day.
A special talk about the design of lighting fixtures, reflective screens, and plant lights. The main thing you should pay attention to is the distance from the light source to the plant, which will change as it grows, so the height of the light should also change.
In my opinion, it is very important to strictly adhere to the schedule of switching additional lights on and off – to turn it on and off at the same time. The best option is – time relay.
And about the temperature regime. At too low temperatures, seeds either do not germinate or germination is weak and unfriendly. If the temperature is too high, plants start to grow fast, which means they need more light and nutrients. If they are lacking, the seedlings will stretch out and all hell will break loose.
The best temperature for seed germination will be 71-75°F (22-24°C), and when seedlings emerge at 68°F (20°C). In addition, you should gradually lower the temperature so that the seedlings are not stressed.
In general, you should understand that these parameters – moisture, light, nutrition, and temperature – are interrelated. The top tip for growing seedlings is to combine them correctly and with their help manage the growth rate and quality of the seedlings.
Careful selection
If you have planted seedlings in a common container, it is likely that you will need to split them up and put them into different containers. This should be done promptly, usually when a few true leaves appear. It is at this point that the plants go through this painless process. Although not all plants are comfortable, and many gardeners refuse to do this.
Gradual hardening
Your seedlings have been in the house for about 2 months. It is almost under greenhouse conditions: no wind, no temperature fluctuations, soft and even light. Try to keep it outside, even if it is already warm there.
Most likely, the result will be regrettable die, or “sick” for a long time. Therefore, gradually acclimatize your small plant to the unfavorable conditions of the street. First take it out in the shade for half an hour, gradually increasing the time and intensity of sunlight.
I hope these 10 rules of good germination will help you to get a friendly and strong seedling of vegetables and ornamentals, and eventually a great harvest. That’s my wish for you!