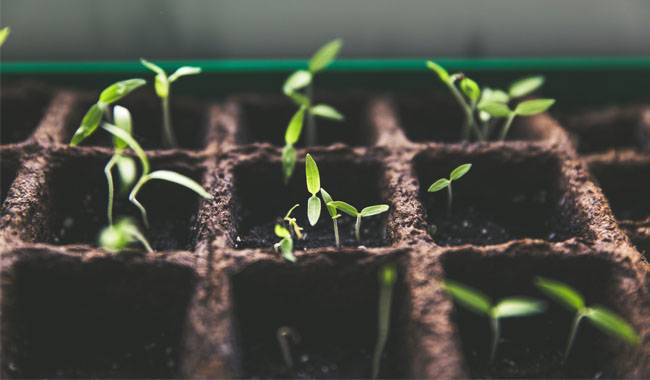
In areas with chilly springs, short summers, and chilly early autumns, the sprouting method of growing vegetables may be the only effective method.
But even in our conditions, I grow most vegetables by Growing Seedlings because it has many benefits. Over the years, I have accumulated a lot of observations and have developed a method for growing vegetable seedlings.
In this article, I will answer 11 questions about Growing Seedlings that are of most interest to beginning gardeners.
When to start preparing Growing Seedlings?
Don’t pay attention on winter. With the arrival of spring, chores and work appear in abundance.
Therefore, it is necessary to record the sequence of crop lists and preparations for sowing Growing Seedlings in your garden journal during the winter (in the absence of garden troubles). This method will free up some time in the spring for other, more necessary tasks.
What should I consider when filling out the Garden Diary?
Determine the list of crops and the number of seedlings needed to produce enough for fresh consumption and winter saving for harvest.
Write down the date of sowing of the selected seeds for cultivation by sprouting.
Determine the implements and soil for sowing.
Provide additional lighting and easy watering, if needed.
Decide whether to purchase fertilizer and pest control products.
What container to choose for sowing?
For each type of seedling, it is necessary to prepare a separate container. I sow seeds in prepared wooden trays, plastic planting containers, or boxes in cups of dairy products. I sterilize the dishes with 1-2% manganese solution.
Make a note of it! Plastic cookware is more economical. It is reusable, easy to sterilize, and does not require annual maintenance and other extra work to prepare for sowing.
For large seed crops, especially those with taproots (cucumber, zucchini, watermelon, etc.), I use peat-peat planters of different capacities. For seedlings with taproots, the containers should be deep enough so that the roots do not bend as they grow.
Seedlings grown in them are planted in the open ground with such pots. Pots soaked in the soil will decompose and act as fertilizer. The roots are not disturbed during the planting process.
Seedlings grown in peat pots and boxes do not need to be harvested, which shortens their cultivation period. In addition, the no-picking method eliminates fungal and bacterial infections of seedlings, which often occur during the harvesting process of seedlings.
What kind of Growing Seedlings soil is better?
I recommend that beginning gardeners purchase ready-made Growing Seedlings soil, which is available from many companies on the market today. Generally speaking, such soils are perfectly suitable for sowing seeds and growing young plants. They require no additional preparation, including sterilization.
Experienced gardeners can also prepare their own soil mixtures. In the past, I always prepared my own soil for sprouts. I used the following ingredients: leaf or sod soil, mature humus (better bio-humus), sand in the following ratio – 1:2:1. To this mixture, you can add (if available) 1 part of the peat upland.
I always spend a lot of time preparing the substrate: decontaminating, activating, adding fertilizers, tracking the acidity of the soil, etc. As my experience shows, this makes sense if there are a lot of seedlings – plan to sell seedlings or crops.
But for growing seedlings for a small family, unambiguously, ready-made soil is best. This will free up a lot of time to do other chores around the house and family.
How to prepare seeds for sowing?
To reduce the time required to prepare seeds for sowing, it is more practical to buy ready-made seeds. You are better off buying seeds only from specialized stores or popular breeding companies. Good quality seeds are already sterilized and pelleted in a nutrient mixture. They do not require any further preparation.
Preparing seeds for sowing on your own requires time-consuming preparation at all stages of the procedure. To save preparation time while obtaining healthy, friendly sprouts and quality seedlings, I currently treat self-prepared seeds with seedling growth stimulants.
When soaking seeds in “Trace Elements Organic Fertilizer”, the germination time is reduced and their germination rate and germination energy are greatly increased. The use of this preparation is particularly effective for delayed sowing of seedlings or sowing of very small seeds (e.g. petunias), seeds with capricious root systems (cucumbers).
Do not forget to mark the crop immediately after sowing, so that there is no guessing which crop was sown before the seedlings emerge.
How to sow the seeds correctly?
Fill the prepared container with the ready-made substrate, leaving 1-2 cm of the top edge. Knead the soil slightly (gently) to eliminate voids. If the mixture is dry, water it, cover it, and leave it for 1-2 days to mature.
In the prepared wet substrate, sow the seeds. The depth of their embedding depends on the size. Usually, the seeds are buried in a layer more than 1,5-2 times the size of the seeds, or the seeds are scattered on the surface, slightly pressed into the soil, and covered with a small layer of the same prepared mixture (you can use it for spreading agricultural perlite and similar materials).
Especially for small seeds (strawberries/straws, petunias), I simply leave them on the surface of the soil and sprinkle them carefully with water through a sprayer or sieve. Going deeper, the water pulls the seeds into the ground and creates comfortable conditions for them. After planting, I place the individual cups on trays or in small boxes, cover them with light-proof material, and put them in a warm place.
How do I take care of the seedlings?
After mass germination, I move the container with the seedlings to a place with lighting. I use a wide windowsill in the kitchen with a special extension on the windowsill.
On days 5-8, if the upper layer of soil dries out, I water the first time with warm water at room temperature through a fine strainer. I carefully monitor the condition of the topsoil before sprouts appear. It should be consistently moist (but not wet).
After extensive germination, seedling care is reduced to sufficient light to maintain optimum temperature, soil moisture, and environment to prevent fungal, bacterial, and viral diseases and insect pests.
Do seedlings need to be backlit?
To ensure that seedlings are not stretched, weakened, wilted (growing in the absence of light), or elongated, maintain normal lighting with additional lights for at least 14 hours per day.
Don’t be lazy and prepare unobstructed lighting in advance, then there is no need to spend time systematically unfolding containers with seedlings’ shaded surfaces into the light.
What is the optimal temperature for Growing Seedlings?
The room temperature should not fall below 73-77°F (23-25°C) before germination. After mass germination, when placed on a windowsill the air temperature drops to an average of 59-64°F (15-18°C).
The more cold-tolerant cultures are placed near the window glass, while the heat-loving ones – on the side table. There is no need to create a steam room with high humidity and high temperature: seedlings will start to get sick immediately.
It is more practical to keep the temperature slightly below the required 57-59°F (14-15°C) and the soil – moist, but not wet. Then the seedlings will become squat, strong, and resistant to diseases and pests.
How to water seedlings properly?
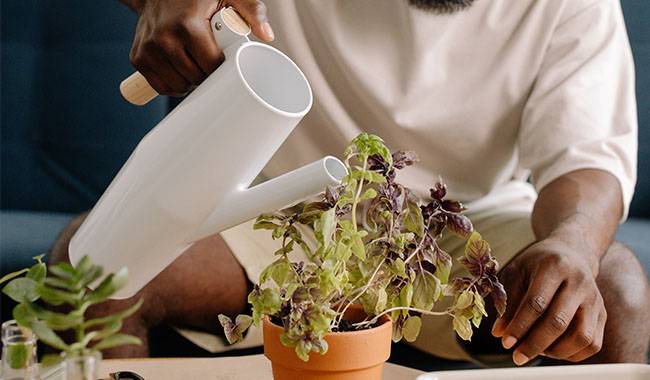
Near the seedlings, I always put a bucket of water. This creates the necessary microclimate around the container with the seedlings and always has room temperature warm water, free of chlorine, but not too hot in a hurry.
Always ventilate the seedlings after watering (but not with the wind). To get the seedlings to grow their 3rd-4th leaves, I water them through a sprayer and the adult seedlings through trays.
This method promotes better root development in adult seedlings. After watering (within 2-4 hours), I loosen the soil and dry the top layer with dry sand, sifted grass ash, and agricultural perlite.
How to protect seedlings from pests and diseases?
The most difficult thing to take care of seedlings is to prevent the defeat of pests and diseases. Due to improper watering, humidity, and temperature, molds (fungi, bacteria) can appear on the soil and plants, which can ruin the whole crop in a few days if done in ordinary containers.
From this point of view, it is better to grow one or two seedlings in a separate cup or in a box.
In my gardening toolbox, I always have biological preparations for the prevention of diseases and pests. They are harmless to people and animals and can be used indoors.
But after switching to growing seedlings in pots with box culture and peat culture, my seedlings hardly ever get sick. I sprayed the plants and soil more for prevention than to eliminate the source of the disease.
The first treatment of seedlings with a solution of bio fungicide I made 7-12 days after germination. All treatments were carried out strictly according to the instructions.
During the rest period of seedling growth and development, the prophylactic agent is sprayed every 15-20 days (3-4 times during the whole period, 1-2 times in other years). I combine spraying of plants and soil with watering through a sprayer or a fine filter.
I recommend treating the disease with a bio fungicide solution. For aphids and whiteflies, I use bio-fungicides, etc.
For the “rush” – you can use chemicals “fungicides (a powerful combination of methoxyacrylates and triazole active ingredients)” and other approved seedling preparations instead of biologicals. Note, however, that the use of fungicides on-premises inhabited by families is prohibited.
How to harden seedlings properly?
I start the hardening process 10-12 days before planting seedlings on permanent sites. During 5-7 days at night, I gradually lower the temperature in the room where the seedlings are located (in my place – kitchen) and then bring them to the hallway or closed wooden house (without heating).
Planted in a permanent place by transplanting from the box, or immediately in peat compost pots, the hardened seedlings are always fully rooted (100%) and already in the garden well resistant to changes in environmental conditions, diseases, and pests.


