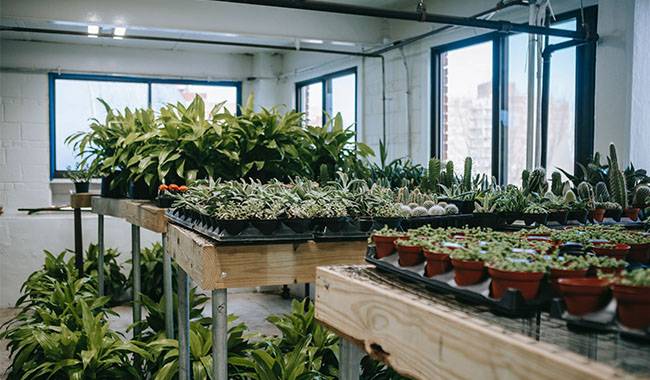
The main task when planting seedlings is to obtain strong plants with well-developed root systems. However, many crops need to be picked (or even more than one) during the first weeks of development, while others need to be “forbidden” to transplant.
At this point, you can use fewer standard containers for seedlings. Another good reason to try them is to save money. This article talks about how to do this without using common boxes, pots, tapes, and pills.
And note the non-traditional, but very effective seedling containers which can be made in an easy way.
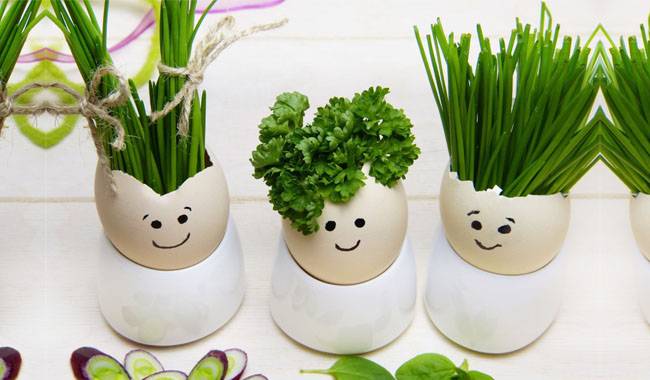
EGGSHELLS
Eggshells are always collected for use in gardens. It was crushed and then used to improve the soil in gardens and vegetable gardens. Nowadays, shells are carefully collected to try to keep them intact and later used for seedlings as well. Of course, it is best to leave the larger hen’s eggshells. If possible, use goose eggshells.
How do I prepare the eggshells for seeding?
Before putting soil into the shells, they should be boiled in water (2-3 minutes) and dried. There should be a drainage hole in the bottom of the shell to remove excess water. It is easier to make it from the inside of the shell, using a thin metal knitting needle.
After filling the shell with soil (a teaspoon is convenient), place it in the plastic container containing the eggs (paper ones quickly absorb moisture and “spread”, you can protect them with a film). Other plastic, glass, or ceramic containers can be used as trays. They should be filled halfway with garden soil, sand, peat, sawdust, and small stones.
Wet the prepared soil, dig small holes in it and place eggshells. To make sure the soil in the eggshells does not dry out, cover them with film or cut plastic bottles.
Advantages of eggshell nursery
As the shell of the embryo, eggshells contain many nutrients: calcium carbonate (90-95%), fluorine, phosphorus, iron, zinc, molybdenum, sulfur, manganese, selenium, copper, and silicon. When the shells are broken down in the soil, all these substances are assimilated by the plants, although not at a fast rate. Eggshells also improve the structure of the soil and reduce the acidity of the soil.
Eggshells are suitable for growing plants that do not tolerate transplanting (larkspur, lingonberry, cranesbill). It is convenient for obtaining early salads.
When transplanting, the “eggshell” pots are not removed, only slight pressure is applied on their four sides to slightly deform the walls of the pots.
It is convenient to sign plants on eggshells. This type of nursery always attracts the attention of children and is worth using for stimulating learning.
Disadvantages of eggshell seedlings
Eggshells, due to their small size, cannot always be used as the main container for seedlings. If you plan to grow a large number of seedlings, it is not very convenient to grow them in eggshells. Sometimes, it is difficult to make a drainage hole due to the fragility of the shells.
It is best not to plant plants that only need acidic soil (pH = 4.0-4.5) to grow properly in eggshells, such as azaleas, hydrangeas, heathers, violets, lupines, chrysanthemums, and sumacs. Even pumpkins, zucchini, and rhubarb are best grown without the use of shells.
Eggshells are not well suited for cultivating plants with long germination periods, for example, primrose seeds take at least 35 days and canola seeds – from one and a half to six months.
It is not always convenient to store collected eggshells or just to break eggs in some way.
HOMEMADE SPUNBOND BAGS
Spunbond (Spunbond Non-Woven Fabric) is a mulching non-woven material that is quite popular among gardeners. The material already used in the garden can also be used to make bags.
It would be better if it were black, but light-colored agricultural fibers would also work. Dense or black material that is folded twice will not allow light to pass through and the roots of plants develop more actively in the dark.
Rectangles of spunbond material are cut out to the right size and secured on both sides with tape or staples, or sewn together by hand. However, sewing with a sewing machine is safer and faster. Medium-density spunbond is usually used, but if you are sewing large pouches, you should use thicker material or thin spunbond rolled in two layers.
Pouches with strong edges are usually turned out (seams are left inside the pouch, but this is not necessary) and covered with soil. The prepared bags are placed in plastic trays, glass, or ceramic containers.
Advantages of spunbond bags for seedlings
Unlike plastic containers, Spunbond passes well through the air, which has a positive effect on the development of the root system. It is easy to pour water directly into the tray when watering seedlings.
Further transplanting into larger containers or directly into the soil is done with spunbond bags. You can quickly prepare the required number and size of bags. Spunbond in storage does not take up much space.
Disadvantages of spunbond bags for seedlings
The bags are placed tightly together and when the seedlings grow they become dense. Some plants will be in the shade and don’t get enough light, so they will be stunted.
TEABAGS
There is an alternative to small-sized peat and coconut pellets: used tea bags, or filter bags from a coffee maker. These can be used to grow seedlings in the early stages.
In a teabag, cut off the top portion and pour the soil over the brewed tea (a teaspoon is handy). Put two seeds in each bag (later remove a weaker plant). For more stability, the bag with the soil is placed tightly in a plastic container or a container of glass or ceramic.
Advantages of teabag seedlings
In a teabag, the roots of the plant grow in the bag and do not intertwine with the roots of their neighbors. When transplanting plants in the open ground or in larger containers, the roots are not harmed because the bags are not removed (although the walls of the bags can be cut for insurance purposes).
Disadvantages of teabag seedlings
The material used to make the bags can quickly draw out moisture, which can cause the soil to dry out. This method is better suited for sowing small seeds.
It is best to use bags of black or green tea that do not contain spices or dyes.
CITRUS PEEL
This nursery method will suit lovers of oranges and lemons as well as grapefruit and pomelo. Of course, although it is difficult to set aside a large number of “citrus” containers at once, the peels keep well in frozen form and can be accumulated in certain quantities if needed.
Make a drainage hole in both halves of the peel and pour in the soil. Citrus pots with soil are placed in low plastic containers.
Advantages of citrus peel seedlings
One of the great advantages of citrus pots is the large number of plant hormones contained in their walls. It is hard to imagine any better protection for the plant.
Citrus peels contain a large amount of essential oil, which is an environmentally friendly means of protecting the plant. Citrus essential oil is an excellent fungicide and can inhibit the growth of many fungi, such as gray rot. Citrus essential oils contain aldehydes (citral, citronellal), which kill nematodes.
All citrus peels contain a substance that repels aphids and ants – it is a terpene, limonene. Citrus peels attract earthworms. Citrus peels also contain high levels of micro-and macronutrients. When broken down in the soil, citrus peels improve soil structure.
It is easy to grow seedlings in a seedbed with “citrus” pots or to transfer them to large containers. Children usually like the process of preparing a “citrus” pot, filling it with soil, and sowing the seeds, but the greatest joy is the emergence of buds.
Disadvantages of citrus peel seedlings
The long process of harvesting citrus peels. It takes up a lot of space in the refrigerator.
Plants that are not good for acidic soil are best avoided in “citrus” pots. These plants include broccoli, onions, nutmeg squash, spinach, lettuce, beets, freezers, bananas, milkweed, lavender.
CARDBOARD TUBES
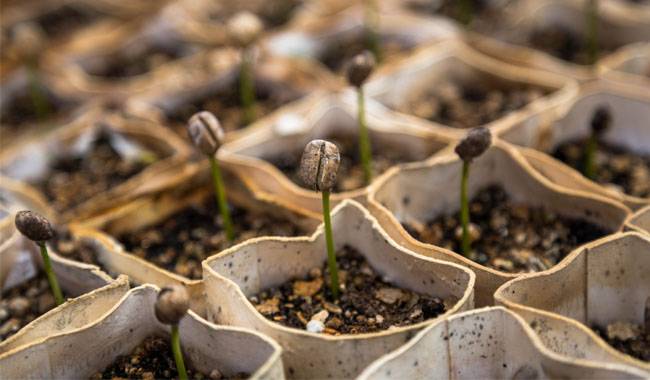
These small cardboard cylinders can be easily made into seedboxes. You can make them without a bottom, or make a cylinder with a bottom by cutting slots in the bottom of the cylinder and bending it inward.
The sleeves can be wrapped in thick paper for added strength. The cylinders are placed in plastic containers. After sowing the germinated seeds, the cylinder is covered with film and placed in a warm place for rapid germination.
Advantages of cardboard cylinder seedlings
These cylinders are convenient for use in the first stages of seedling development, transferring the plants to larger containers along with the quick-dissolving cups. In this way, it is easy to start seedlings of plants that do not tolerate transplantings, such as peppers, poppies, goldenrod, sweet peas, and crane orchids.
Disadvantages of cardboard tube seedlings
Such containers are not durable and it is necessary to move seedlings in time either in the open ground or in larger containers.
PLASTER CONTAINERS FOR SEEDLINGS
Enthusiastic gardeners are willing to endure difficulties to find the best container for their seedlings. The desire to prepare a container that would not only be easy for the plants to grow but also aesthetically pleasing and suitable for the interior of the apartment prompted the gardeners to use plaster. This creative process does not take much time, they write.
Materials needed.
- Gypsum.
- Water.
- Vegetable oil or food film.
- Boxes, containers, jars of different sizes.
Step-by-step instructions on how to make plaster containers for sprouts.
- According to the instructions on the package, the plaster mortar is prepared very quickly. It is necessary to knead it thoroughly.
- The inside of a larger container is thoroughly coated with vegetable oil or lined with food film. The outside of the smaller container should also be carefully coated with vegetable oil or lined with plastic wrap.
- Pour a plaster solution 0.8inch (2cm)) in the bottom of the larger container and let it harden for a while.
- A smaller container is placed on top of the slightly hardened plaster in the larger container.
- Pour the plaster solution into the gap between the walls of the container and leave it for about two hours until it hardens.
- After removing the container, you can start decorating.
It is said that gypsum retains moisture in the soil very well.
Advantages of gypsum container seedlings
Creative work. Ability to make containers of the desired size and shape.
Disadvantages of plaster container seedlings
The walls of such containers do not allow air to pass through and they are rigid. The root system is affected when transplanting seedlings. The pots become thick-walled and heavy, they are more like a cache.
It is necessary to purchase plaster.
HOMEMADE “SMALL SNAIL” NURSERY CONTAINERS
“Snail” is the name of a small roll made of the laminate liner. It is a soft, waterproof material. It is more convenient to use a substrate no thicker than 2 mm. Any vegetable and ornamental crops can be grown in this way.
To obtain a convenient seedling container, cut strips of 4inch (10 cm) x 40-60inch (100-150 cm) from the substrate for a large number of seeds, or cut into rectangles of 4x6inch (10 x 15 cm) for one or two seeds.
Pour soil over the prepared strips or rectangles, tamp it down and make it moist. The height of the soil layer is about 0.4-0.8inch (1-2 cm). (Then sprinkle the seeds, leaving 2 cm from the edge). Put the seeds of only one plant in each “snail”. You can dry the seeds in the sun, but it is better if they have been germinated or at least soaked.
When scattering the seeds, you need to press on each seed to make it sink in. The seeds should be placed at a sufficient distance from each other, depending on the type of plant. Only in this case can the root system develop properly and not intertwine with neighboring roots.
It is best to roll up the snail so that later its top part is a little higher than the rest of the “turned” part, which will help each emerging plant to get more light. In a rolled-up snail, the soil should be placed evenly on top of the edges. If necessary, thicken the soil and water it down with sprinklers.
Place the rolled-up snail vertically so that the seeds are at the top of the roll.
To secure the rolled-up “snails”, rubber bands or clear tape can be used. A label indicating the plant species or variety is also attached here.
(The rolled-up “snail” is placed in a plastic container that should be about 2 cm thicker than the roll). It is possible to place several “snails” in a large container. All this is covered with film – a mini-greenhouse is thus obtained.
Take into account the requirements of the sowing culture and place it in a warm place. It is necessary to remove the aluminum foil periodically for ventilation. After the first shoots appeared, the film was removed and the greenhouse was moved to a well-lit place.
Advantages of using “snails” for seedlings
The “snail” does not take up space on the windowsill, although it puts a considerable amount of seeds inside. The roll is easily unfolded, and the stronger plants are removed from it and transplanted into a larger container, then twisted back to allow it to finish growing the remaining seedlings.
Seedlings are easily removed from the unfolded “snail” for harvesting, and the plant’s root system is virtually unharmed.
It is easy to grow seedlings of many floral cultures in snails, which can be transplanted directly from the rolls into open spaces. For example, velvet. They will send out friendly shoots if the first five to six days of the “snail” will be at a temperature of 22 ° C.
After sprouting the reels are transferred to a bright room with a temperature of 64°F (18°C). Under these conditions, the seedlings will be strong and will not elongate.
The tape or rectangles used for “snails” can be saved for next year’s seedlings; they won’t take up much space.
Disadvantages of using “snails” for seedlings
This method is only suitable for the first stage of seedling growth. When growing seedlings in “snails”, extra lighting is needed to keep the seedlings from stretching out.
You need to buy a roll of substrate or other suitable materials.
Dear readers
We are sure that in this article we are not describing all the traditional methods of growing seedlings. We would be grateful if you could share your own proven methods of raising healthy seedlings that you can make with your own hands.


