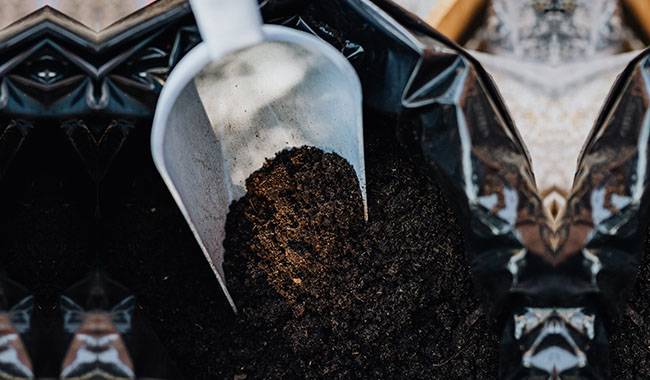
Once you have your own piece of land, the beginning landowner or gardener starts gardening by improving the soil quality. Is this improvement really necessary? If the plot has been under natural vegetation cover for many years, likely, the soil will not need to be “improved” for several years, even with intensive use.
Therefore, to competently start your vegetable gardening, you should first:
- determine its physical condition (mechanical composition and structure)
- the degree of acidity of the soil (acidic, alkaline, neutral)
- the chemical composition (nutrient supply)
The best solution is to take the soil to a professional laboratory for analysis. If this is not possible, you can make your own preliminary determination of soil composition, structure, and nutrient availability (approximately).
TEXTURE AND STRUCTURE OF THE SOIL
To determine the initial soil type, wet a handful of soil and roll out a bagel shape.
- A smooth ring without cracks indicates that you are dealing with clay soil.
- If there are several cracks in the bagel – heavy loam.
- When the bagel dries naturally, and its surface is covered with many cracks – the soil is medium loam.
- If the bagel breaks when rolled up, you have light loamy soil.
- If the bagel is unshaped and breaks when rolled, instead of being full value soil, you are faced with sand.
- If the bagel crumbles into separate small pieces when rolling – yellow sand.
To determine the level of soil structure, cut through a layer of soil with a shovel and toss it into the air. Structured soil will break up into individual elements – chunks, grains, etc. – as it falls. Thick clay soils will fall like pancakes, and sandy soils will crumble into dust.
All of these types of soils will need to be treated. Thick soils will not allow water to pass through. They are virtually impermeable to air. Crusts will form on these soils after irrigation, stagnating irrigation water, and rainfall. Plants will be permanently depressed. Sandy soils will allow all water to pass through unimpeded and carry away the soluble form of the fertilizer applied. This type of soil must be treated before extraction. Organic manure (cattle, horses, sheep, etc.), humus, and compost are the main remedies. Sawdust, finely chopped-no more than 2-2.3 inch (5-6 cm) perennial grasses, shrubs, twigs, and bark can help increase the permeability and structure of heavy (clay) soils. Sandy soils can be well mulched with sod and forest soil before manure, peat, or compost (from autumn). In the spring, it is spread on the plot and dugout.
The treatment can be carried out in two ways
- Do not plant anything on the plot for 2-3 years. Do only the treatment. During this period, except for the introduced organic matter, to occupy the area with Arachis, sowing and burying, when reaching a height of 3-5 inches (8-13 cm), several times during the season.
- treating while planting vegetable crops and growing fruit and berry crops. If the second method is more suitable for you, please note that you must not use fresh manure from the crop and limit digging rate in the fall (no more than 1 bucket/11 square feet). Otherwise, the sown and planted crop will be burned.
ACIDITY LEVELS OF DIFFERENT SOILS
The reaction of the soil solution is very important for the development of plants. Soils are classified according to their level of acidity.
- strongly acidic. These include bogs and lowland peatlands.
- acidic. The most common are coniferous crops, clay turf, and soils under peat bogs.
- low acid. Lawn and heath soils.
- Neutral. Basic soils for growing vegetable crops: sod, humus, deciduous soils, all types of chernozems, and others.
- Alkaline and highly alkaline. These include carbonate soils with a high content of calcium and its compounds.
In addition to these classes, there are saline soils.
Most plants grow and develop well on neutral soils and produce good crops. Vegetable crops can be grown on slightly alkaline and weakly acidic soils but can be significantly inhibited by plants that require neutral acidity.
STANDARD SOIL ACIDITY TEST
If you can’t do the test in a chemistry lab, you can buy a pH tester or a litmus paper with a scale from a specialty store. Simply put a pile of soil and some water in a cup and dip the litmus paper in. Compare this with the scale. The change in color compared to the scale will tell you the acidity of the soil. For cultivated plants, soil with a pH of 6.5-7.5 is optimal.
Approximate soil acidity by vegetable and weed vegetation
If you do not have a pH tester or litmus paper, you can determine the approximate acidity of your soil based on weeds.
On strongly to moderately acidic soils, horseradish and garden sumac can grow up to 20 inches (50 cm) tall. On such soils, weedy plantain as well as buttercup trees and creeping buttercups look attractive. Wet areas on the garden plot will be covered with a beautiful decorative carpet of common buckthorn and green forestry plants.
The neutral and weakly acidic soil is always covered with healthy green dill, onion, and lettuce in spring. The slender rows of peas and early potatoes are a delight. Eggplants, bell peppers, and tomatoes sprout quickly.
If there are no overwintered or early spring sowed vegetable crops, creeping wheatgrass with thistle, bright green common mother’s bloodwort, clover, and twining strawberry vines will confirm that the soil is suitable for growing absolutely most vegetable crops.
There are some “omnivorous” weeds. Wild loosestrife grows equally successfully on slightly acidic-neutral-alkaline soils. In this case, you need to look carefully at the accompanying weeds. If horsetail, stargrass, and mosses dominate, the soil is acidic.
Horticultural crops require neutral soil. Mildly acidic and slightly alkaline soils can be tolerated. In all other cases, the soil should be conditioned.
Quick soil acidity test at home
Can’t easily distinguish between different types of weeds? There are several other ways to perform a quick test at home to find out the acidity of your soil.
Method 1: For determining soil acidity before leaf germination
- In a small dish (shallow pan), spread the soil in a 1-2 finger layer.
- Apply coarse drops of vinegar in several places in the soil.
- If bubbles appear on the surface of the soil, the soil is neutral. If there is no reaction, the soil is acidic and needs to be acidified.
Method 2: If you have dark-colored grape juice (not wine) (black, dark pink, red), use the second method. Drop a pile of soil into the container with the juice.
- If the juice changes color and bubbles appear on the surface, the soil has enough calcium salts and is neutral in reaction.
- If the solution stays the same, the soil is acidic.
Method 3: Usually used in summer. Boil currant or cherry leaf tea. Let it cool well and throw some soil into the solution.
- If the solution turns red, the land is acidic and unsuitable for vegetable crops.
- A green or blue color indicates that the soil is neutral or slightly acidic, respectively.
This determining soil acidity is often used when planting landscape shrubs (conifers, heathers, and rhododendrons).
HOW CAN I CHANGE THE ACIDITY OF MY SOIL?
Acidic soils are usually acidified by
- Ground lime.
- Dolomite powder.
- Burnt lime and quicklime.
- Ground chalk.
- Peat turf.
- Marl.
If there is industry nearby, its waste can be used to deoxygenate the soil.
- Shale ash.
- Cement dust.
- Peat dust.
- Gas lime.
On light soils, dolomite dust is preferable. Limestone or ash elements are more effective on heavy soils.
To increase acidity, use coniferous soils, upland peat, mineral fertilizers with active acid reactions, and pine needles from semi-decomposing ground cover. It should be noted that long-term application of only mineral fertilizers gradually acidifies the soil and requires regular de-acidification or introduction of organic matter (manure, humus, compost). Wood ash is a very effective fertilizer and a good deoxidizer. After burning, all essential nutrients and trace elements remain in the ash (except nitrogen).
SIGNS OF PLANT NUTRIENT DEFICIENCIES
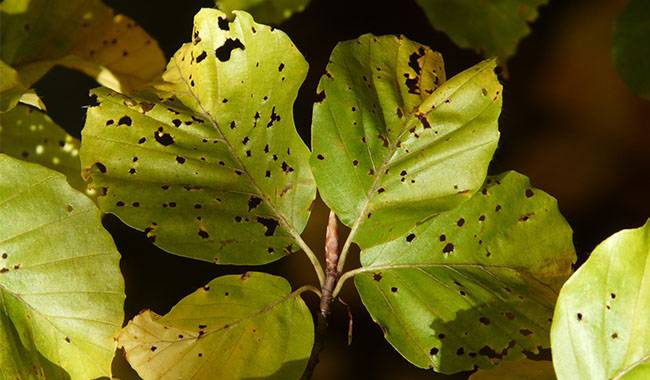
Plants need a balance of essential nutrients and micronutrients for proper growth and development. A chemical analysis of plant organs can immediately reveal a deficiency or excess of an element. However, if you cannot go to a laboratory, you can do your own soil and plant diagnostics without any special equipment. You can determine deficiencies or excesses of the most important nutrients and trace elements yourself. On soils with sufficient organic matter, the presence of micronutrients will have a positive impact.
Please remember! Disfiguring, small, tasteless vegetables are the first signs of micronutrient deficiencies in the soil.
Nitrogen deficiency
The growth of healthy, undamaged plants is retarded. The leaves take on an unnatural light green color, and the lower, older leaves turn yellow. The leaves are arranged at an acute angle relative to the main stem. Shoots sometimes have a reddish tinge.
Excess nitrogen causes a burst of vegetative mass on the ground and increases proliferation. Insufficient flowering. The fruit formation period is delayed. Fruits do not ripen.
Deficiency of phosphorus
Leaves are strongly dark green with blue, red, bronze shades. Some cultivars have leaves that are not typically read. There is almost no shade of yellow, even on older leaves. The leaves are tiny, while the older leaves become spotted. When they wilt, they turn black. Flowering is delayed.
Potassium deficiency
Intensely mottled leaves with a blue-green tinge in some plants. The deficiency starts in the middle part of the shoot. At the top of the plant, green spots surround areas of extinct tissue. The lower leaves of young plants have wrinkled tops and edges that turn downward. In severe starvation, the edges of the leaves and even individual shoots turn brown and wilt.
Magnesium deficiency
On larger veins, the leaves become covered with a white (almost white) discoloration. In some plants, the marginal veins turn red or purple. There is almost no leaf wilting.
Zinc deficiency
Leaves are small, narrow, and hard to touch. There are isolated chlorotic spots. Aggregate into leafy rosettes at the tips of young shoots. Wilt is not of the leaves but along separate parts of the entire leaf, catching the lateral and central veins. The dead tissues disintegrate.
Boron deficiency
The growing points of the stem mass and root system on the ground die. A dwarf bush is formed with thickened stems and delicate leaves. There is little flowering, and the ovary falls off at an early stage of development. The cone tops shrivel, the fruit is filled with blistering tissue, and the flesh is coarse with a bitter aftertaste.
Sulfur deficiency
Leaf-blades are pale green, but leaf death does not occur as in the case of nitrogen deficiency.
Iron deficiency
General wilting of the whole plant during the rest of the growing season, without wilting of the leaves and stems.
Copper deficiency
Large areas of chlorosis on the ground. In contrast to iron deficiency, there was a distinct whitening of the leaf tips.
Manganese deficiency
It starts from old leaves. First, the edges of the leaves turn yellow, then a thin layer of the entire leaf. The veins on the leaves remain green. Over time, the young shoots are affected and die.
More Related Information About Improve Soil Quality


