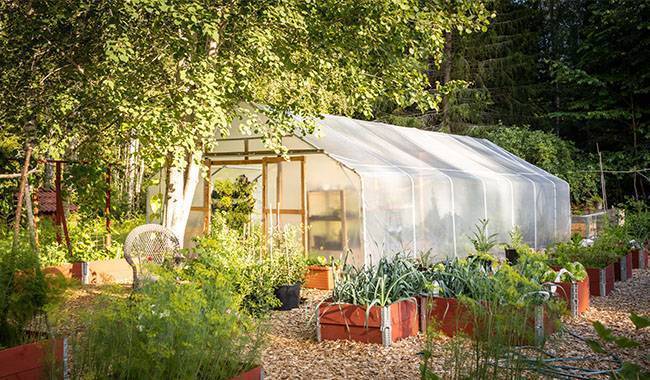
In a small cottage or large yard, there is always room to build a greenhouse that can be used virtually year-round, including the greenhouse’s off-season, to grow fresh herbs for the table. In the winter, dill, parsley, salad, celery, and onions can be grown in a heated greenhouse in colder areas and can be grown in a greenhouse in winter in unheated conditions. Bok choy and onions are generally early-maturing vegetable crops with a short growing season, allowing for multiple harvests in the fall and winter and a constant supply of herbs for the table.
PREPARING TO GROW HERBS IN THE GREENHOUSE
Growing herbs in the fall and winter seasons can be done in 2 ways.
- using the main area. However, this is not always advisable, especially if the soil is already prepared for the main greenhouse crop.
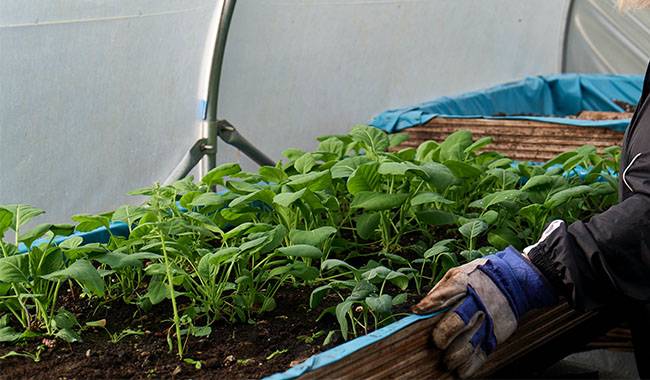
- Use the extra area created by the shelves to hold boxes and other containers for green plants. This is the easiest and cheapest option and is a win for beginners.
Preparing to grow herbs in the greenhouse.
- Knock down the shelf (or 1 shelf).
- Get crates and other containers.
- Prepare potting soil and fill containers, labeling which crop.
- Record the list and the agronomic requirements of the crop in your garden journal.
- Purchase the seeds you need.
This may be all the preparation work. As you gain practical experience, you can introduce crops other than dill, parsley, and chives. You’ll get a crop rotation on the shelf and a tight one at that. Give it a try. You’re sure to succeed.
FEATURES OF GROWING VEGETABLES IN WINTER
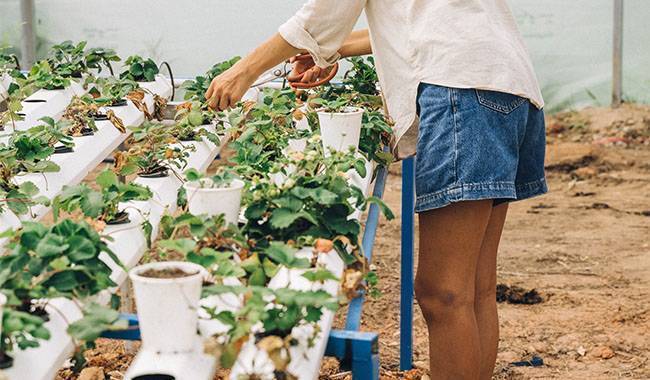
For winter planting, it is common to choose unpretentious cultures to take care of, which do not require special temperature and light regimes. Due to the short vegetation period, several crops can be harvested in winter. To obtain good ecological products in time, the agronomic requirements of farming should be strictly observed.
The location of crops is important for winter planting. For example, dill is shade-tolerant and can therefore be placed in a poorly lit greenhouse area. Lettuce is less demanding and can be grown in any conditions, while parsley requires light and a certain temperature regime.
GROWING LEEKS
Onions are the most popular winter crop. Their special flavor perfectly complements any dish and helps strengthen the immune system with a large amount of vitamins that the body needs.
Common varieties of leeks
The common leek is Allium ampeloprasum var. porrum. There are two main types of leeks: the cold-intolerant, faster-growing fall varieties, which usually have light green leaves and are not winter hardy north of zone 8, and the blue-green winter hardy leeks. In the first category, we like Lincoln (50 days to slender bunch leeks, 75 days to mature leeks), King Richard (75 days, fast-growing), and the giant Giant Bulgarian. American Flag does not work well for us. Giant Musselburgh (105 days) is resistant to bolting s and is suitable for overwintering in milder climates. For winter leeks, we like Tadorna (100 days), Jaune du Poiteau, King Sieg (84 days, King Richard crossed with Fedco’s winter hardy Siegfried), and Bleu de Solaize (105 days, very tough).
Preparation
Thus, from the crates and other containers on the shelves, a prefabricated plot was prepared, convenient in that it could be readily moved and placed next to the desired neighbor. Under the onions, we prepare a simple mixture of garden soil and peat or other loosening material. Line the bottom with cling film, poke a few small holes (in case of overwatering) and fill 2/3 of the prepared substrate.
Spread out and mix the nitrogen fertilizer with the top layer of the soil substrate. Since onions are feathered and harvested in a very short period of time (modified stem wrapping method), the dose of mineral fertilizer should not exceed 10 g/11 sq. ft. of the total area of the box. If the soil is nutrient-poor, apply 15-20 grams of ammonium nitrate phosphate per 11 square feet of prepared soil. Water the soil with a warm solution of Trichodermin, which prevents fungal diseases and allows the soil to mature.
Preparing and sowing bulbs
- Leave the bulbs to be forced over the winter and calibrate them to their size. It is best to fill a separate box with an appropriately sized planting material. Radishes with a diameter of 1-2 inches (2.5-5 cm) are most suitable.
- Trim the neck of the bulb with clippers, even if it has already sprouted. This method helps to interrupt the dormant period of this crop.
- Pour the prepared onion into individual pegs or nodules made of gauze or other sparse material and lower them in water heated to 104-113 °F (40-45°C) for 10-15 minutes. You can immediately use a 0.5% manganese solution.
- Immediately plant the treated bulbs in prepared containers and place them on a shelf or rack in the greenhouse.
- Plant radishes at 0.4-0.6 inch (1-1.5 cm) intervals. The distance between bulb rows should be at least 0.8-1.2 inches (2-3 cm). The heads should be placed 1/3 of the way into the soil.
CARING FOR ONIONS IN THE GREENHOUSE
Onion care includes watering, feeding, and regulating temperature and light conditions.
Watering
Water onions 2 times during the bale period. After planting, water heavily until moist. The second time – 1.5-2 weeks later – water warm water with a fine mesh watering can at room temperature. The watering rate is relative to the condition of the soil (the greater the dryness, the higher the watering rate). Water the onions one week before mass cutting, which is the last time. If using the onions gradually (if necessary), the soil should be kept moist (not wet).
Fertilization
If the soil is sufficiently fertile, it is not advisable to fertilize the crop. On poor soils, fertilize once with a solution of nitroglycerin (10-15 g/2.5 Gal water) or ammonium nitrate (15-20 g/2.5 Gal water) and apply only 2 weeks after planting. A mixture of 20 g of water-soluble calcium superphosphate and potassium sulfate per 2.5 Gal of water can be used.
Mix the solution thoroughly and water with a fine-meshed watering can. The fertilizer solution should always be rinsed off the surface of the leaves with clean water. The soil can also be sprinkled with wood ash, which is an available source of micro and macronutrients.
Temperature Range
It is very important to keep the air temperature within 50-59 °F (10-15ºC) in a closed soil.
If you enclose a separate compartment in your greenhouse and raise the air temperature to 64-68 °F (18-20ºC) during the day and lower it to 53-59 °F (12-15ºC) at night, you can get green feather onions in 25-30 days.
For strongly undesirable green germination, lower the air temperature to 50-53 °F (10-12 °C). In this case, the growth and yield of bulbous vegetables will be reduced.
Lighting of onions in the greenhouse
Onions grow and develop normally in the natural light of the greenhouse, but the leaves turn light green. Supplemental lighting increases the firmness and color intensity of the leaves. In rack cultivation, only the lower shelves that are excessively shaded can be illuminated to conserve light energy. For greenhouse lighting, plant lights are usually used.
Harvesting onions in the greenhouse
When the onion feathers reach 6-8 inches (15-20 cm), they can be cut as needed.
CULTIVATION OF DILL IN THE GREENHOUSE
To prolong the harvest of dill greens, sow them in several stages on the allocated area at intervals of 10-12 days, or use them as a press for onions (change the scheme of growing bulbs) lettuce leaves, cabbage, and other crops.
Preparation of dill seeds
To accelerate vegetable production, dill is sown from germinated seeds. Wrap the seeds in a double layer of gauze 3-4 days before sowing. Soak them in water at 104-122 °F (40-50°C). This method is necessary to remove essential oils from the surface of the seeds, which will speed up the emergence of seedlings and rapid seedling growth. During the soaking period, the water should be changed once a day, and the seeds should be thoroughly washed under running water. At the end of the 3rd day, spread the seeds on a dry cloth to dry.
Dill varieties for greenhouse use
Most people grow dill annually, which means it does not have a USDA hardiness zone rating. In cooler areas, dill will grow throughout the summer. In warmer areas, such as USDA Zone 9 and warmer, the herb will set seed. When this happens, growth and leaf production will slow down or stop as the plant uses all of its energy for seed production. Once the flowers fade, leaf production will resume.
Gardeners who struggle with plant tufts in greenhouses or warm climates should choose bolt-resistant varieties. Alternatively, continuous planting or planting varieties that mature slowly will extend your dill season.
Vierling is a reliable dill variety that matures and bolts slowly. In addition, Dukat and Superdukat are slow to flower and decline. This allows you to enjoy an extended harvest. It also means you don’t have to bother with sequential sowing.
This Hercules variety also takes a long time to flower. It is best to harvest when the leaves are young and fresh, as the older leaves look rough and have no flavor.
Gardeners in cooler climates or with short growing seasons may have difficulty finding varieties that mature quickly. An alternative is to plant potted or dwarf varieties such as Fernleaf. They will grow year-round regardless of the weather conditions outside.
Soil preparation for dill
Dill does not require much soil, so compaction grows and normally develops in a substrate of the main crop. When planting alone, dill should be sown in a container or box. Mix the soil with peat, mulch, biomethane, sand, any other loosening agent to increase the permeability of water and air. In dense soil, the roots of dill begin to rot, and the plants get powdery mildew, which is not recommended to treat with preparations.
Further soil preparation is the same as for onions. To the substrate, add 20 grams of urea and 15 grams of potassium sulfate per 11 square feet of box area. You can substitute wood ash. Mix thoroughly with the soil and water. The soil beneath the dill should be continually loosened to allow more oxygen to enter.
Sowing dill
Make 1 inch (2.5 cm) deep furrows at 5-6 inch (13-15 cm) intervals in the prepared moist soil. Sow the seeds in a row and cover them with a small layer of soil. A single row sowing scheme is most often used, but a strip sowing method with 3-5 rows can also be used. In this case, the distance between the strip furrows is 3-5 inches (8-13 cm), and the strips are 6-8 inches (15-20 cm) apart.
Watering or moisturizing
For dill, constant moisture in the soil is ideal (no excessive moisture, as the greenery will be watery and may get sick). Before germination, moisten the soil daily with a sprinkler. Once seedlings begin to emerge, water moderately every 5-7 days when the topsoil becomes dry.
Fertilization of dill
Fertilization is done before the first cut: twice: with 15-20 g of nitroglycerin/11 sq. ft. of box area, or with the fertilizer solution used when seeds were planted. After the first cut, fertilize the remaining 2-4 inches (5-10 cm) of the stump with an ammonia solution of 10-15 g/2.5 Gal of water. If cutting is optional (for families), no further fertilization is done until the final harvest of the rape.
Temperature and light regime
Dill is a fairly hardy crop, so keep the temperature in the greenhouse at 59-64 °F (15-18°C) with no wind. It can be placed closer to the door. Dill has very low requirements and can be cultivated in a cool place. When growing in a box on a shelf, additionally only use plant lights to illuminate the lower shelf where the plant is most shaded.
Harvesting dill
For the bush to grow leaves, the dill plant needs enough space to eat. Therefore, thin the crop at the height of 4 inches (10 cm) by gently pulling at the roots or pulling off at the soil level. The uprooted plants can then be replanted or used as food.
GROWING PARSLEY IN THE GREENHOUSE
Preparing parsley seeds
Depending on the variety and growing conditions, parsley has a long pre-germination period of about 45 days. To shorten the growing period before sowing, it is best to sow parsley as germinated seeds. Therefore, the seeds are soaked in moist double gauze for 5 days before sowing.
The germinated seeds are then transferred at a temperature of 33 °F (1 °C) for 10 days. When sown, such seeds germinate within 15-17 days and form above-ground parts three times faster than sown conventionally.
Sowing of parsley
Divide the prepared substrate into 4 inches (10 cm) furrows, 1 inch (2.5 cm) deep. Scatter the seeds evenly into the furrow at 1.6-2 inch (4-5 cm) intervals and cover them with soil by hand.
After sowing, moisten the soil with a sprayer to avoid washing the seeds out of the substrate. Keep the air temperature between 53-64 °F (12-18 °C) and no higher. At 68 °F (20°C), parsley leaves will wilt due to overheating.
Caring for parsley in the greenhouse
If seedlings are dense, thin them out, leaving at least 2 inches (5 cm) between each other.
Water parsley when the top layer is dry, as they cannot tolerate too much water.
Before closing the rows, loosen the soil and eliminate weeds. Fertilization should not be done.
For home use, a 4-5 inch (10-13 cm) tall above-ground portion can be cut green.
After the first cut, the remaining parsley “stumps” are fed with a nitrogen and potassium fertilizer solution at a rate of 7-10 g/2.5 Gal warm water. During the cold period in the greenhouse, 5 times more parsley can be harvested, providing the family with vitamin vegetables throughout the winter.
WHAT IS THE NEXT STEP?
It is good practice for beginners to grow 2-3 low-maintenance herbs in the greenhouse. Experienced greenhouse growers can grow more early crops with a shorter growing period in their greenhouses to use as staples and thickeners in the winter: salads (leaves, cabbage, coarse-grain lettuce), various varieties of radishes, rhubarb, and other crops.
More Related About How To Overwinter For Plants


