When and how to harvest potatoes properly?
Harvesting vegetables, fruits, fruits, and berries are very simple. We check to see if the color of the collected fruit (e.g. fruit) is typical, we can pick it (after all, there are many of the same colors on the tree and we won’t damage the plant in any way) and taste it, and then find out if it’s ready to taste it.
With tuber crops, especially potatoes, everything is different: in order to dig the potatoes properly, the tubers end up ripe, tasty, large, and, above all, kept as long as possible until new tubers are made.
For harvesting, you need to understand the many nuances and characteristics of this culture. Let’s try to find out how, when, and the best way to dig potatoes.
WHEN TO DIG POTATOES?
Every gardener must firmly understand that many different factors, including potato tubers, affect the final ripening process.
These are the characteristics of the current season, soil conditions and the degree of pest and disease infestation, and finally, varietal characteristics, which determine their own patterns.
For example, if you plant potatoes during the May holidays (or at the end of April if the soil temperature has risen and you are ready to use it), you can dig potatoes until mid-August, until the end of the year, and the beginning of September. This is the usual maturity period for most potato varieties.
Naturally, don’t forget that it is even better to write down the variety you want to plant at maturity when planting potato tubers in the soil in spring: early, medium, or late, because the start of harvest also depends on the time here.
Do not assume that the differences may be small. So, if it indicates an early potato variety, then you can dig a full month earlier than mid-season and a month and a half earlier than a late variety.
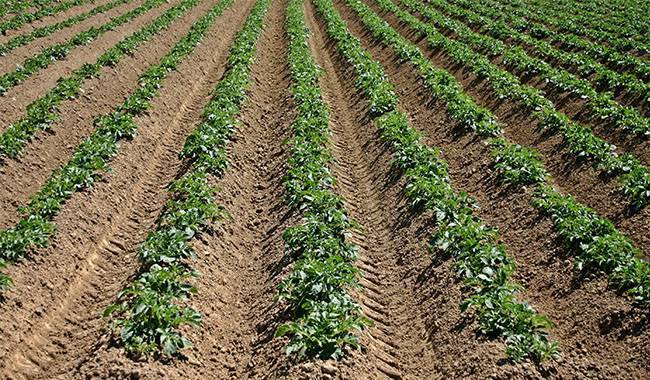
Also, check your site: if you are a responsible owner and weed on time, then perhaps your potatoes are absorbing the most nutrients from the soil, bypassing the missing competitors, and you can at least dig them up.
A few weeks ahead of time. And, if there are so many weeds that the tops of the potatoes are invisible, your potatoes are hungry and need more time to finally “mature”.
HOW DO YOU CHECK?
Of course, you can never guess, but to check if it’s time to dig up your potatoes, why choose an easier bush near the edge and dig it out completely, checking the tubers and the skins on them.
If the tubers separate easily and they have dense skins, then it is likely that you will start digging up all the potatoes.
PRECAUTIONS
Important! This applies to beginners, who are making their first independent efforts to grow potatoes on their own site.
Usually, due to inexperience and ignorance, they will start digging potatoes in the middle of summer.
The harvest is good, but the skin of such tubers is thin and boils quickly, i.e. they can be cooked immediately, but they can not be stored for a long time.
Look at the top
If you don’t want to dig the bush, look at the top of the potatoes. They are turning yellow and haven’t fallen off yet.
If this happens at the end of August, the potatoes themselves will tell you it’s time to pull them out of the soil, otherwise, unevenly timed, frost will strike and the potatoes will turn sweet, but part of the potatoes are dead as if it is not the end of August but June.
Why does it happen? This happens to lazy gardeners who are too lazy to sort the medium, late early varieties and plant them on different plots.
In this case, you need to cut off the part of the potato that has died and started to dry out at the top, and, if digging with a pitchfork or shovel, try not to touch the young tops.
With a walk-behind tractor, everything is more difficult: you should not go around these later bushes but have to sacrifice them, which will be a lesson for you in the future.
IF THERE IS EPIDEMIC MOLD, IT’S A BAD TIME
By the way, at potato harvest, you can see the following pictures: some bushes are dead, their tops are apparently dead, and some are “biting” late blight.
It has been noted that such bushes may have tubers affected by this dangerous fungal infection.
Imagine what would happen if you dug up this bush and stored the affected potato tubers together with healthy potato pieces. Yes, bad: all or most of the crop could die.
Therefore, I recommend that you dig up this potato bush from scratch, and I do not recommend that you eat the tubers removed from the soil or feed them.
DO YOU REMOVE THE TOPS WHEN HARVESTING POTATOES?
Until now, the controversy about removing the skins before harvesting potatoes has been put to rest.
Personally, I decided firmly that everything should be done in moderation: completely removing the skin (up to soil level) would complicate the whole process, and then digging up the potatoes – you would have to look where the bushes are.
The second problem is the same with the blight fungus: when you cut the whole potato into a whole, you spread the infection over the whole area, and when you dig up the tubers, you also bury the fungus in the soil, which is what the infection needs.
In principle, these tops can be harmful, but on farms where potatoes are harvested by machine, the hardtops can damage the tubers.
I recommend that you do this at home: First, we remove and destroy all organisms, but are devoured by late blight plants. No tubers or the tops of such plants are needed.
Next, we trim the entire top to a height of 12cm-15cm (4.72inch-5.9inch) and not lower.
So you will see the bushes and provide power for the tubers: they will soon need to get rid of the soil, they say, which means you should stock up on strong “crusts”.
After a week, you can start harvesting potatoes. By the way, a healthy surface layer free of mildew makes good compost.
DIGGING POTATOES
First, choose the right day. Choose the hot, windy and it hasn’t rained for the first two days and the forecast also shows it won’t rain for the coming few days.
Next, we do control digging. The potatoes have hard skins and the tubers are easy to separate – then everything is ready.
We estimate the likely crop size to see how many people, bags, wheelbarrows, garbage cans or storage bins, and other equipment will be needed.
How do we find out? One simple way: We dig up five potato bushes, select each tuber from each potato tuber, and divide by five to get a very accurate average yield per bush.
Next, we multiply that by the number of bushes on the site. Again, although approximate, it is close to the actual yield at the site.
If something is missing in the transport or storage of this vegetable, then we buy it urgently. Remember, the sooner you dig potatoes, dry them and store them in good weather, the better.
I recommend that you take four bags, a pitchfork (if it is hard to dig), and a shovel (if it is easy to dig) with you when you go out to harvest potatoes.
You can also take a walk-behind tractor, but we’ll tell you about that later. Not everyone owns it or knows how to manage it, but progress is unstoppable and you can’t afford to miss the moment.
Why are there so many bags? Quite simply, I recommend that you divide the potatoes into four parts as soon as you dig them.
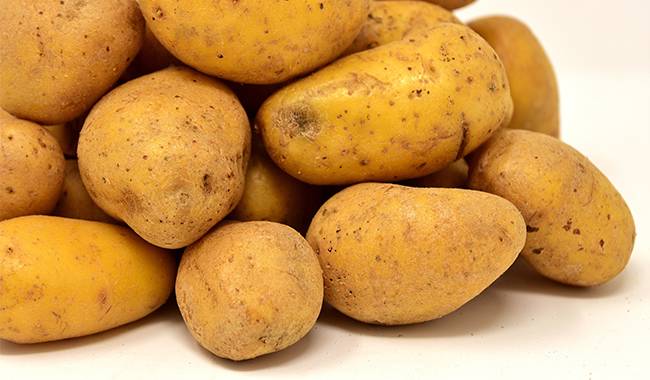
The first batch – these will be the largest giant tubers, which can be eaten or saved for seeds.
In the second bag we put normal sized potato tubers up to 80-90 grams in the third bag, potato tubers of smaller size (40-50 grams, not much more) and finally in the fourth bag we put all the smaller stuff, cut off, pierced with a pitchfork, broken tubers, which will be used immediately for food or as livestock feed.

POTATO DIGGING TOOLS
SHOVEL
This is a reliable tool, but it is recommended that you use several of them, as interruptions in the handling process can occur.
I don’t recommend using an all-metal spade; it’s best to use it where there are slits in the body, where the soil will wake up in them and make it easier to dig.
The downside of a spade is that it often breaks the potato tubers – cut, cut leaves – but the choice is yours, depending on the soil (personally, I can dig for hours with a spade in clay soil).
FORK
A pair of pitchforks is also desirable. Do not use a four- or five-tined pitchfork, as this is more likely to minimize the risk of damage to the potato tubers.
Be careful with the pitchforks, especially as you can easily puncture the rubber boots when pushing them into the soil, so here I recommend that you wear tarpaulin boots, they will be much stronger.
In principle, digging with a pitchfork is no different than digging with a shovel (although for me personally, it’s easier to dig with a pitchfork, just like anyone else).
When digging potatoes, you need to stand so that the sun shines directly on your back so that you can see what and where you are digging.
Make sure to dress neatly so that all parts of your body are covered from the sun, that Panama has a brimmed hat on its head, and that the persistent aroma of mosquitoes and horseflies is dispersed over the surface of your clothing.
As for shoes, the ideal choice is boots (which can be difficult to wear, but accidental damage to the legs can be very difficult). A few people should follow you, simply by digging a few holes behind the potatoes and wearing gloves; they should select the potatoes and sort them into bags.
TILLER
This has come from the field of modern technology and it is designed for those who have free money and the ability to manage such equipment.
In my opinion, if at least one hectare of land is planted with potatoes, then a mid-tiller is important. smaller areas can be dug out slowly by three people.
When working with a mid-tiller, it is recommended to remove all potato skins without leaving anything behind. But the first step is to dig out the late blight-infected bushes with a pitchfork or shovel while cutting off the tubers along with the potatoes. Next, you need to wait a few days for the grass to fall and not interfere with the work.
The weather is the same – warm and dry for a few days. By selecting the potatoes: Here, on the contrary, everything must be done together, after harvesting the whole plot, the cultivator will go through each row or usually the last time.
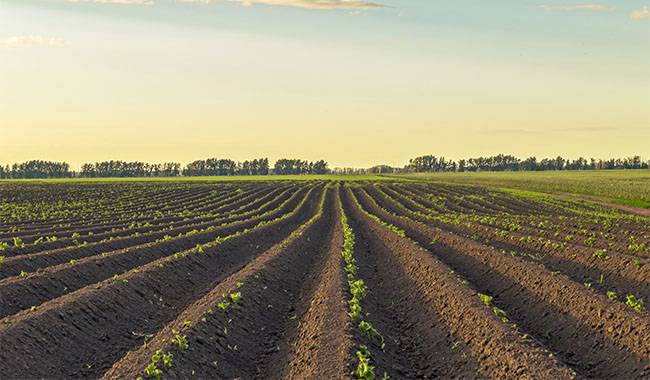
In order to be able to work with a motorized tiller when digging potatoes, rather than turning them into flour, it is necessary that all rows are neat and that the tiller does not have to “walk” in different directions.
In addition, the distance between the rows should be the same. Naturally, when digging potatoes for the tiller, you need to use an attachment designed for digging potatoes without any other tools. The speed of rotation of the knots should be adjusted so that they pick up the tubers, but do not press them into the ground.
From my own experience, I can say that when digging potatoes with a motorized tiller, instead of digging them in rows, it is better to dig them in rows, otherwise, one wheel always moves on the plowed land and the other always moves on the plowed land. It is more difficult to work because it is compacted.
The advantage of a motorized tiller is that it usually allows you to select all potato tubers from the soil with little spoilage, facilitates work, and significantly speeds up tillage. As mentioned above, several people can also walk behind the tiller and sort the tubers or do it later, when the tiller’s work is done.

DRYING AND STORAGE OF POTATOES
After harvesting all potatoes, dry them before storing them.
To do this, it is necessary to choose a sunny day, preferably windy, but potatoes should not be dumped in an open and well-lit area: although they will accumulate a little lycopene, they will build up. The best choice is a canopy located on the south side of the tree.
Potatoes can be dried in stages, as drying takes only 4-6 hours.
After drying, each fraction must be placed in the cellar and rotated to another barrel after two hours.
An ordinary standard cellar has a depth of 2-3 meters, four walls, annual bleaching with lime and white powder, plus bins – actually, large wooden boxes or standard apple crates, always new and dry. When pouring the potatoes, they cannot hit each other and fall from a height of more than 10 cm, which can lead to negative consequences, causing any consequences or even decay.
Each batch must be sorted as if it were in the field. It is recommended to visit all potato fractions to check their condition.
In order to maintain potatoes properly in the store, it is necessary to keep the temperature in them at a high temperature of around 2°C-3°C (35.6°F-37.4°F) and the humidity should be around 85-90%.
After putting all potatoes for storage, please pay attention to the field: if all skins and weeds are disease-free (weeds without seeds), you can collect them and pile them in the compost. If you find signs of fungal disease, then it is best to burn the tops.
All about when and how to dig potatoes.
Recommend you to read “Is it ok to eat potatoes that have sprouted“