How to plant potatoes? Potatoes are the most common vegetable in the garden. Recently, their acreage has decreased, although early varieties are still grown in almost every summer farmhouse.
In one place, potatoes can be grown for 6-9 years, but gradually, if they are not harvested, the quality of the tubers will decline dramatically due to soil fatigue and accumulation of pathogenic microorganisms.
In this case, changing potato varieties does not help, because they consume the same elements to form the crop and usually already carry pathogenic microbiota in the planting material (unpleasant rotten smell, black circles on the tubers, etc.).
Moreover, buying varieties of planting materials does not guarantee their quality.
One solution to this situation may be the technique of growing potatoes from biological seeds. They are formed from loose brushes at the top and white and pink flowers.
The fruits are berries that are light green, dark brown, and other colors when fully ripe. The seeds are small and brown.
HOW TO GROW POTATOES FROM SEEDS
SOIL PREPARATION
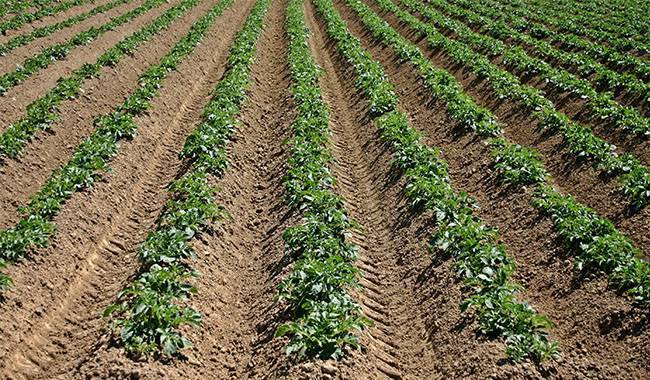
Potato is a plant that likes sunlight and usually allocates light areas in its placement. In the shade, the bushes stretch out and the tubers become smaller.
The best precursors for potatoes are early harvested beans (peas), corn, beets, vegetables (not eggplants).
In autumn, after harvest, we release the allocated areas from the weeds and dig them out with a spade bayonet.
If the soil is easily acidified, introduce one cup of lime, dolomite powder, or 2-3 cups of wood ash per square meter at the time of digging. Metre area.
Our chopped and sown seeds can be encapsulated in soil (peas, barley, rye, mustard, rapeseed) after 5-8 weeks and be fully prepared for spring sowing.
By preparing for fall digging without subsidies, we bring in. 1 bucket or half a bucket of humus or compost per square inch. If hummus is not available, use mineral fertilizer for 15cm (5.9inch) cultivation in the spring.
The easiest way is to use 30-40 g/m2 of nitrate balanced mineral fertilizer. The surface of the soil is flat and unaffected by the soil.
PREPARATION OF SEEDS
For faster germination, wake potato seeds from dormancy by pre-sowing them in a humid room at 40ºС-42ºС (104°F-107.6°F) for no more than 15-20 minutes. If not treated at the seed preparation center, the seeds can be treated additionally with trace elements.
Dry the treated potato seeds at room temperature until they are ready to flow, then sow them in the soil to dry or germinate. Scatter the seeds evenly in a saucer on a wet paper towel, cover the top with a wet paper towel, and place in a warm place.
It may be near on a warm windowsill. We keep moistening the napkins. 3-5 days later, the nailed potato seeds are ready to be sown.
SOWING SEEDS
In the first or second decade of May, when the 10 cm (3.93inch) thick soil warms to 14ºС-16ºС (57.2°F-60.8°F), we again loosen the bed allocated for sowing potato seeds and prepare holes no more than 3cm-4cm () deep for a distance of 30cm-40cm ().
We spread 2-3 seeds in each hole and cover them with the same soil or 0.5 cm (0.2inch) of fine soil.
Instead of sowing holes, plow furrows can be used. Cut furrows 4cm-5cm (1.57inch-1.96inch) deep and fill them with water. After absorbing water from the soil surface, sow and cover with 0.5cm-1.0cm (0.2inch-0.4inch) for potato shoots to appear on days 5-10. Seedlings may be sparse, so we thicken the sowing.
In the second stage of true leaves, when the seedlings on the ground start to close, we thin the seedlings. Moisten the soil before thinning. Potato seedlings can be planted neatly pulled through in individual rows or holes spaced 20 cm-25 cm (7.87inch-9.84inch) apart.
Potato seedlings grow very slowly at first and suffer from weeds, soil compaction, and dryness. Therefore, they need to be constantly loosened, weeded, and irrigated with an average amount of water.
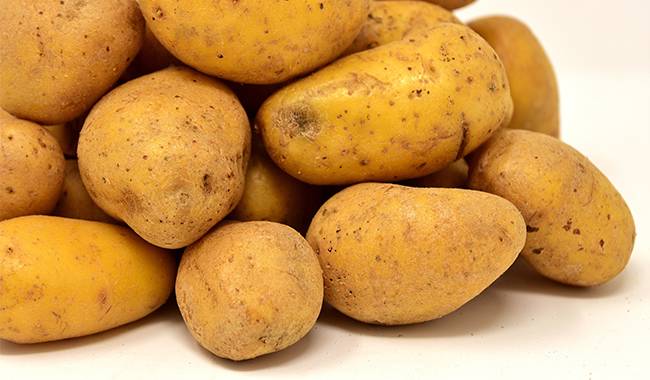
After about a month, potato seedlings will form multi-stemmed bushes. Further care for them is the same as when planting tubers. Depending on the variety, harvest in late September or early October. Yields may be low (20-40 g tubers).
We store potato seedlings as nutritional seeds, free of viruses and other pathogens, ready for planting next year.
PLANTING POTATO SEEDLINGS
In the southern region, we plant 40-55 day-old potato seedlings in the open air or in a greenhouse in May.
In a prepared open garden bed, we punch holes 8 cm-12 cm (3.14inch-4.72inch) deep, with the distance between holes depending on the final target.
If we use the first year of planting to obtain potato seedlings, then we prepare holes 25 cm-30 cm (9.84inch-11.8inch), and to obtain potato tubers (for taste-testing), we increase the distance between holes to 40 cm-60 cm (15.7inch-23.6inch), depending on the variety.
You can plant 2 seedlings in one hole.
If necessary, add 0.5 cup of mature humus and a few tablespoons of ash to the holes, mix with soil and water, absorb the water, and then sow the potato seedlings.
Potato seedlings are usually prone to collapse and breakage. Gently lay the seedlings down, place them in the holes and cover them with soil so that 2-3 upper true leaves remain on the surface.
Sown potato seedlings may be covered by sudden, abrupt cold spells or by overheating from the spring sun’s rays.
As time passes, we remove the seedlings as they begin to form new leaves.
During the first month, we start with small doses of watering on 2-3 days, then increase the watering rate and switch once a week.
We constantly loosen the plant bed from the crust and remove weeds. We watered and then mulched the soil before the bushes closed.
Monthly potato seedlings form multi-stemmed bushes, and caring for them is no different than caring for a crop planted with tubers.

FERTILIZATION OF YOUNG POTATO PLANTS
During the growing season, we feed potatoes.
Early variants of potatoes have 1 appearance within a month after sowing underground and a phase cutting surface is formed. We combine chasing fertilizer with mounding.
We feed mid-to-late-season potatoes twice. The first time was at the apical growth stage and the second time was for heavy sprouting.
The first feeding is required when the potato seedlings are more than 10 cm (3.93inch) tall and requires a mixture of nitrogen, phosphorus, and potassium (non-chlorinated form) fertilizer at a ratio of 1:2:1 or 1:2:1.5.
You can add phosphorus nitrate, ammonium nitrate (30-35 g/shrub) to the first feeding.
Some gardeners recommend adding an organic fertilizer solution under the potato roots. If hummus is brought into the main soil preparation or planted directly into the hole, an organic injection is not needed.
Instead, it is better to use pesticides, for example, 10 g/m2. This fertilizer contains trace elements that are essential for the quantity and quality of the club.
In the second feeding, which coincided with the massive formation of shoots, we excluded nitrogen and added potassium sulfate and phosphorus fertilizer at a ratio of 1:1.5.
The potassium enhanced the unprocessed of the club and the delivery of nutrients to the plant organs.
During this period, it is advisable to add ash 1-2 cups per square meter. Follow-up fertilizers can also be used in the form of solutions (10 liters of solution for 15-20 bushes).
The amount and proportion of mineral fertilizers used in the main application and in the follow-up fertilizer depend on the soil type, climatic conditions, potato variety, and will vary in each case.
Therefore, read the recommendations of your local agronomist when preparing potatoes for planting.
To stimulate the flow of nutrients from the top to the tubers at the end of flowering, treat the above-ground parts of potatoes with a calcium superphosphate solution.
Dissolve 20 g of calcium superphosphate in 10 liters of water, hold for 2 days, filter, and spray the tops.

PROTECTING POTATO SEEDLINGS FROM PESTS AND DISEASES
When potatoes are grown from seed, the resulting planting material (subsequent potato seedlings and tubers) is healthy, but the plants themselves, especially the seedlings, are susceptible to disease and damage by pests, which are found in many places in the soil.
It is, therefore, necessary to protect potatoes at seeding (especially if the seedling soil is not sterilized) and during permanent planting sites.
Among these diseases, potatoes are most often affected by Fusarium, late blight, tuber cancer, tuber and tuber rot.
Among these pests, Colorado potato beetles, bears, nematodes, aphids, potato ladybugs, quarantine pests, potato cyst nematodes, and potato moths are considered particularly dangerous. In addition to destroying the tops of potatoes, aphids are also virus vectors without drugs.
The chemical industry offers a wide range of drugs to prevent diseases and pests. However, if you need environmentally friendly products, there is no need to use chemicals in the home.
Recently, biological agents that do not harm humans, animals, and beneficial insects (bees) have been widely developed.
To fight potato diseases, the use of biological products is recommended. The latter can be used for processing plants 1-2 days before harvest.
In order to eliminate pests in biological products, it is recommended to use Bicol, bitobacillin, phytoprotectant, again, ratoon, etc.
According to the recommendations, biological can be used in tank mixtures, thus significantly reducing the processing burden, labor and time costs, and thus the burden on the plants.

HARVESTING POTATOES
After the skin has completely dried, the crop is removed from long-term storage. Potato seedlings are small, so care is needed when harvesting.
Even 10 grams of change can bring a good harvest next year.
We scatter the dug nodules in a dry place (shed, garage, other outbuildings), dry them for 3-5 days, sort them by fractions, and put them in the basement for storage.