As a rule, when we plant garden strawberries, we take seedlings from our own nursery to propagate varieties. We simply dig up the young rosettes and transplant them to new places, renew the planting or increase the planting area.
But as time went on, our strawberry garden started to fall with less and less crop, even if we planted regularly. So we either put up with it, or changed the variety completely, or even gave up the crop altogether, thinking that strawberries were not for us.
But in fact, we just make a mistake in cultivating our favorite berries, which makes us lose the pleasure of growing them. In this article, we will tell you how to grow strawberry seedlings so that they are of high quality and the variety does not degenerate.
SELECT THE MOTHER PLANT IN ADVANCE
Have you ever noticed that bushes of the same variety planted at the same time in the same strawberry bed have significant differences in yield and berry size? These differences are due to mutations that may occur for various reasons. But it does not matter, what is important is that these characteristics are inherited.
Therefore, when aiming to produce quality seedlings, the first thing to do is to analyze your planting and choose the most productive and healthy bushes for propagation, using any marker: a twig, a stick, a plastic spoon to note them …….
If you renew your planting beds with rosettes of your own growth, row by row from all the bushes, in 2-3 years you will have to renew your collection with new, bought planting material, because this will significantly reduce its potential.
It is important to choose the best plants at different stages in different varieties of strawberries. Thus, for large-fruited strawberries: it is an annual (the best choice) or biennial planting. It should be chosen to fall on the healthiest, most productive, giving the largest and most aligned berry bushes.
Interestingly, the less productive the plant, the denser the flowering, and the more rosettes are given. And it is these that inexperienced gardeners often take to propagate.
BUDS
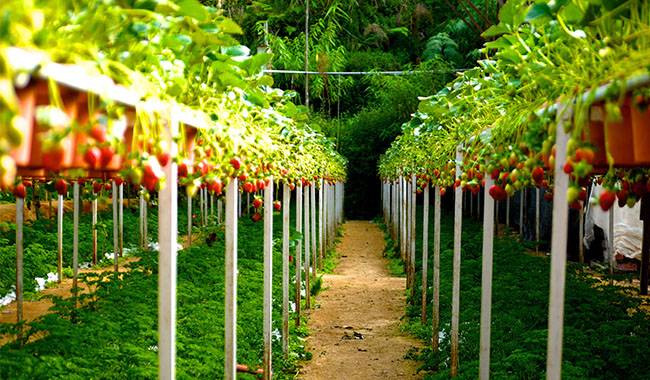
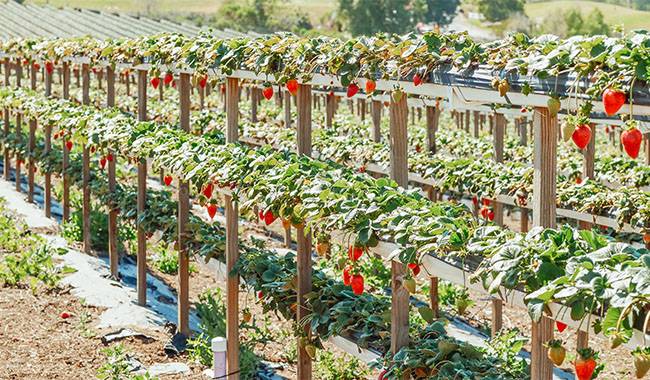
If you need a lot of seedlings, or if you have the goal of growing them for sale, the best option is to start a nursery. Organize separately from the fruiting ground for propagation or select rosettes from selected plants, or buy elite seedlings with closed root systems.
Prepare the beds in advance and apply humus at a rate of two buckets per 1 square meter. If possible, install drip irrigation: this will allow you to grow strong mother bushes that will be able to bear stronger rosettes. The beds should be kept spatially separated from each other.
The planting scheme of the mother plant can be single or double rows. In this case, a distance of 12inch (30 cm) is left between the bushes in the rows. When planting in a single row, the rows are spaced 28inch (70 cm) apart.
When planting in two rows, staggered planting is used, leaving 12inch (30 cm) between bushes and rows and 23-67inch (60-170 cm) between beds, using the space left to plant other crops if necessary.
Starting from spring, plants growing in the womb are carefully inspected. Plants infested with strawberry mites and nematodes, as well as those showing obvious signs of deviation from the characteristics of the variety, most evident during the fruiting period, are discarded. If the plants are infested with spots, aphids, spider mites, and other insects, they should be treated.
In the first year, cut off the flower stalks on the mother plant to promote the development of the flower whiskers. It is during this period that many strawberry varieties are fertilized most intensively. In order to get as many but most importantly strong seedlings as early as possible, it is not possible to lose it. In order to accelerate seedling production, even more, the mother bed is covered with non-woven material in early spring. From the second year on, the beds are used for harvesting.
The second and third years are the most intensive fruiting period for strawberry barns. With proper watering and timely fertilization, garden strawberry production will be at its highest.

DO NOT PUSH THE NUMBERS
Some strawberries produce very few beards, while others grow extremely fast. In the laboratory, one plant can produce up to 200 rosettes. But this is under ideal conditions. For us, it is important to obtain quality, not quantity. For this reason, it is important to control the process.
First, only three rosettes are left on a single beard. The seedlings must have time to grow a good root system before they can quickly take root in a new place and show their potential. After the third rosette, only the fibrous roots need to be trimmed.
Next, leave only the thickest whiskers on the mother plant. Such whiskers provide the best rosette development and are a sign of large berries. Thin whiskers should be removed ruthlessly.
TAKE CARE OF THESE PLANTS
Plants with mother plants should be more thoroughly cared for than those with fruiting plants. The bed should be weeded regularly so that the rosettes can reach the ground freely. The best method of irrigation is drip irrigation. This method produces strong, vigorous mother plants, which in turn produce a large number of well-developed, strong rosettes. To maintain soil moisture and give the young plants a chance to root, the beds should be loosened regularly.
Also, to speed up the rooting of rosettes, you can fix them in the ground with simple pins made of wire, etc. But you can also root them directly in the cup, which is especially useful if you are growing plants for sale. In this variant, they are less traumatic to the root system.
In order for the roots to develop vigorously, the seedlings should be covered with humus or peat. And they must be watered, at least 59°F (15°C). When the rosettes grow up, weeds are pulled manually in order not to damage the strawberries. Nitrogen fertilization is carried out.

PLANTING SEEDLINGS CORRECTLY
Laying the mother plant, however, while harvesting in the seedbed, many people make an important mistake – carelessly treat the roots of rosettes. But what to plant and how to plant depends on further results.
- Only strong rosettes with well-developed root systems should be taken for planting. It is that they are not only perfectly rooted but also have time to develop well and give a quality harvest or beard, depending on the purpose of planting.
- When planting, tidy up the root system of the bush. If the roots bend upward with the end, the plant will not be fully developed in the first year.
- If the roots are very long, they need to be pruned. This is nothing to fear! It is from the shortened part that will go to the densest growth of new roots.
- Care should be taken during planting to ensure that the heart (top bud) remains at soil level and is not submerged or above the soil. In either case, the plant will be stunted and will not develop as expected.
- After planting, the soil around the bush should be compacted. This method ensures that the roots have better adhesion to the ground, which results in the better rooting ability of the plant. To check if the rosette is well planted, you should pull the leaves gently. If the plant is firm, you will feel it.
Finally, there is the shade. Because in most cases we plant garden strawberry seedlings in mid to late summer to give her a chance to root properly for the winter. At this time it is very hot outside. Newly planted plants intensively evaporate water from the leaves, cooling the tissues somewhat, but the roots are not yet able to absorb the right amount of water, even if the watering is effective.
Therefore, in order to reduce the temperature to some extent and speed up the adaptation of the seedlings, it is better to shade them for 2-3 days. This can be done using materials such as newspapers, sacks, grass, old sheets, etc. that are on hand.
To avoid this, plant on a cloudy or rainy day, if possible. Or remove some leaves from the plant.
CORRECT SELECTION OF ROSETTES
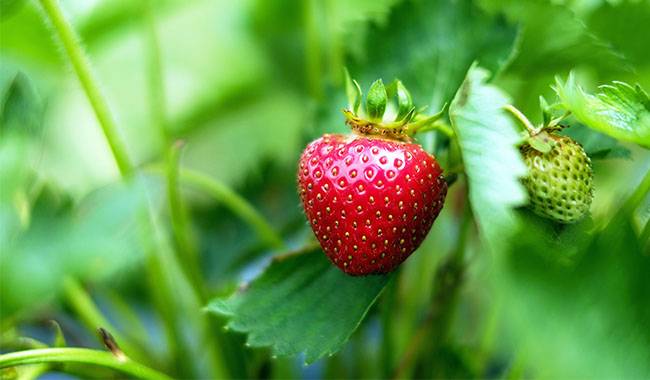
A fully developed rosette, which can be planted in a permanent place, has 3-5 leaves, a well-developed root system, and is 2-2.8inch (5-7 cm) long. In this case, the more densely the bush is developed, the more production is obtained from it.
When separating the rosette from the mother plant, do not pull it out of the ground or tear off the rosette’s whiskers. The crown should be cut off, leaving 0.4inch (1cm). Dig up the rosette and replant it, if possible, together with the root ball.
SEED PROPAGATION
This type of propagation refers exclusively to seedless strawberry varieties. The vast majority of seedlings of large-fruited varieties obtained from purchased seeds represent excessive variation due to over-pollination, while seedless types, on the contrary, do not recover their potential by vegetative propagation – clumping differentiation, although at first glance this propagation seems simpler and more reliable.
It is necessary to propagate seedless strawberries exclusively – either purchased or collected from your own bush. At the same time, the seed material should be fresh, because after a few years its germination rate decreases significantly.
It is necessary to take seeds from your plants from the first harvest of berries, from the largest fruits. It is not necessary to wait for them to overripen but to turn completely red or yellow (depending on the variety).
The largest seeds from the collected berries are in the central part, so remove the top and bottom parts of the berries and rub the middle part with your fingers in a container with water. Next, the seeds can be washed out by draining the mud and water only a few times.
Another method is to soften the berries in a small bowl with a little water and leave them to ferment for a few days. In this case, the pulp will come off better, but you should only do this if you want to get a lot of seeds. In this case, make sure you don’t miss the moment and don’t let mold form on the surface of the fermenting mass.
Next, the seeds should be placed on a piece of paper and left to dry in a cool place for about two weeks. Put them in a paper bag or wrap them in the paper. Label them. And store them in indoor conditions until the time of sowing, i.e. February-March.
Strawberry seeds that we buy in winter or spring along with seeds of other crops are best sown immediately in the year of purchase, without delaying the next spring.
Sown strawberries germinate friendly but poorly tolerate dry air during seedling disclosure. Therefore, it is better to sow seeds in a simple greenhouse, which should be regularly ventilated to avoid the accumulation of excessive moisture.
Also, it is better to take soil from your own seedbed, because bare young strawberry plants do not need too many nutrients during the seedling stage and are laid with purchased soil. They remain small in the seedling stage and do not establish large clumps, and only grow actively after transplanting to a permanent place. Peat soil is also not suitable for them: in peat soil, small plants quickly dry out and fall off.
The best conditions for seedlings – moist air, low temperature, full light (but not the hot sun). For this purpose, trays can be brought to the balcony, gazebo, greenhouse, as long as the temperature rises there above 35-37 °F (2-3 ° C).
Until the appearance of 2 – 3 true leaves, the seedlings should be watered with soft water. During this period, they are very fragile. Later, the greenhouse is ready to be removed. And plant the seedlings in a permanent place in mid-May. At the same time, it is not necessary to unplant the plants in separate cups, unless you plan to sell the excess seedlings.
Strawberry seeds can be stored for up to 4 years. The germination rate of fresh seeds is 100%. Over the years, the germination rate decreases to an extended period of seedling emergence.