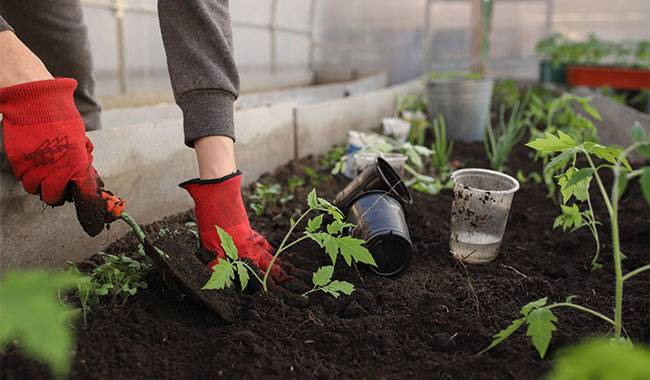
A warm bed usually serves a dual purpose. First, it relieves the need for seedlings (i.e., seeds can be safely sown in the open ground). Second, a warm bed helps residents of colder areas, when you can both sow seeds in the open ground and grow young plants in the open without fear of them dying.
Every gardener dreams of building a warm bed on his plot so that it consists of things that are thrown away every year or lie for many years and are absolutely not needed in the home.
This is what we will mainly consider when making a warm bed (i.e. to be “cheap and sulfurous”).
WHAT IS A WARM BED?
Beds with heat are easy to make and not complicated at all. Tomatoes can be grown in a warm bed, provided that there is an additional clay drainage layer at the bottom of the warm bed, and also cucumbers (in this case it is necessary to provide a moisture layer, such as a layer of moss). Also, greens, radishes, zucchini, and squash. Of course, for zucchini and squash, it is necessary to increase the area of the warm bed itself, for example, by 35% compared to the cucumber bed.
Do not think that a warm bed is just a bulk structure in the vegetable garden. Many people are afraid of this and do not build them simply because they are afraid of spilling water in the vegetable garden when watering and of not being able to keep the beds in their original form and keep them so throughout the season. Only for these people, there is a second option, and that is warm beds – below the surface of the soil, for which it is easier, though not more, to take care of.
Before we begin to celebrate the warm bed and describe in detail the sequence of its construction, I would like to very briefly describe the essence of the bed. Outline it as a section so that you can think: do you have all these materials needed to build a warm bed, or do you need to buy a few more things. The first thing is bound to be a protective layer of metal mesh in the base with a layer of drainage. This should be pebbles, finely crushed bricks, or expanded clay. Remember what we said: for tomatoes, it is better to make this layer higher because tomatoes do not like stagnant moisture.
Surprisingly, but in warm beds, many people even grow potatoes. So, and this culture requires a thicker (20% thicker) drainage layer. By the way, not many people know this, but the drainage layer can be made of non-degradable materials (for example, when you decide to build a warm bed in this place for many years), or decomposable materials, but very slowly, which is only enough for four seasons (the maximum life of the bed).
Therefore, stock up on thick branches and cut them nicely into sticks that can be spread evenly over the base, or feel free to build a warm bed out of them. These branches will also decay and decompose, but very slowly. Heat will also be released: what you get, albeit slightly, is still a plus. Next, a layered warm bed method is used, where different materials that can be “soil digested” and release heat are layered on top of the garden soil, which is covered with polyethylene film.
ADVANTAGES OF WARMING BEDS
- The first and perhaps most important advantage of any heated bed is the ability to receive a variety of vegetable products early while having larger fruit and thus a larger harvest.
- No need to worry about fertilizing for the first three seasons (maybe four, further you will know why) of using a warm bed, as the root system has quite enough “food” that you put in the warm bed in all three seasons. Your concern will be only about watering and weed removal.
- Care is extremely easy: loosening the soil and removing soil crusts is kept to a minimum, no fertilizer is needed, watering is necessary but limited. All of this is really convenient.
- We mentioned weeds in passing, so in such a seedbed there are usually no or very few weeds, so weeding is reduced to a minimum.
- In any case, if these frosts are not too strong and too long, there is no danger of the plants being killed by a return frost. Usually, the bed will do well in this regard.
Disadvantages include the additional labor costs and sometimes the cost of materials to organize the heated beds, albeit quite small. The construction of a heated bed is different from the simple digging and fertilizing that used to be your job.
However, this disadvantage is compensated by a huge advantage – the reward in the form of harvesting, getting a lot of delicious vegetables and more of them, in the envy of your neighbors, which will appear on your table earlier than they should.
And, of course, you reduce the work of those who remove the garbage or relieve them of the need to build a fire on site, burning all the plant debris, twigs, grass, semi-rotten fruits, berries, and vegetables.
Warm beds are especially beneficial for those with thick soils, such as clay, acidic (varying degrees of acidity), waterlogged, or with a high water table.
HOW TO CREATE A WARM BED?
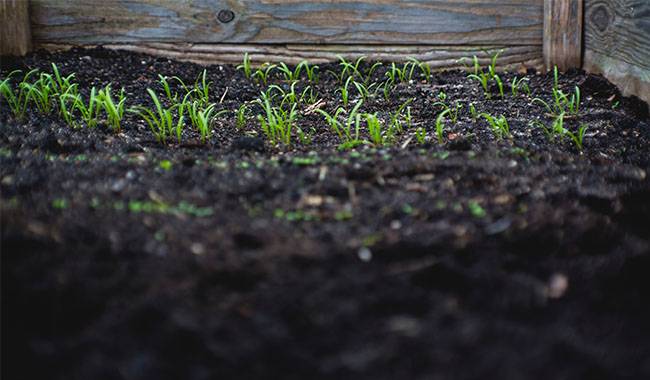
It can be formed in many ways. However, as a rule, gardeners, when creating a warm bed, necessarily pay attention to the climatic characteristics of the area in which they live. We will try to help everyone at the same time, although it is difficult.
If the season in your area is usually wet, that is, cool and full of rain, then your bed will begin to swamp and become oversaturated with water. Then the seedbed must be made very high, knocking down boxes of boards (preferably soaked with a waterproof component).
If you build a bed in a normal climate, for example in the middle zone, it can be partially soaked in soil, and where it should not be overwatered. If you take the cold climatic conditions of the Urals and Siberia, then you need to combine and deepen into the soil, i.e. dig a trench and knock down a box of boards – this is the best option for this climate.
In cold regions, and also in our center, if a severe back frost comes, it is not forbidden to put ordinary curved rigid metal wire on a warm bed and stretch polyethylene film over it. Then you will reliably protect your plants and crops from cold winds and severe frosts in a warm bed.
Choosing the location under the bed, which, by the way, is also included in its proper category of production, you should also be careful. Obviously, the best choice is not a shady or semi-shady place, but the most open and maximally protected from the shade.
If you simply don’t have more completely open areas in your vegetable garden, make sure the beds get at least five hours of sunlight. You may have to remove a large bush, such as a current, or cut down a large branch of an apple tree. But that doesn’t mean that the bed should be in deep shade for the rest of the day. There should be light, but if it is diffused light is acceptable.
Try to choose the tallest part of the vegetable garden under the warm bed. In doing so, the bed should be oriented in such a way that it is permanently protected by tall bushes (such as iris) on the east, west, and north sides, as well as by the walls of the house, fences, or any other structures (but this is not a mandatory condition, only a desire).
The heated bed should be positioned from east to west so that it is warmed to the maximum by the sun’s rays. This is absolutely necessary.
Important note: Do not make a heated bed under a tree even if there is enough space. Remember three simple rules – altitude, lots of light, and protection from the north.
TYPES OF HEATED BEDS
Ditch
This type of bed is best suited, first of all, for plants that like water (pumpkins, cucumbers). Secondly, this type of bed can be built on the soil where the water table is not close to the surface of the soil 80inch (2 meters) and there is no risk of meltwater, rain, or irrigation water stagnating for a long time.
First, we need to remove the topsoil and set it aside. The thickness of the excavated layer should be quite large – 18-24inch (45-60 cm), if you live in the northern regions – 40inch (1 m). Regarding the width, 20inch (0.5m) is enough in any climatic region to facilitate the maintenance of the bed and not to do too tedious earthworks.
The first layer should be the strongest metal mesh. This will be a restriction to the beds and will in a way save them from sinking, and infiltration by rats and moles, but will not retain moisture. Next is a drainage layer. As we have already said, it can be pebbles, broken bricks, swollen clay or branches, slightly or strongly rotted boards, pieces of cardboard of various thicknesses, thick paper, or fairly large pieces that will decompose over time.
Typically, the drainage layer is about 7-8.5inch (18-22cm) high, and for tomatoes, you can make it about 1 inch higher. Next, lay down a layer of soil that takes exactly the layer left over from digging the hole. The height of this layer should be about 1inch (2.5 cm).
The next step is to lay down various plant residues. These can include ordinary grass (after mowing the lawn or otherwise, for example), weeds (just not formed seeds on top), rotting or starting to rot vegetables, fruits, kitchen waste (potato peels, etc.). This layer should be about 5.5-6inch (14-16 cm) long.
On top of this layer, you will again place a layer of soil 2-3inch (6-8 cm) thick. On top of this layer should be placed a layer of humus, preferably not completely decomposed, but about half.
Its height should be about 3.5-5inch (9-12 cm). If you do not have a layer of semi-digested humus on hand, you can use a layer of semi-digested manure. If this is not available, you can again use a layer of plant trimmings, such as grass clippings of the same thickness. But this is not the best way to go.
On our layered “cake” you can put any fresh and weed-free garden soil in a layer of 10-12inch (25-30 cm) – for root crops 16inch (40 cm). It remains well leveled at room temperature for all watered rain, melted water, or settled water and covered with cling film.
Speaking of aluminum foil: When exactly should I cover my warm beds with foil in the fall or spring? Most people prefer to cover in the fall, with one condition – in the spring, the film should be removed from the bed as soon as possible so that warming can begin quickly.
Important! Do not pay too much attention to the height of the layer specified in the material, it is likely to be approximate, depending on the amount of this or that material you have at your disposal and, of course, the size of the trench (the narrower it is, the larger the layer is likely to be and vice versa). In order to accelerate the warming process (natural treatment of waste), you can use preparations produced specifically for this purpose, for example, “microbial fertilizers”. It greatly stimulates the decay process. But remember that it is highly recommended to apply such preparations exactly to well-watered beds.
The next variant of this bed is the bulk bed
This version of the hotbed is ideal for plants that prefer moderate amounts of moisture (such as tomatoes) and for areas with low summer temperatures and high humidity with rainfall.
In theory, with the right skills and patience, you can even lay raised beds in swampy areas that were previously completely unusable or in areas threatened by repeated frosts or huge temperature changes.
First, choose a place as described above. Then, in this place, we put the very first layer, i.e. drainage: all the same, on the same layer – about 8inch (20 cm). On this layer, we put various plant waste, about 5-6inch (12-16 cm) thick. Cover this layer with garden soil.
On top of this layer, you should pour humus or its substitute (as we wrote above), 3.5-4.5inch (9-12 cm) thick. Then, almost most importantly – all these layers should be covered with clean weeds, preferably fresh and well-rested vegetable soil, with a thickness of 20-24inch (55-60 cm). Next, everything is covered with aluminum foil. In this case, it is better to cover the film exactly in autumn.
This is still a small thing – build a new wooden crate around this bed, impregnated with appropriate material to prevent rapid decay, so that the bed does not fall apart.
Important: In general, the composition of a warm bed is the same as that of a lukewarm bed. In these beds, it is also acceptable to use agents that stimulate rapid decay, of which we have already given one example. As for reinforcing the walls of the warm bed trenches, you can use stone slabs in addition to wooden slabs, but they will look beautiful and more reliable.
Combined warming bed trenches-boxes
In fact, it is suitable for any vegetable crop and most climatic conditions. We can say with certainty that it is a universal heated bed, which combines all the advantages of a heated trench bed and a heated box-bed.
You start by removing a layer of soil, but smaller – up to 10-14inch (25-35 cm) and no more. In addition, you can lay metal mesh to keep out rodents, and if you are not afraid of their penetration, you can lay boards on both sides, right along the contour of the formed trench, so that they stick out of the soil surface about 20inch (0.5 m).
The number of layers is the same – drainage, any plant waste, and then a layer of humus and garden soil on top. Don’t forget to spread soil on each layer. Once the bed is ready, it should be watered to the bottom and apply preparations that accelerate decay, covering everything with a film until spring.
Important! Do not forget that any heated bed can “work” for about four years, then it will be exhausted to the maximum, and the best option – to destroy it and spread it evenly in the garden, making a new one according to our “recipe”.
CROP ROTATION IN WARM BEDS
To grow vegetable crops in a warm bed intact, crop rotation must be followed. This is not always possible if there is only one bed. Therefore, if possible, you should make several warm beds on the plot and even experiment to see which is more effective: trench beds, box beds, or combination beds.
During the first season of the beds, vegetable growers recommend planting pumpkin crops on them. Then, in the second season, cucumbers can be planted, along with squash, bell peppers, tomatoes, and eggplants.
In the second, third year of the warm bed – where you can plant carrots, beets, potatoes, onions, and radishes.
In the fourth and final year of the warming bed, it is best to plant any legumes that form nodules and accumulate nitrogen, and you should also fertilize the soil with the maximum available nitrogen when you lay the warming bed on the plot.
If you don’t want any beans, but also don’t want any tomatoes or cucumbers in the last year of the bed, then apply 5-6 kg of semi-digested manure or compost to the bed in the fall and gently dig them in. In spring, sprinkle the beds with nitrophenols at the rate of one tablespoon per square meter of bed.
SPECIAL FEATURES OF CARE IN WARM BEDS
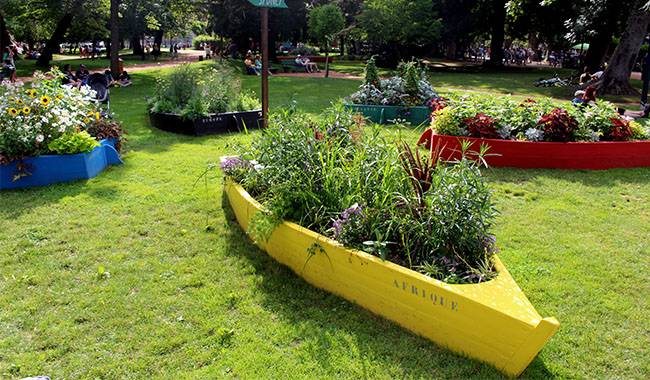
In the south, these are the first days of April. To the north, in mid-April, but strictly under the plastic film. In the mid-April, the plastic film is completely optional. On May, the first shoots will appear on the warm beds built with their own hands.
The story about the creation of a warm bed would be completely incomplete without a few words about how to take care of the plants actually “burn” constantly somewhere inside the bed.
We wrote above that watering is necessary, but with a limit. Thus, that limit is rain, and if there is no rain, then the bed still needs to be watered. Under no circumstances should the soil in a heated bed be dry.
Next, you can measure the temperature of the soil with a thermometer: if it exceeds 122°F (50°C) (which is actually only possible in covered beds), then the cover should be removed or the beds should be ventilated. But try to do these procedures during the day, not at night, so that there is no significant drop in temperature.
If you use seedbeds with mulch in cold northern conditions, crop mulching with nonwoven can reduce the temperature of the soil. It is a non-woven material that allows moisture and air to pass freely, unlike film. He also provides good protection for plants from the hot sun.
Don’t be afraid to experiment in your vegetable garden, especially when it comes to warming the bed. Your experience will most likely be successful and you will get fresh produce earlier than the owner of the neighboring plot. We recommend making several warming beds on the plots, then there will be no problems with crop rotation and you will be able to use the soil according to all “vegetable garden” rules.


