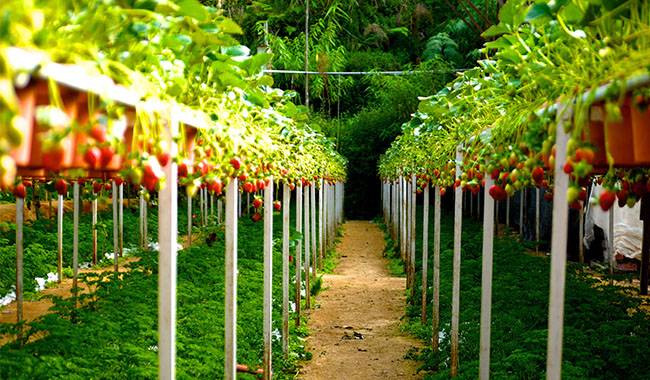
Most varieties of strawberries (garden strawberries) are propagated asexually with beards but rarely divide the bush. But sometimes these methods of breeding strawberry seeds become ineffective.
Along with nutritious planting material, accumulated diseases spread to young plants, the skin of strawberries becomes smaller, and the taste of berries changes (and does not get better).
The solution to this situation is to obtain healthy planting material. This can be nursery seedlings or seed propagation. However, purchased strawberry seedlings do not always meet our expectations.
If strawberries are neglected (strongly affected by fungal, bacterial, and viral diseases), then the best way to get rid of this situation is to switch to seed propagation and be 100% sure that this is the strawberry variety you have chosen and that you can prepare the seeds for sowing and grow your own seedlings.
This work is very exciting, and in the first half of the year, it will provide you with exceptionally tasty berries.
Note: In this article, strawberries we call strawberries orchard strawberries, or strawberries are large fruits, which is not exactly true for the plant, but is generally accepted in everyday life.
STEP-BY-STEP TECHNIQUES FOR CULTIVATING SEED STRAWBERRIES
Purchase of strawberry seeds
Seeds can be purchased from specialty stores. It is best to buy seeds with a shelf life of more than 12 months. For beginning gardeners, smaller strawberry varieties are preferred.
They have high germination and germination energy and are therefore easy to care for, especially when picking up and harvesting.
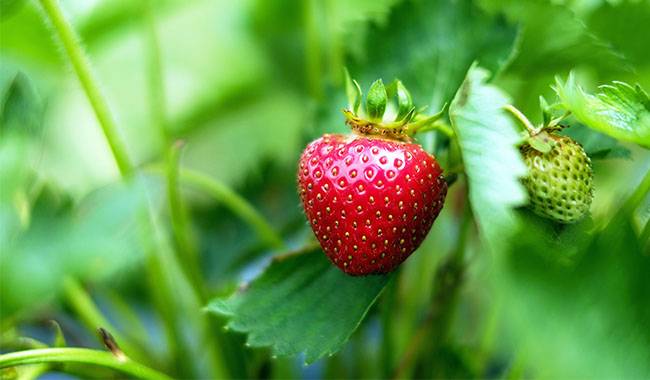
Among other varieties capable of forming berries for the first harvest within 3-4 months after permanent planting.
Separation of strawberry seeds from berries
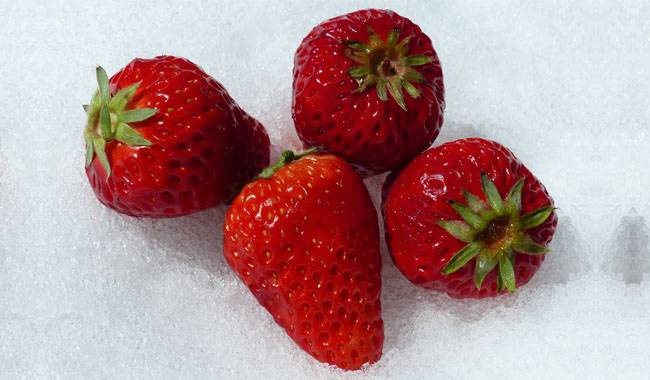
You can collect seeds yourself. To do this, you need to ask for a few exceptionally large, healthy, ripe strawberries from friends, neighbors, or choose your own berries.
If you have more than one variety, number each package containing berries and write down the variety name and the date of berry selection in your garden diary.
After picking the berries with a sharp blade, carefully cut off the uppermost layer of the flesh, with the seeds above the middle part of the fruit.
The cut must be very fine, otherwise, it will start to rot and the strawberry seeds will die. The cut strips are placed on gauze or cotton lint folded into several layers, which is another material with good liquid absorption.
We number or sign each strawberry variety (if there are several) and place them in a warm, dry place without direct sunlight.
After a few days, the pulp layer will dry out. Gently fold the lining with the seeds and wipe it with your fingers or palm. The dry hulls will release the strawberry seeds. Sort them and place them in paper bags or glass jars. Store the seeds in a dry place.
PREPARATION OF SOIL MIXTURE FOR STRAWBERRY SEEDS
Composition of the soil mixture
To grow seedlings of any crop, you need a special soil mixture, especially for small seed crops.
For strawberries, you can provide several components of the soil mixture.
- 3 parts of high bog peat mixed with sandy soil, divided into 1 part.
- Mix soil, sand, and peat in a ratio of 2:1:1. In addition to peat, you can add mature humus or bio-humus to the mixture.
- mature humus and sand (5:3).
Some gardeners use peat tablets instead of soil mixtures, while you can buy generic substrates for boxes, pots, and other containers. The recommended soil mixture is optional. Experienced gardeners have many other options to work with.
Disinfecting soil mixtures
Any soil mixture contains fungal, bacterial, and viral pathogens, pests, and eggs. Therefore, the soil mixture must be disinfected by one of the following means.
- sprinkle the soil with 1% potassium permanganate solution;
- spreading on trays and calcining in an oven at the temperature of 40-45°С (104-113°F) for 1-2 hours.
- in regions with severe winters, the soil mixture is harvested in autumn and then frozen in outdoor bags
-3. Activation of soil mixture
The disinfected soil mixture is full of useful flora. For this purpose, it is treated with a biological product containing live beneficial flora.
For the treatment, you can use one or one of the canned biological products. After the wet treatment, the soil mixture is kept moist for 7-10 days and then dried until it flows at room temperature.
A small amount of mineral fertilizer for flower crops can be added to the prepared mixture. To reduce the amount of preparation, some gardeners who are just starting out, in order to reduce the amount of preparation, just buy prepared strawberry substrate or for hay soil at the florist.
PREPARATION OF STRAWBERRY SEEDS FOR SOWING
About one week before sowing, sterilize the strawberry seeds in a potassium permanganate solution by placing the knots with the seeds in a dark pink solution for 6-12 hours and then in a growth stimulant solution for 3-4 hours.
The seeds were extruded and sent to harden. For this purpose 2 layers of bandages are wetted, the seeds are laid, and then rolled up with sausage.
The sausages were placed upright in the container and sent to the refrigerator all night, and the blanks were kept at room temperature 18-22°С (64.4-71.6°F) during the day. Thus, they were repeated for 3 days. It is not necessary to extend the hardening time. The seeds will germinate and die.
It is not necessary to harden to place seeds for stratification.

STRAWBERRY SEED STRATIFICATION
The seeds of every crop that requires a resting period are necessarily stratified. The length of stratification depends on the requirements of the crop. Stratification is artificial in winter.
During such a “winter”, the seeds go through several stages of development, thus shortening the dormancy period. Seeds germinate several times faster.
Thus, the germination period of strawberries is 30-40 days. After stratification in the warm room, the first shoots appear on the 4th-5th day, and the mass appears after 1-2 weeks.
It is easier to stratify strawberry seeds after sowing. Containers with seeds are placed on the bottom shelf of the refrigerator, where they are kept at 2-4°С (35.6-39.2°F) for the whole stratification period. Periodically the containers are opened for ventilation and moisturizing. Do not make the substrate to dry out.
In cold regions, containers with seeding material should be covered with a lid or film and placed outside under snow. After this natural stratification, move the containers to a warm room.
For large-fruited strawberry varieties, stratification should take longer, at least 2-2.5 months.
The seeds can be stratified separately before sowing. In this case, seed storage stratification is carried out roughly in November and January. The time of stratification is counted from the time of sowing.
For stratification of strawberry seeds are placed on moistened cotton swabs (round), covered with the same (also moist), and placed in a container on the bottom shelf of the refrigerator at 4-5 °С (39.2-41 °F).
The swab is moistened regularly. At the end of the stratification, the seeds are slightly dried and sown into the prepared containers.
PREPARATION OF CONTAINERS FOR SOWING STRAWBERRY SEEDS
Place a drainage layer of 2-3 cm (0.78-1.18inch) of coarse sand or fine gravel at the bottom of the box or other container. Stuff the top of the prepared container with a 5-10 cm (1.96-3.93inch) layer of potting soil that does not reach the top 1.5-2 cm (0.59-0.78inch).
The soil mixture is slightly compacted with the palm of your hand and moistened. If there is snow, sprinkle a 1-2cm (0.39-0.78inch) layer of snow. You can use frost from the refrigerator.
On an even layer of snow, make furrows 0.2-0.3cm (0.078-0.118inch) deep at 3-4cm (1.18-1.57inch) intervals in rows spaced 3cm (1.18inch) apart by light pressure with a ruler. The container is ready for sowing.
SOWING OF STRAWBERRY SEEDS
Sow strawberry seeds in the prepared containers from late March to early April.
Some gardeners sow seeds in February, but in this case, after germination, the seedlings need additional lighting to ensure 15-16 hours of light from the sun during the day. Due to the lack of lighting, seedlings become elongated, fragile, and prone to disease and loss.
Place the strawberry seeds in a prepared container on the snow surface. The snow (frost) gradually melts and pulls the seeds to the desired depth. Cover with a lid or light film. There are several puncture holes (to provide oxygen).
If sowing is done before stratification, then (if necessary) send the container with sown seeds to stratification under the snow on the street or in a refrigerator on the lower shelf for 2-2.5 months before moving to a warm room.
If stratification is done before sowing, cover the sowing seeds to mimic a small greenhouse and place them in a warm place with temperatures of 18-20°C (64.4-68°F).

STRAWBERRY GERMINATION CARE
After stratification, the first new shoots may appear on the 4th-5th days, while after 2-3 weeks a large number of new shoots appear.
After the appearance of the first shoots, during the first week provide temperature 23-25°С (73.4-77°F), which will help the seedlings to emerge more friendly.
Then transfer the container with strawberry buds to a cool place where the air temperature does not exceed 15-18°С (59-64.4°F) (transfer to a cooler windowsill or another place).
This is necessary so that the seedlings do not stick out. It is necessary to keep the substrate in a moist (not wet) state both during germination and in the subsequent period. Wipe or turn the glass and foil daily to prevent condensation on the seedlings.
As the first leaves of the cover are straightened on the strawberry buds, they are gradually removed to accommodate the increased light and temperature of the young seedlings.
During this period the optimal temperature is 18-20°С (64.4-68°F). No watering is necessary. At lower temperatures and higher humidity, the shoots will rot.
With the full development of 1-2 true leaves, the mulch is removed from the seedlings and the seedlings are moved to a place with light, but without direct sunlight. The air temperature is lowered to 10-15°С (50-59°F).
FURTHER CARE OF STRAWBERRY SEEDLINGS
Further care of seedlings includes soil moistening, fertilization, sprinkling soil to elongated seedlings, picking. Strawberry seedlings are first watered literally from under the roots with a straw at row spacing, once a week.
To avoid fungal infection, you can water 1-2 times at 2-3 weeks intervals with a solution such as bio fungicide according to the instructions.
If overgrown strawberry seedlings bend sideways under the weight of leaves, sprinkle sand or a mixture of sand and fine humus under the base of the stem, but in such a way that it does not sleep the central part (heart) of the seedlings.
Under such sprinkling, the young plants will soon form additional roots.
STRAWBERRY GERMINATION
It is better to pick at the stage of 3-4 developed leaves. Some gardeners dive when the plant forms 2-3 leaves, sometimes it takes 2 dives: at the stage of 2-3 and 4-5 leaves, especially when the seedlings grow up and it is cold outside. You pick up the number of picks yourself, depending on the weather.
The soil in the container is divided into squares with sides of 8x8cm (3.14×3.14inch) or 10x10cm (3.93×3.93inch). Holes were punched in the middle of the squares with picking pegs, enough for the roots of the strawberry seedlings to be placed freely. Pre-water the seedlings in order to facilitate the extraction of the leaves from the parent soil.
Do not touch the stalks during the picking process! After removing the strawberry seedlings, pinch off the center roots and place them in a new location. Carefully backfill and compact the surrounding soil, and water in a thin trickle so as not to flood the growing points of the seedlings.

STRAWBERRY BUD FERTILIZATION
After picking, strawberry seedlings can be fertilized. Fertilizer is applied every 10-12 days and contains mainly phosphorus and potassium, with a small amount of nitrogen. The most ideal is water-soluble fertilizer: soluble fertilizer with the addition of 2% iron chelate and trace elements solution.
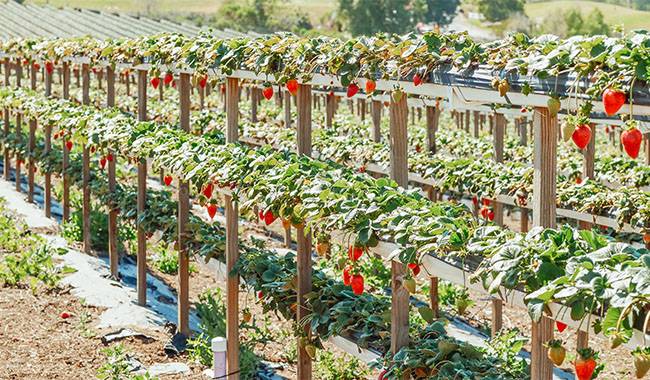
OPEN FIELD PLANTING OF STRAWBERRY SEEDLINGS
Strawberry seedlings are hardened before planting in the open ground. About 7-10 days before sowing, we gradually (starting from 2-4 hours to twenty-four hours) bring the seedlings to the unheated room.
1-2 days before transplanting, we leave the seedlings indoors (on the balcony, in the attic) with a temperature difference of 10°C (50°F) between day and night.
Seedlings are raised in the open field in mid-to early May in southern regions, later in northern regions. Choose the period when the soil warms up to 12°C (53.6°F) and the threat of returning frost ends.
Pay further attention to the usual time. In the next 2-5 years, propagate these strawberries by mustard, grafting, and bush splitting. Then it is necessary to improve the variety by seed propagation.
Recommend you to read “Top 13 FAQ about strawberry plants“