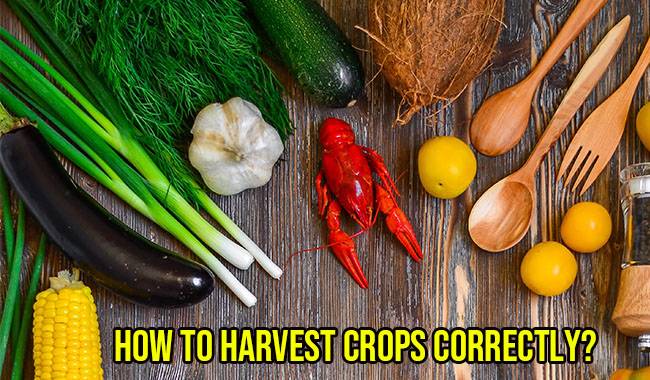
When the dripping sounds outside. April begins, it’s time to prepare the soil for sowing seeds and planting vegetable crops in the clearing. The main prerequisite for a high-quality crop depends on the preparation of the soil. All plants need fertile soil that is as light, friable, breathable, and permeable as possible, and that breaks down into small clumps as it matures.
Loose, heavy, or sandy soils do not provide the required conditions. Such soil for planting must be improved by the addition of loosening agents, additional organic matter, and other methods.
SPRING SOIL PREPARATION
Determining soil maturity
The soil maturity for starting spring work is determined in different ways.
- The foot should not sink into the soil, leaving a shallow – no more than 0.4-0.8inch (1-2 cm) impression.
- Flatten the lower soil cortex – from a depth of 2-4inch (6-10cm)) and let it fall from a height of about 50-60inch (1.3-1.5m). The flattened clods are moist and the crumbled soil is mature. It is possible to start spring work.
- Soil does not form dense clumps when squeezed and crumbles immediately when opened to the palm (usually sandy loam) soil has dried out and needs irrigation for seeding/planting.
Closure against moisture in spring
Once the top layer of soil has matured, rake the soil that has been re-tilled since fall. Use the rake to break up soil crusts and level the surface, especially for small seed crops. At the same time, remove waste (leaves, residues from late fall crops, supports used to bind taller plants). This also prevents weed infestation and preserves soil moisture.
Of particular importance is moisture sealing in light soils and in areas with deep groundwater. In these areas, topsoil dries out quickly.
Spring tillage
It is best to complete rough soil preparation (digging, fertilizing) in the fall and to limit the preparation of topsoil for sowing in the spring.
Also, heavy sloping soils are usually re-tilled in the spring. This is usually done before sowing or planting young plants. The hoeing is done at a height of 6inch (15 cm) of the root layer, with or without turning the soil layer.
If the plot is heavily clogged with root weeds, the soil layer should be turned if May beetles, click beetle larvae, etc. were observed last summer. Otherwise, it is best to dig without turning the soil layer, especially on poor soil, sod, and sandy soil.
If there is no litter in the area, you can limit deep tillage to 4-6inch (10-12 cm) in spring (hand hoeing), which also works well to loosen the topsoil and seal in moisture.
Why is it inappropriate to turn the soil layer? Soil is a living organism and each layer has its own inhabitants. The upper breathable horizon contains a group of aerobic microorganisms that recycle organic matter into plant-usable humus compounds in the presence of oxygen.
The layer beyond 6inch (15 cm) has a kingdom of anaerobic bacteria for which oxygen is poison. The overturning of this layer alters the living conditions of both groups, leading to their death. The vacated space is occupied by pathogenic microflora, the soil quality decreases and, as a result, the conditions for growing future crops deteriorate. Plant roots will be more frequently affected by diseases.
A good improvement of soil fertility and its physical condition is green manure. Read more about the role of green manure and techniques of its use in the related article.
Lawn sprouts do a good job of clearing the soil of weeds, loosening the upper layers with their roots, and enriching the soil with the organic matter due to decaying biomass. Spring construction on beds with green manure: excavation on green manure, or direct trimming of the above-ground parts and direct planting of seedlings or sowing of seeds in live stubble.
In the suburbs, it is better to garden by rows so that all spring work can be carried out more qualitatively and on time: removing weeds from the garden, fertilizing, irrigating, and planting seedlings.
RAISED ROW GARDENING
Row gardening involves sowing or planting tall plants (tall tomatoes, cucumbers, climbing beans) or a strip (carrots, onions, radishes) in a row. Leave paths between rows and strips to maintain the crop. It should be noted that separate rows are not the most successful use of the garden plot: a large amount of soil is occupied by paths; during the treatment of plants, the solution goes to the next row of crops that can not be treated with the preparation used, watering plants is not convenient, etc.
Row gardening is more often used to design borders for vegetable beds or plots allocated to medicinal crops for high growth or climbing crops.
A vegetable garden starting from a bed
If the vegetable garden is small, it makes more sense to use it under the cultivation of bed crops.
Garden beds are subdivided into.
- Classic raised beds.
- Deep raised beds.
- Elevated garden beds.
Beds-boxes.
Beds-seedbeds.
Bed gardening allows you to introduce crop rotations, observing which improves the quality of soil and crop planting, care, and handling of plants. Beds can be temporary, but preferably permanent, occupying a certain wedge of land for growing vegetables and other crops.
HOW TO MAKE A PROPER SEEDBED?
Classic raised bed
Classic raised beds are formed directly on the soil. They do not have a standard size. Usually, each gardener marks out an area (width and length) so that it is easy to handle the plants and take care of them from the path without affecting the surface of the bed.
The beds are arranged in such a way that each bed has a free passage on both sides. In this arrangement, the optimal width of the bed is 60-63inch (1.5-1.6m). This means that each side of the bed can be plowed to a length of 28-30inch (70-80cm) with outstretched hands without stepping on the bed itself.
The length is arbitrary, depending on the size of the plot allocated to the vegetable garden. Allow a path width of 20-40inch (50-100cm) between beds to allow free access to garden equipment, watering and plant handling.
By the way, in the warm season weeds and other waste are dumped on the paths, in the fall clean the paths, throw organic matter in the beds, and dig as additional organic material. Permanent beds and convenient paths will make the vegetable garden neat and attractive, making it easier to control weeds.
In the beds, the plants are planted in a north-south direction. This arrangement will bring more light to the rows and reduce shading from each other. If the beds will run east to west, the seeding/planting will be done across the beds rather than along them.
On slopes, beds are placed in individual terraces that span the slope.
If seedbeds have been fertilized in the fall by digging, they should not be fertilized in the spring. Work should be limited to watering (raking with a rake), tillage prior to planting, and (if necessary) partial watering in the furrow or hole prior to sowing/planting.
Deep raised beds
Deep beds can be subdivided into deep and trench beds. With this method, the bottom of the bed is deeper in the ground. Deep beds are usually formed in greenhouses, and also in open turf or sod areas.
As for the classic bed, the area of the bed should be marked out. Hammer a nail into each corner and pull a signal line at the same height. Use a knife or spade to cut a layer of sod around the bed (it can have not 4 corners, but 5-6 corners – your choice). Roll it up like a carpet.
It turns out to be the base of a depressed bed. To reduce weed germination, the base of the bed is covered with a dense plank of whatever natural materials are at hand – cardboard, old newspapers, old magazines read into the holes, rags. A carpet of sod is laid and the sod is placed on the base. Then interspersed with humus, earth (from the path), compost in a layer of 4-5inch (10-13 cm).
The order of laying – chosen by the owner – is the main thing – the top layer should be of high quality, preferably humus. In spring, the beds are raked flat in order to seal in moisture. Before sowing/planting, the soil is loosened again and watered locally (if necessary). No fertilizer application is required.
Cold-resistant crops can be cultivated on the beds from early spring. Decomposing humus and compost will help to raise the temperature of the soil layer. For cold-resistant crops, seeding can be started at 37-41°F (3-5°C). Seedlings of heat-loving crops can be planted after harvesting early crops with short vegetative periods. Trench beds are mainly used in the south.
Trenches are dug to a depth of 12-20inch (30-50 cm). With the introduction of organic and mineral fertilizers, the foundation is dug. The soil does not dry out. Plants escape the scorching rays of the sun, creating a good crop and reducing disease. However, this bed is only suitable for soils with good water permeability.
On clay and other soils that drip water everywhere, it will start to soak the roots and root rot will occur.
Elevated garden beds
Recently, no-dig farming is gaining more and more acceptance. It is most convenient to do it in raised beds or raised beds. Farmers call them by different names, but the main point is that the soil in such beds does not need to be dug. The top layer is rich in useful microflora and weeds are easily eliminated.
Organic matter is brought into the bed every year and mulch is used instead of weeding under the crop.
Techniques for removing such beds from such seedbeds include creating fences for 8-10inch (20-25cm) raised beds, up to 20-24inch (50-60cm) high beds, and sometimes up to 35inch (90cm) high.
Fenced beds laid on the ground received different names from gardeners.
- Compost
- Raised
- Warm
- High garden
- Puff garden
- Lasagna vegetable garden
A raised, or composted, a heated bed is usually arranged directly on the vegetable garden plot. Standard-sized beds are enclosed with suitable materials: boards, planks, wicker vines, etc. Soil can be dug into the snags of a shovel to increase its permeability.
Dry branches, bark, wood chips, shavings, leaves, straw, sawdust, old rags are placed on the dug-out surface or directly on the ground, interspersed with soil. On top, a layer of 4-5inch (10-13 cm) of compost or well-rotted manure, straw with poultry manure.
The next layer is soil, again with organic matter. Count so that the top layer is good garden soil and you can mix the soil of the leaves with humus. The top layer below the rake can be covered with the planned fertilizer. Add soil, humus, and mature compost to the settling bed.
A green fertilizer, glucosinolates, can be used. It is better not to sow oats or rye by sinking them into the soil. Simply scatter the seeds on top of the soil and sow them in the bed. If it is necessary, water.
It is recommended to leave the green manure until spring. In the spring, trim the above-ground part and use it to cover the seeds when sowing or planting seedlings.
Multilayer beds should not be overfilled. Add only a mixture of organic matter and soil every year. Slightly loosen the top 2-4inch (5-10 cm) layer before planting/sowing. Such beds are watered with hot water in spring and insulated with mulching material, straw. Organic materials are “ignited”, i.e. they decompose strongly with the release of heat. The soil in such beds warms up 6-12 days faster than in the usual above-ground beds. Warmer beds allow earlier planting of seedlings (under mulch if necessary) and an earlier vegetable harvest. Raised insulated beds can be planted in all areas of the crop rotation.
Beds-boxes
Box beds have been used by gardeners for a long time. They are identical to hotbeds in that sprouts are raised in the early spring in the hotbed and, after harvest, the vegetable crop is planted in a permanent location. They have the advantage that after the seedlings have been selected there is practically no need for preparation since the soil for seedlings is always prepared very carefully and with sufficient fertilizer.
Beds-seedbeds
Box seedbeds have been around for a relatively short time and have gained importance in areas with wet summers and cold climates.
Their structure is very similar to that of raised beds. You can read about them in more detail in the corresponding article.
This type of bed has many advantages:
- In northern areas, bulk beds cut off the cold soil.
- Decomposition of organic residues creates early positive soil temperature, which accelerates early crop sowing/planting
- No water overflow during irrigation.
- It prevents weeds.
- It is easy to deal with moles; it has a fine mesh at the bottom.
Beds-seedbeds in one place can “survive” up to 6-8 years, or even longer if they are arranged by human head.

COMPLEXITY OF CARE
After 3 years, the organic material laid down will have burned out. The top layer of soil will need to be removed and replaced with a new layer of soil, better organic matter, and subsequently covered with an organic-soil mixture. To prevent the soil in the box from overheating, it must be watered frequently, which can damage the soil structure. After a few years, a new layer of organic soil is needed to start a warm bed, which complicates care.
In the meantime, in the cold north, bark beds are an advancement in open field vegetable production.
In order to prepare plots for early sowing, it is necessary to:
- The main work (removal of crop residues, digging, fertilization, deoxygenation, sowing of glycosides) is carried out in autumn, which gives time to prepare the soil for sowing early crops in spring.
- Harrowing is done in the spring, as soon as the dryness of the soil surface allows, to seal (preserve) the moisture. If necessary, cover the soil with cuttings, small shavings, and humus.
- In dry winds, to warm the soil more quickly, the beds are covered with crop cover nonwoven or other mulching material. This method can accelerate the warming of the soil for up to 6-12 days.
- Warm beds are prepared in order to obtain an early harvest. They can be laid from autumn and warmed up by hot watering or in spring by introducing manure with straw under the soil layer.
The best beds in the south are classical beds, raised beds, and trench beds.
For colder regions with short summers and severe winter frosts, it is best to grow early vegetable crops on bed boxes in which the soil warms up faster and is not connected to the main soil.
More related information about soil