How to plant a tree seems to be a simple matter. But in fact, it is a complete and comprehensive measure, all of which must be understood and followed.
Otherwise, it is possible to obtain completely different results, which every gardener dreams of. Incorrect and ill-timed planting can achieve smaller yields, or not wait for it at all, or, instead of putting a few years from planting to the first harvest, wait for the results in twice, or even three times as long.
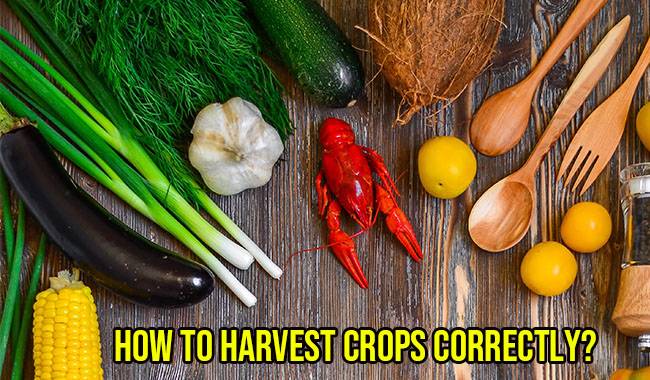
So, how to plant a tree correctly? That’s what we will discuss in this article.
CONDITIONS FOR PLANTING FRUIT TREES
It is known that trees can be planted both in spring and autumn. The best time to plant in the spring is before the buds bloom. In most parts of the United States, it is April. In the fall, seeding should be completed 15-20 days before the onset of steady cold weather. Trees are usually planted in October, when the soil is moist, no longer hot, and not yet cold.
Knowing the planting date, people can decide for themselves when it is more convenient to plant trees. Of course, there is less time in the spring: there is a lot to do and it is not always possible to plant the trees before the buds open.
Fall is quieter and there is a wider selection of saplings in the nursery. If you buy a tree in the fall and decide to plant it in the spring, you will have to bury it somewhere and protect it from mice.
NURSERY MARKETS ARE THE BEST PLACE TO BUY
The first rule of planting any tree starts with choosing where to buy it. It is best to buy trees from a nursery. Preferably the nursery where you are going to get the sapling has been successfully present in your city for at least a few years. At the nursery, you can buy mature saplings of any tree species, corresponding to the species and free from diseases and pests.
However, even when buying there, be sure to check the root system, i.e. the above-ground part of the plant, and if you do not find rotting, bark scratches, or excessively dry roots, then the seedlings are ready for purchase. By the way, it is better to transport the seedlings to their plots after dipping their root systems into clay putty beforehand, covering the roots with sawdust and wrapping them in polyethylene bags.
EACH SEEDLING HAS ITS OWN PLACE
In order for the tree to grow successfully on your land, you need to choose its exact location. The vast majority of trees will grow well in full sun, unobstructed soil with no depressions or troughs (where meltwater or rainwater accumulates), and a water table at least 6.5 feet (2 meters) above the ground surface.
It is perfect if it is protected by a house wall, fence, or other structure to the north and no trees will reject it. Choose a spot where the crop you want to plant has not grown before or at least in the last five to six years. Don’t plant an apple tree in, say, another apple tree, and so on. Why?
It’s simple, in addition to a certain type of crop sucking the necessary amount of a specific element from the soil, it “enriches” the soil with hibernating or dormant pests and diseases that will activate as soon as the same crop is planted again in that spot.
The type of soil is also important, as an optimal place is one that is not only well-lit and flat but also does not stagnate. The vast majority of trees will only grow well on nutrient-rich and loose soils such as chernozem, loam, and similar types of soil.
Do not plant trees on sandy or very clayey soil. First, prepare the substrate: if it is clayey, loosen it (add river sand or, for example, buckwheat hulls) and, conversely, if it is sandy, compact it (add loose clay to the soil, usually in the form of a bucket per square meter).
The pH value, i.e. the balance between acid and alkali, is undoubtedly also important. The optimum pH is usually 6.0 to 7.0 – above this value is alkaline, below it is acidic, and hardly any trees like it. You can check the pH with litmus paper and soak the soil in water. The color the paper turns will indicate the pH level. A set of litmus paper and a scale can be purchased at any garden center.
SPACING OF SEEDLINGS
About planting patterns. Trees, whatever they are, certainly do not like to thicken. When the sapling is young, with only thin stems and a few shoots, it may seem that 40inch (1 meter) of free space is quite enough, but after five years, when a strong above-ground complex is formed, your canopy will interfere with neighboring trees or shrubs, will extend into the light, may start to bend or become unsightly leaning, and then nothing can be done about the tree. It’s too late.
To avoid trouble, don’t be greedy; when planting large trees, keep at least 10 feet (3 meters) away from other trees, which should be enough to allow the canopy to develop fully.
FERTILIZE THE SOIL BEFORE PLANTING
Before planting, once you have decided on a place and a scheme, you need to prepare the soil properly. On the surface, it may seem that all soil is the same; it is black or gray, closer to brown, etc.
However, in reality, the composition of the soil can be unique. In one place, only potassium may be sufficient for the tree’s needs, in another, it may be deficient in nitrogen, and in a third, all three major elements are insufficient for the tree’s full development.
Therefore, to quell the risk of trees starving to death after planting, you must fertilize the soil before planting. Fertilizers are usually introduced under soil tillage, distributing well-decomposed manure or humus (4-5 kg per 1 m2), wood ash (250-300 g per 1 m2), and nitroaminophosca (one tablespoon per 1 m2). Usually, these fertilizers are enough to start the tree fully developed in its new place.
When preparing the soil, be sure to remove all weeds, especially – rhizomes of wheatgrass, which are the first competitors of seedlings and should not appear in the first stages of the tree’s life in the new area. By the way, wheatgrass, even if only 0.4inch (1 cm) of roots remain in the soil, can resume its growth.

FEATURES OF CREATING A PLANTING HOLE
When the soil is ready, you can proceed to create planting holes. This procedure is common and not complicated, but it has its own rules here. For example, it is necessary to dig the hole so that its edges are flat, the size is 25-30% of the volume of the tree’s root system, and at least a few weeks before planting the seedlings.
The preliminary digging of the hole allows the soil to settle down before putting in the seedlings, then there will be no unpleasant surprises of seedling failure in the days after planting. At the bottom of the hole, be sure to arrange for drainage of expanded clay, crushed brick, or pebbles.
Drainage is favored by most trees and it does not allow water to stagnate at the root system, thus excluding its decay. On top of the drainage system, it is necessary to pour a nutrient layer, as gardeners call it – a nutrient mat. It should consist of humus and nutrient soil (usually the top layer of soil is the most nutritious) mixed in equal proportions with 50 grams of wood ash and 15-20 grams of nitrocellulose ether. The seedlings should be well watered before putting their roots into the hole.
HOW DO PUT THE SEEDLINGS INTO THE HOLE?
Let’s proceed directly to planting. So, the pit is ready, fertilizer is applied, water is applied, 12-14 days have passed, the soil has stabilized and you can plant the tree in a permanent place.
When you start planting, it is better to install a support stake, which should be placed exclusively from the north. The support spike is necessary to keep the sapling initially upright until it becomes stronger. After installation, it is necessary to take our tree in your hands and inspect its trunk properly. You can see the darker side and the lighter side of the trunk.
The dark side is usually the south side and the light side is the north side. If you want the tree to take hold quickly in its new location, you must place it this way – with the darker side facing south and the lighter side facing north. By planting it this way, it will be planted exactly as it was in the nursery and will be at least somewhat less stressful to replant.
Next, when planting, first place the sapling in the hole and carefully straighten its roots so that they look to the sides and do not bend, break or point upward out of the hole.
It is generally easier to plant any tree together, with one person holding the trunk firmly and the other covering the roots with soil. When filling in the roots, try to jerk the sapling around a bit so that all the spaces between the roots are filled with soil rather than air. When planting, we recommend compacting the soil in layers, i.e. lightly fill the pit-compact a little, then fill the soil again, compact again, and so on, until the pit is filled.
When planting, it is extremely important to make sure that the root neck (where the roots enter the trunk) is always a little higher than the soil surface, at least 0.4inch (1cm) or more. This may seem trivial, but in fact, if you bury the root neck, the tree’s growth will immediately slow down and its entry into full bloom will be severely delayed (in the case of drupe crops, for example, the root neck can even be uprooted and the tree is mediocre will die).
Don’t let it go in the hope of “hitting the jackpot”; even if you later “dig out” the root neck, a depression will form around it and the water that falls on the soil surface, whether it rains or is watered, will stagnate in this depression and the root neck will rot.
Once the root system is completely covered with soil, it is necessary to compact the soil, hold the tree upright, tie it to an “eight” stake to prevent overstretching, and then water the soil with several buckets of water, making sure to cover the surface with a layer of humus several inches thick.
Green beans are an excellent mulch to use when planting in the fall as they will save evaporation of water and not frost the roots of the seedlings, and when planting seedlings in the spring, a layer of mulch in the form of humus will be additional food that will not create soil sloughs and inhibit weed growth.
CARE FOR FIRST-TIME SEEDLINGS
If you think that with the immersion of seedlings into the soil, planting is over, you are wrong. There are several actions that are already carried out after planting but should still be included in the list of indispensable planting activities.
In the fall, it is to protect the young trees from rodents. Usually, after planting, the trunk to about 20inch (50 cm) high is wrapped with plastic netting and poisonous bait is spread around the seedlings.
When planting in spring, the young trunk of the tree should be protected from sunburn by painting it white.
After all, this is done, you can confidently say that the planting is complete. As you can see, planting a tree on your land is not difficult and if everything is done correctly, the tree will soon bring the first harvest and more and more each year.