Bad soil on a plot of land is not the final verdict. You can remedy these deficiencies with Raised Beds.
The principle of Raised Beds is not to fight bad soil on the whole plot, but to create a separate place – a bed above the ground – which allows you to control the texture and composition of the soil.
In this publication, read about what Raised Beds are and how to make them with your own two hands.
WHAT ARE RAISED BEDS?
Raised Beds are beds that are built on top of the soil surface. Raised Beds can be complex in design, using a high fence made of wood or stone, or simple when the bed is only 4inch (10cm) above the ground.
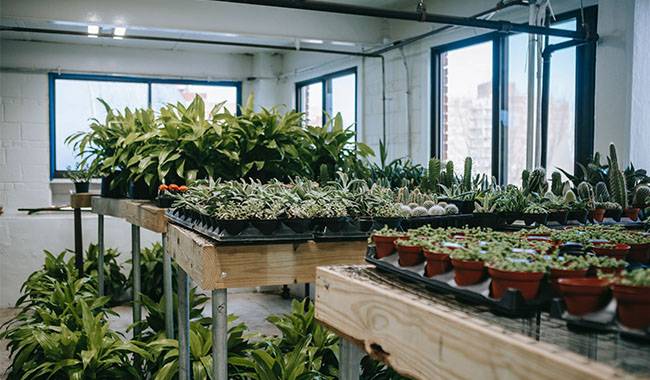
Raised Beds can be planted with anything from herbs and vegetables, to perennials and even shrubs.
BENEFITS OF RAISED BEDS
By building Raised Beds on your plot, you will forget about the problem of poor soil and gain the additional benefits of.
- Raised Beds warm up faster in the spring, so you can treat the soil and grow plants earlier.
- Raised Beds are better for drying.
- Raised Beds’ soil will not compact because no one tramples it.
- Raised Beds’ soil is more easily adapted to specific plants.
- Raised Beds are easier to maintain.
HOW TO MAKE A RAISED BEDS?
The most popular type of Raised Beds is fenced beds because they are perfect for any vegetable crops, berries, herbs, and flower beds.
The material options for making Raised Beds fencing are quite diverse. It’s no surprise that most gardeners build Raised Beds out of wood: it’s easy to work with and affordable at the same time. Concrete blocks, stones, or bricks are also suitable for Raised Beds, but it is much more difficult to make a fence out of them.
Some gardeners do it more simply: they bind hay or straw to a size suitable for the beds, then pour soil and compost on top and plant the plants. However, this doesn’t last – straw decomposes quickly, so such a bed will last no more than a year.
If the need to replace the contents of the bed once a year doesn’t scare you, or if you’re still looking for a permanent design, it might be worth starting with the above version.
We’ll take it from there. Given that most Raised Beds are built with wooden planks, here are instructions for making Raised Beds with wooden planks.
STEP-BY-STEP INSTRUCTIONS FOR CREATING A RAISED WOODEN BED
- Choose a location for your Raised Beds. If you are sure you will be growing vegetables, plants or light-loving flowers, choose a location that receives at least 8 hours of sunlight per day.
The surface on which Raised Beds are built should be flat and level, and Raised Beds should be located in a place where they can be easily watered and have enough space to work with plants. - Determine the size and shape of the Raised Beds. Make sure the plants will be easily accessible to you without having to step on the bed.
One of the main advantages of Raised Beds is that, due to their clever accessibility, the soil in them will not be compacted as it would be in a regular bed.
Raised Beds are usually about 4 feet (1.2 meters) wide, as you can access the middle of the bed from both sides. If you build the bed on a wall or fence, it should be no wider than 35inch (90cm).
If you have chosen the right width for Raised Beds, its length does not matter. - 6inch (15cm) is the normal soil depth for most crops to grow. The ideal height of the bed should be 10-12inch (25-30 cm). If the soil is not too sticky or rocky, you can simply loosen it and make a 6-8inch (15-20 cm) high bed.
But if the soil is poor, or if you will be growing crops that require deeper soil such as carrots and beet, then the bed should be at least 10inch (25cm) high. - Prepare the space. Once you have decided on the size and shape of your bed, you can start the site preparation work. The amount of work is determined by the height of the bed you plan to make and the plants you plan to grow there.
For most vegetables and herbs, a bed with a height of 6inch (15cm) will be fine. You can save time by simply lining the top of the bed with newspaper, landscape fabric or cardboard and filling it with soil.
However, to ensure that the roots of the plants have enough room to grow, it is best to remove the existing sod and additionally loosen the soil to a depth of 8-12inch (20-30cm) with a trowel or garden fork. - Make a frame for the Raised Beds. When making the frame, use decay-resistant boards such as cedar, larch or modern composite materials. To make a 6inch (15cm) high bed, cut the right number of planks to the right size and nail them together to make a simple frame.
There are various ways to staple planks together. You can pre-drill holes and use galvanized screws (self-tapping screws) to fasten the planks together in pairs. You can also use small wooden blocks in the corners to secure each plank to. - Level the frame at the location chosen for the bed. Using a level, make sure you have aligned the frame in all directions relative to the horizon. This is important: If the frame is not level, water will run off one side of the bed and pool on the other side. If any side of the frame is too high, remove only some of the soil under that side.
- fill the bed with soil. the whole point of Raised Beds is that it can be used to create the perfect soil for plants. So, fill the bed with good quality substrate, compost and skimmed manure. After filling the beds and leveling the soil in them, you can start growing plants or sowing seeds.
RAISED BEDS CARE
Tall beds are easy to care for. They need to be replenished with compost and manure every spring or fall. If the beds are intended to be planted for only part of the year, compost or manure should only be placed in the top few inches of soil.
As with any flower bed, mulching the top of the soil in a tall bed will help retain moisture and avoid weeds. Moisture retention is especially important for tall beds because they dry out more quickly than normal beds.