Garden tools and implements are indispensable anywhere you work on the soil or plant trees or shrubs. We can only pick fruits or single pests with our own hands, everything else has to be done with the help of gardening tools.
Nowadays, a good spade and a high-quality rake are quite expensive, and more and more gardeners and horticulturists like to take care not only of plants but also of garden tools so that once winter comes and the work in the garden is over, they will last as long as possible.
For some, the whole care of garden tools, absolutely any type, from a simple spade to a complex shear or mower, boils down to the form of his placement in the garage or shed where he is present at the moment. With such careless owners, even expensive shovels, rakes, and hoes begin to rust quickly, their wooden elements dry out, sharp nodal trimmers and saws become dull, and all the elements begin to flow and crack in the wrong places.
Therefore, in order to make gardening tools last as long as possible and use them conveniently throughout the season, it is necessary to prepare them accordingly for long-term storage, which can last from the beginning or middle of November to the beginning of April, which is almost half a year, even in fairly warm places in central Russia.
PREPARATION OF METAL GARDENING TOOLS FOR WINTER STORAGE
Therefore, before you forget about the presence of such gardening tools as shovels, axes, rakes, hoes and hatchets for six months, it is necessary to remove soil and plant residues from their surfaces, then rinse them thoroughly, complete the cleaning process with a metal brush, then dry them sufficiently, grease them with ordinary motor oil and finally wrap all metal parts with greaseproof paper.
As for the handles of the above tools, the danger they face is severe drying. A dry handle may not hold the metal parts or may simply break at the most critical moment. Check this or that tool first: if its metal parts are loose, fix them with extra nails, use clips made of wooden parts, or tap the handle deeper.
Important! There should not be any counteracting forces, and if the metal part of the shovel, fork, hoe or something very dangerous, an axe hangs loose, then this problem should be eliminated. In addition, they will not only lead to longer and less efficient work, but also to calluses on your hands.
In some cases, if you use the tool a lot, or if the tool has been used for several years, the handle at the bottom of the metal part may rot. In this case, you can do two things: replace the entire handle or make it shorter.
Important! It is better not to make the axe handle shorter, but longer. The axe handle must be long enough to be able to hold comfortably while chopping.
Handles of other tools, hoes, shovels, rakes are often referred to as handles, so the handle is placed in the metal socket of the shovel or hoe, and when secured with a large head nail (self-drilling screw), the shovel or hoe should reach the worker’s shoulder when mounted on the ground. If the blade of the assembled tool exceeds the stated length, it is not convenient to work with this tool, and conversely, it is more difficult to work with the short blade on the shovel and hoe.
An unpleasant problem to solve with axe handles or hoe handles, shovels or other things is the appearance of burrs on them. Deburring can be caused by careless handling of the tool, that is, if you drop, throw, fold them differently – metal parts both up and down. In such cases, burrs while working with such tools may lead to painful blisters on the hands.
The best way to remove burrs from gardening tools is to clean them with sandpaper. You can use coarse sandpaper to remove the burrs quickly, then use finer (gentler) sandpaper to smooth out the smaller rough spots as well.
The next step is to treat the handles and cuttings. To do this, they should be treated with a combination consisting of a mixture of equal parts varnished gasoline and linseed oil. After this treatment, the life of the handle or handle head can be at least doubled.
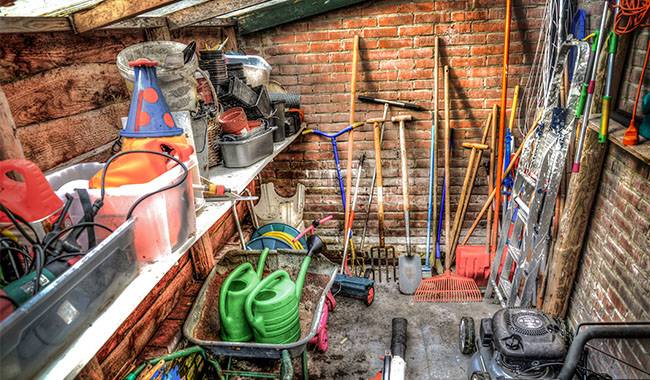
The tool should be stored in a dry place where no moisture can penetrate. A shed or a garage will do, as well as a garden house, or as a last resort, a terrace. Note that ideally, the tool should be in a horizontal position, lying on a specially designated shelf or overhanging. Thus, the metal parts are not far from the ground (3-4 cm), so that they do not cause injury to people in the event of a fall.
HOW TO STORE CUTTING TOOLS
Cutting Tools used in the garden, such as garden shears, garden knives, loppers, and garden saws, also need to be maintained before winterizing. First, all cutting parts of the tools should be cleaned to remove any dirt, wood debris, and plant sap that has accumulated on them. All these substances not only spoil the appearance of the tools but also damage them very quickly (after just one winter of improper storage).
Various plant sap and everything else can be removed from any cutting tool extremely easily with steel fibers that have been heavily dampened in ethanol. After such cleaning, you can go ahead and check the sharpness of the cutting tool, and if it is dull, be sure to sharpen it.
Sharpening of cutting tools is best entrusted to professionals. It will cost several hundred rubles, but the master will do everything correctly, you will not hurt yourself, and the tool will faithfully serve throughout the next season until the next sharpening. The workshop not only grinds cutting parts but also checks for defects that you may not have noticed – chips, dents, cracks, etc.
After you have sharpened your own tools or had them sharpened by a master, all cutting parts should be oiled and/or wrapped in greaseproof paper. Cutting attachments should preferably be hung in the air and not touch other surfaces, especially metal surfaces.
MOWER STORAGE
Lucky owners of lawnmowers don’t even know that they have to clean this complicated tool – also part of the lawn care equipment line – after each mowing. Sometimes mowers are not designed to be cleaned, but every mower model should be prepared for winter.
The first thing to do is disconnect it from the power source, drain all gasoline, and unscrew and dry the spark plug. Before working with the mower, it is necessary to fix it as much as possible so that during the cleaning process it is not possible to work cutting parts and hurt you. Next, the mower must be completely cleaned of grass, even small grass clippings, which can dry out or rot inside and in some cases even cause the failure of individual components of the mower.
In order to clean the whole mower, it is not enough to turn it over and clean all the visible parts, it is better to remove the housing, which is held in place by a few screws and is sometimes very easy to remove. It is better not to remove the grass from the mower by hand, but with a fairly flexible brush, but not iron, but better plastic.
It is recommended to clean all the cutting parts of the mower with alcohol, then after letting it evaporate, lubricate it with oil and if possible, wrap it with greaseproof paper.
Regarding the blades of the mower, you can also ask for professional help to carefully remove the blades beforehand, sharpen them by a master and then reinstall them very carefully.
The final work on the mower is to replace all existing air filters and engine oil, as well as to check the continuity of the electrical wiring (if the mower uses electricity): if it is bare, either replace it (better and safer, but more expensive) or insulate it with insulating tape (more unsafe, but cheaper).
UNICYCLES AND TROLLEYS
Unicycles and wheelbarrows facilitate our work throughout the spring, summer, and fall and should not be neglected. First of all, if unicycles and trolleys are inflatable, their wheels should be removed and stacked horizontally. The body of the trolley and cart, then it is necessary to thoroughly clean the dirt and other debris accumulated in it, rinse, dry, and lubricate a layer of machine oil.
It is necessary to pay attention to all moving parts of the trolley, and if there are rolling bearings, in case of their spillage, to replace them with new ones, and if everything is in order, to apply a thick coating of hardener. When storing trolleys outdoors (which is not uncommon), they should always be placed upside down: this way no water will accumulate in the body and no rust will develop.
WATERING FACILITIES
All watering installations can be damaged by frosts or even 35-37°F (2-3°C). The water in the irrigation system must be released by blowing, preferably done with a pump (as efficiently as possible).
Then, once the water supply to the room is stopped, all watering taps must be opened to avoid frost. Once the taps are opened, it is best to wrap them in ordinary food film to prevent dirt and snow from entering and to secure them (rubber bands for money, tape, or duct tape).
If possible, clean the irrigation system with a special compound to get rid of the seasonal accumulation of dirt or limescale.
Transfer to the hose. Overwintering in the snow is the worst thing that can be thought of for such a seemingly pristine part of an irrigation system. It’s best to twist the hose into a coil and secure it with a cable tie. During the twisting process, the excess water will come out of the hose on its own. Next, it should be brought into any room and placed horizontally on a flat surface (do not hang, the hose will deform considerably).
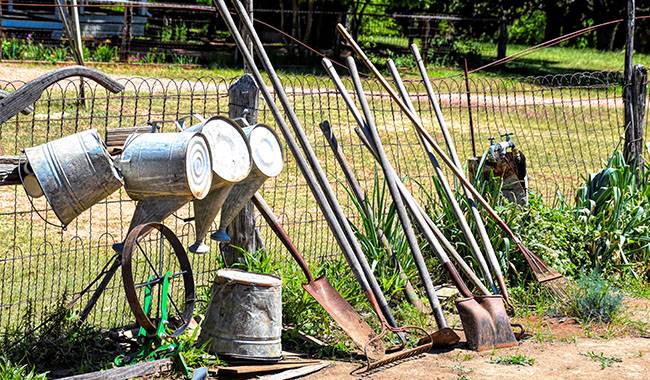
Finally, see what remains in your area? Usually one or a few water spouts, a few buckets, or barrels. It is unlikely that there will be enough room in the shed or garage to accommodate them. Of course, if there is plenty of room, you can leave the buckets, watering cans, and barrels thereafter they have been washed of dirt and dried in broad daylight.
If there isn’t enough room, you can just turn them over and put them outside so that neither snow nor rain gets into the barrels or buckets and they don’t get thawed out during the spring temperature changes.
TIPS
Don’t keep all those metal tools that have fallen into disrepair for one reason or another: over time, they will all become a mass of junk that you will haul from place to place and never use again. It would be better to scrap it and at least get some money out of it, or simply throw it away.
That’s the end of getting your gardening tools ready for winter.

