Vegetable growers can hardly wait to start Plant seedlings after the New Year holidays. Tired of frosts, winter, and exuberant fun with subsequent cleaning, people want to usher in spring quickly.
The first stage – buying all the necessary things – goes “happily”, while the further stages with sowing often start to slip away. Most often – because there is no time at the right time. Work, family, children, household chores, and many other quite objective reasons.
Therefore, I want to simplify the process of planting seedlings. And to organize it so that it takes less time and the result will not be worse. On the choice of cohabiting busy people with seedlings, tested in our house and told us in the article.
PREPARATION
This variant came up quite spontaneously: at the beginning of the sowing season, at the beginning of February, I had to leave urgently. So it was not possible to do the regular sowing in time. This on the one hand, but on the other hand, there were a lot of bought seeds and the desire to grow exclusive plants. And did not want to postpone all this for a whole year.
In order to prepare, it was necessary to allocate a day off. We brought the soil into the house three days before planting and warmed it up. We used our own soil because our seedlings developed less well in the purchased soil.
These activities took place in Komsomolsk, Amur, where the soil was collected in the fall and stored on the outdoor terrace. The temperature there was below -22°F (-30°C) for two months – enough time for the soil to freeze well.
On the eve of the weekend, in the evening, I turned over all the seeds I had decided to sow and put them aside. I didn’t put only cucumbers, squash, watermelons, and melons because I planned to be at home by the time they were sown.
I counted how many peat pellets I needed to sow the small seeds, how many boxes I needed to sow the flower buds, and how many containers I needed to sow the vegetables. It got scary, but there was no way around it. I spent an evening making plastic labels.
I always make drainage for all the containers, which makes me feel safer. The drainage material is a mixture that collects all winter long. It’s different every time. It includes chopped onion and garlic shells, nutshells (from walnuts to pine nuts), seed shells (sunflower seeds and pumpkin), and peanut pods.
Generally, it was clear at once what we had nibbled on during the winter. (This time I also found a stonecrop – some seedlings were contained in it, so it was still there.) Put it in the same place. The container with the seedlings was filled with a third of this mixture, and the rest soil.
SOWING SEEDS
Tomatoes, peppers, eggplants, sow 2 seeds per cup, slightly watered with warm water, poke labels. I put the cups in plastic fruit boxes, covered with aluminum foil, and wrote numbers on the boxes with a marker.
Large onions and large annual seeds were sown in rows in shallow plastic containers. I inserted the containers one by one and used an awl to make drainage holes on the inside of the containers. I labeled and numbered the containers.
Some of the flower seedlings planted in boxes also had each tray labeled and numbered. All the seedlings were watered with warm water, a little.
Small seeds of strawberries, celery, petunias, primroses, sweet cigarettes, etc. – It is a headache because they need careful care. With all the responsibility of my husband, who has been “in charge of the sprouts”, this little thing is a bit unsettling. I decided to put the little peat pellets in a plastic egg container, and these fit nicely after soaking.
The container was handy because it was closed, but not tight, i.e. tiny sprouts, like in a greenhouse, but in an aerated one. In the dry air of a heated apartment, they should not dry out, and too humid will not. Pour water into the cells and water them easily – without worrying about hurting the seedling-wire.
Swell in hot water, cool the peat pellets in the cells, sow 3 barely visible seeds there, lay them on top, and press the toothpicks slightly. I also numbered all the containers.
HARDENING
I listed the number of boxes, trays, and containers, in which box, when and how many seeds were sown. This is for me. I made a calendar for my husband – which boxes and containers to put in when (by number), where to put them, which days to water, which days to turn the boxes and containers. Then solve the ongoing problems over the phone.
All the potential seedlings were taken out and put on the cold porch. Outside, we picked up loose snow in buckets and spread it evenly on the surface of the soil and peat particles. We covered everything with aluminum foil and mulching material to equalize the temperature.
In the morning in February, the temperature in the room dropped to 68°F (20°C) and heated to 41°F (5°C) in the afternoon on a sunny day. Turns out, both storage and hardening.
Then, my husband worked on a calendar schedule and the experiment was successful. Subsequently, we have been using this method regularly. By the way, after such “hardening”, the germination rate is very good.
HOW DO YOU GET A FEW FROM A TOMATO?

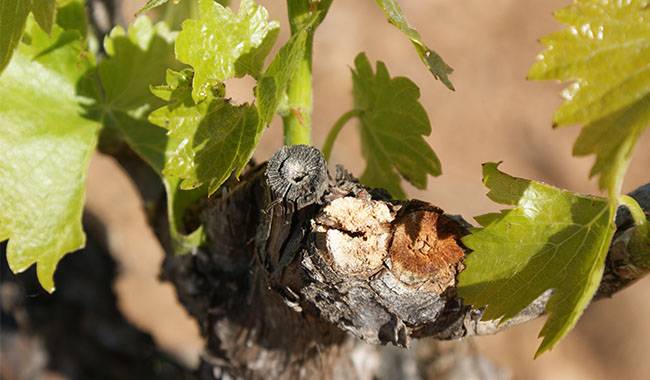
A large number of discoveries have been made by chance. And seedling technology is no exception. Broken tomato shoots, watered with tears and placed in water, produce good roots and become new strong plants, bypassing the traumatic and disease-prone stages of cotyledon and early development.
Moreover, the deeper the broken stem is immersed in water, then the more firmly the plant sits in the soil and gains a larger feeding area.
This has proven to be a convenient way of doing things and has become popular on farms. Planting several plants of different varieties upfront helps to ease the sowing itch somewhat and slightly lessens the burden on the host. Tomatoes with strongly elongated root systems in warm habitats and low light conditions can acquire root crowns with strong “anchor” roots. Removing the top roots stimulates the growth of stems and these are still new plants.
From the high-growing tomato varieties planted in early February, “pull” 3-4 stems, plus the rooted canopy, plus the mother plant itself. And we don’t need more than 5-6 plants of a variety.
This option clearly saves space on the windowsill, because the “plucking” and rooting is done in late March, and the planting of rooted cuttings – in April. From the end of April, seedlings have lived on the balcony, which is oriented to the southwest.
Only sometimes, when it gets cold, we bring them home or insulate them with shelter material.
EXPERIMENT WITH TOMATOES
Another option, which also formed by chance: in a pot with tomatoes sprouting from happy trees in January. I added some garden soil to the houseplants, and then it occurred to me that the soil was a bed of very sweet little fresh orange tomatoes growing in it.
They were grown from a “sweet date” mix, but apparently not related to “dates” because they were round in shape. I didn’t bother collecting the seeds. In general, I kept 3 tomato plants in pots and let them grow.
The lack of light in winter certainly stretched the tomatoes considerably, even on the south windowsill. The crown pulling led to the rampant formation of stepchildren. I had to build support and tie it all up.
In this case, the magpies were apparently unaffected, sitting on green foliage surrounded by vigorously growing tomatoes. by the end of May, by the time the seeds were planted, the tomatoes were over 40inch (1m) tall, dangling like ampersands from the cylindrical supports.
Meanwhile, one stepchild remained on each plant, and the rest were removed. The leaves were also removed beforehand, leaving only the tops of the stems and the stepchildren. By the way, I did not let them bloom and cut off the resulting flower brushes so that they would not be distracted.
From the pots, I transferred the whole pile of tomatoes to the pit, and for each tomato stem, I dug horizontal trenches with hippopotamus rays and buried the stems there, leaving the center tips and stems and leaves outside.
A total of six tomato plants, with hippocampus stars in the center, bore fruit. Throughout the summer, they were plump with sweet orange balls, and in the fall, released, they became fat in the hippopotamus-rich soil I brought home.
“Horizontal line” planting, according to my observation, yields increase significantly in the second half of the summer, when you start working at full strength from the buds sprouting from the stem roots.
If the stems of tomatoes are placed in parallel trenches at a distance of 8inch (20cm) by “heads” in different directions, the use of land is more efficient. In this case, the entire bed is penetrated by the roots, and the plants receive much more nutrients and, accordingly, higher yields.
As a result of these experiments, a natural method of symbiosis has developed: tall tomatoes are planted early, initially hardened, pulled up, and rooted, and the remaining long stems are planted “horizontally”. Very space-saving and seed-saving.
The planting season has started and it’s time to experiment!