How to plant canna: Growing and caring? If making yourself happy with bright colors or mixing pink power tops with blue-green tops is your style, then these plants are right up your alley.
canna lilies are big and bold, with foliage that grows “big” to “huge” and flowers that follow suit.
As warm climate foundation plants, replace fences and pond edges along property boundaries, reflecting in bright waters. Try a few cannas and let your imagination run wild. Don’t be timid.
canna is one of the most colorful summer bulbs – as gorgeous as their tropical American ancestors – with wrinkled spikes that gradually refine into delicate buds.
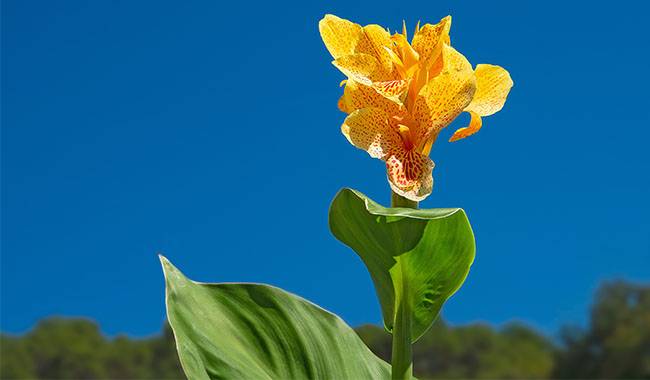
The gorgeous canna has huge, often veined, paddle-shaped leaves and green or bronze sheathing stalks, as well as showy flowers towering above the stems. With their huge reed stems and palm fronds, they will be magnificent even if they never bloom.
But from late spring or early summer until frost, they keep pumping out colorful flowers. When most flowers can’t tolerate the heat of late July and early August, cannas will flourish.
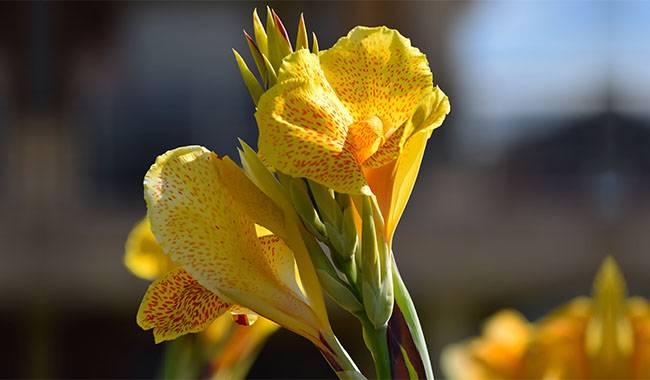
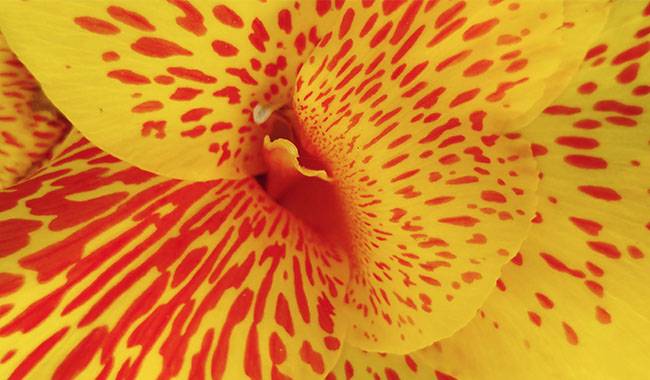
Their flowers come in many bright colors – red, orange, yellow, and pink – and their foliage also offers choices – green, bronze, and ombré.
Although not true lilies, canna lilies are a rainbow of colors that can add dramatic color to your garden. With a wide variety of flower and foliage colors, there is sure to be a canna that will add sparkle to your garden.
While a variety of canna flowers are shown, in others it is the huge tropical leaves, and in many modern varieties, it is both. canna leaves are usually large and wide, with a heavily ribbed center.
They can be various shades of green, burgundy, and red, often with white or yellow spots or streaks of color along the veins of the leaves. Depending on the variety, canna can grow from 16 inches (40.64cm) to 10 feet (304.8cm) in height.
WHEN TO PLANT CANNAS
Plant outdoors in late spring or early summer. Soil temperature must be 60°F (15°C) or warmer. If you have a shorter gardening season, start cannas indoors or in pots in a greenhouse.
Some people ask how to determine soil temperature. Check national extension sites online to post this information for your state. Or, dig a small hole 2 inches (5.08 cm) deep and insert an old-fashioned mercury thermometer into the soil.
Cannas grown in USDA hardiness zones 8 and higher (where winters are not particularly harsh) can remain in the ground all winter.
In zones 6 and colder, you will need to dig up your cannas in late fall if you want to plant them again next year.
In zone 7, it’s a bit of a toss-up: add a layer of straw or leaf mulch to protect your cannas, or dig them up for safety. See the USDA zone map.
CHOOSING AND PREPARING PLANTING SITES
As exotic tropical creatures, cannas flowers need lots of sun and rich, moist soil – but you don’t have to coddle them.
A sunny location is best, although cannas flowers can tolerate partial shade as well. Choose a spot that gets at least four hours of direct sunlight. Early morning or afternoon sun is ideal.
Before planting, loosen the soil to a depth of 12-15 inches (30.48-38.1cm) and mix in a 2-4 inch (5.08-10.16cm) layer of compost.
HOW TO GROW CANNAS

Turn-of-the-century gardeners were so fond of cannas that they grew them from seed, but it wasn’t easy; it was best to leave the propagation to the experts and plant cannas rhizomes.
Cannas are often called “bulbs,” although they are not really bulbs; cannas propagate beneath the soil from a fat stem extension called a “rhizome.
If you are growing from seeds, be aware that germination rates are low and that the seeds need to be filed or given an acid bath to break their hard coats.
Dig a hole 2 to 3 inches deep and place the rhizome in the hole with the eyes facing up. (If you happen to plant with the eyes facing one way or down, don’t worry!
New growth will easily find its way to the sun.) Cover the rhizome with 1-2 inches (2.54-5.08cm) of soil. Firmly tamp it down. Water thoroughly. Space the rhizomes 1-4 feet (30.48-121.92cm) apart.
Cannas germinate slowly and do not need much water until you start to see signs of growth. Sometimes, cannas can take up to three weeks to germinate.
Once germinated, water cannas at least once a week, slowly soaking the area around the roots. During the hottest weeks of summer, give the plants good soaking every other day.
GROWING CANNAS OUTDOORS
Cannas can be grown almost anywhere, as a perennial in the south and a summer flowering plant in the north, and its bulbs can be easily picked and stored.
Choose a sunny spot in your garden. Although considered a tropical plant, cannas flowers actually do well in more moderate climates, with at least six hours of sun per day in the summer.
cannas stems should be planted in a location with well-drained soil. Unlike most bulbs, cannas flowers will thrive in moist soil, but will not tolerate standing in puddles.
For outdoor planting, dig holes 4-6 inches (10.16-15.24cm) deep, spacing them 2 feet (60.96cm) apart for taller varieties and 1 foot (30.48cm) apart for other smaller varieties.
Then dig a little peat moss and perlite.
STEPS TO GROW CANNAS OUTDOORS
- Find a location with well-drained soil. If there are still puddles after 5-6 hours of heavy rain, scout for another location. Or add organic matter to the soil to raise the level 2 – 3 inches (5.08-7.62cm) to improve drainage. Peat moss, compost, ground bark, or decaying manure all work well and are versatile. For many plants, cannas are highly nourishing in the soil, but cannot survive in wet conditions.
- Place your cannas in an area with full sun for the best leaf color and a maximum number of flowers.
- Dig out the holes and plant the rhizomes 4-6 inches (121.92-182.88cm) deep and 2 feet (60.96cm) apart for taller varieties and 1 foot (30.48cm) apart for the medium to dwarf types. Place the rootstock with the eye or growing point facing upward.
- After planting, water your cannas to allow the soil around the rhizomes to settle. Roots and shoots will form within a few weeks, depending on soil and air temperatures. If the temperature in your area is still cool, wait until the temperature warms up before planting. Or put indoor tubers in a pot for early flowering. cannas need heat to get them going.
- Water your cannas enough to slightly moisten the soil, but not enough to soak the soil.
- When in full bloom, feel free to chop up the cannas lily bouquet. Some gardeners plant only dark or striped flowers on the foliage and then cut off all the flowers. If you prefer this method, go for it. If you prune in this way, these plants will be fine.
- Leave the foliage in place after that season’s blooms are over and do not cut them back. The leaves gather sunlight and provide nutrients for next year’s show. Add water as needed. Leaves may be removed when they turn yellow. (In colder areas, to save next year’s canna rhizomes, simply dig them up after the first frost. Allow the rhizomes to dry naturally for a few days. Then store them in a cool place, in a paper bag or box with peat moss. (It doesn’t always work, as maintaining the temperature and moisture levels of the rhizomes and storage medium must be quite precise to please these tropical plants and is worth a try if you are an adventurous gardener.)
- Your cannas will rest for a few months before starting their next growth cycle in the spring.
PLANTING CANNAS INDOORS
For planting in pots, fill the top of a large pot with 6 inches (15.24cm) inside with a well-drained potting mix to which you have added a bit of peat moss and perlite.
Place a bulb into each hole. Technically, cannas bulbs do not have a top or bottom. Plant the bulbs or rhizomes horizontally, with the eyes facing up.
If you have larger pots, you can plant 2 or 3 cannas bulbs in each pot. Backfill your pot or hole with additional soil until the bulbs and roots are well covered.
Gently pat the soil around the base. Water your new plant and expect it to start sending out new leaves and to bloom when the weather is warm.
STEPS TO GROW CANNAS INDOORS
- Fill the container with good quality, well-drained soil. Almost any commercially available potting medium will work fine. Make sure there are adequate drainage holes. cannas should not be left in waterlogged soil for long periods of time or risk rotting. Keep in mind the mature size of the variety you have chosen and plan your container size accordingly.
- Feel free to mix cannas with other plants in the same container. Just remember that all of them must have the same light and water needs.
- Dig holes and plant rhizomes 4-6 inches (121.92-182.88cm) deep and 1.5 feet (45.72cm) tall for varieties, or 1 foot (30.48cm) apart for the medium to dwarf types. Place the rhizomes with the eyes, or growing points, facing upward.
- After planting, water heavily to settle the soil around the rhizome. Roots and shoots will form in a few weeks, depending on soil and air temperatures. If the temperature is still cool in your area, wait until it warms up before planting. Or start your tubers indoors to get a head start on planting before the season. Cannabis needs heat to make it grow.
- Water enough to keep the soil slightly moist, but not too wet.
- When in bloom, feel free to cut cannas lilies for bouquets. Some gardeners grow varieties with dark or striped leaves and cut off all the flowers just for the foliage. If you like this method, go ahead and do it. The plant will do well if it is pruned this way.
- After the season’s blooms are over, leave the leaves in place and don’t cut them off. The leaves will collect sunlight and provide nutrients for next year’s flower show. Water as needed. When the leaves turn yellow, remove them. (In colder areas, to save cannas until next year, bring the pot indoors before the first frost. Allow the soil to dry out and place the container in a cool but non-freezing place for the winter. While this method doesn’t always work, as maintaining temperature and humidity levels in the rhizomes and storage medium must be fairly accurate, please these tropical plants, if you are an adventurous gardener with an unused corner in your attached garage, it is worth a try.
- Your cannas will rest for a few months before starting their next growth cycle in the spring.
HOW TO CARE FOR CANNAS

Fertilization
Cannas is not fussy when it comes to fertilization. cannas bloom easily all summer without much effort.
But for those who want to give their plants an extra boost, apply 5-10-5 or 10-10-10 in the spring and twice more during the growing season if you wish.
Fish emulsion fertilizer has a higher nitrogen content, but it is an excellent organic alternative to fertilizing your cannas. Higher nitrogen fertilizers tend to increase the average height of cannas growth.
Watering
With their large number of succulent leaves, mermaids are best provided with plenty of water, so water your plants in the summer if you receive less than 1 inch of rainfall per week.
Water liberally and keep dry. Keep a thin layer of mulch around the cannas to help retain moisture.
Temperature
Warm weather at 59ºF (15°C) will develop full leaf color.
Varieties
If desired, choose a tall variety. As the flowers fade, hairlessness promotes continued flowering.
Pruning
After you have killed the flower stems a few times and they no longer bloom, cut off the stems and any attached leaves, as this helps the nearby cannas to get more light and bloom on their own. (If you wish, simply cut the stems back to the branches and leaves and keep them going until the first frost.)
FALL CARE
- You can remove the stems and leaves after the first fall frost kills the foliage. Please refer to your local frost dates.
- Cut the plant back to 4 inches in late fall to prepare it for next summer’s display.
- In the deep American South, let the cannas grow and do not move them until the clumps of cannas grow very matted. Every 3 to 4 winters, dig up the clumps, separate the roots and plant them in fertile soil.
- In cold climates (zone 6 and colder), dig up the rhizomes before the first hard freeze of 28ºF (-2.2°C) occurs.
PESTS AND DISEASES
- cannas are not susceptible to disease. Rust, fungal leaf spot, and bacterial wilt may occur when cannas flowers are too wet and crowded.
- cannas rarely have problems with pests, but caterpillars can nibble on the leaves. Slugs, snails, spider mites, and caterpillars are the most common culprits.
- Bean yellows and tomato spotted wilt virus can occur.
It is worth noting that since some cannas have large, soft leaves, it is best to place the plant in a sheltered area so that it is less susceptible to damage.
TIPS
For those of you in northern states with short growing seasons to colder regions, start cannas indoors or in a greenhouse. Move the cannas outside and plant them in the ground when the soil temperature reaches 60 degrees.