How to grow watermelon from seed? I believe that most of you have grown watermelon seedlings, but it is relatively difficult to grow watermelon from seeds.
Probably you rarely meet people who do not like watermelon. However, not everyone can grow their favorite fruits and vegetables. This is the main reason why people want to know how to grow watermelon at home.
Not everyone knows it, but you can grow watermelons without using seedlings, but immediately in a permanent place. Usually, seedlings are used so that the plants can be transplanted to the greenhouse later.
The watermelon plant (lat. Citrullus lanatus) is an annual herb that is a species of watermelon in the pumpkin family.
Watermelon is a culture of melons. The homeland of watermelon is Southern Africa – Botswana, Lesotho, Namibia, South Africa.
Similar species related to watermelon are still found here and are considered the ancestors of the cultivated watermelon.
This culture originated in ancient Egypt in the 20th century BC: watermelon seeds were found in the tomb of Tutankhamun.
Evidence that watermelon was known to the ancient Romans can be found in the scriptures of Virgil, who ate it fresh and pickled it and also cooked honey from it.
The watermelon fruit was also produced in China, where it was called “Western melon”, while the Arabs used it to cleanse their bodies before meals.
The Crusaders brought watermelon to Europe, and on the territory of modern Russia, it appeared in the thirteenth and fourteenth centuries AD.
Today, China has become the champion of watermelon cultivation, followed by Turkey, Iran, Egypt, the United States, Uzbekistan, and Russia.
Watermelon grows best in climates with long, dry, hot summers and short, cold winters.
SOWING WATERMELON SEEDS
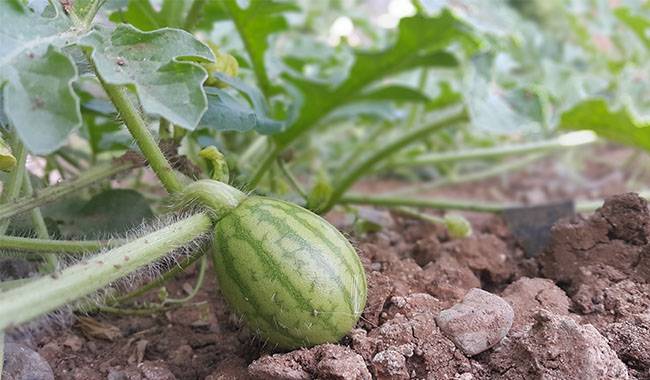
Sowing watermelon seeds in the wild, sowing seeds, sowing methods. In warm areas, seeds can be sown directly into the soil, prepared, and heated to 12-14ºC (53.6-57.2°F) beforehand.
Before sowing, place the seeds in a vial of hot water at a temperature of 50ºC (122°F) until germination. One tablespoon of ash, one teaspoon of ammunition, and one kilogram of humus are placed in holes about 8 cm (3.14inch) deep, 1 meter apart from each other, and the additives are mixed thoroughly with the soil.
Then 2 liters of water were poured into the holes and waited for its absorption. Two to three seeds were placed flat in the holes at a certain distance from each other, covered with soil, and trampled. After sowing, the garden is not watered.
The first shoots may appear in a week or so. If the seeds are sown in cold soil, the seedlings will have to wait longer or they may die completely.
To prevent this, sow your seeds in the ground before the third decade of May. Thin out the seedlings at the 3-4 true leaf development stage, i.e., remove the weak seedlings by cutting them off above the garden surface.
CONTAINER AND SOIL
Before sowing watermelon seeds, be sure to choose the correct container. Watermelon seedlings do not tolerate transplanting well, so you will need to plant each seed immediately in a separate container.
If it is a peat pot, all the better – then you can plant the seedlings without removing them. If you do not have a peat cup, prepare any container with a capacity of more than 250 ml and a height of more than 10 cm (3.93inch).
Prepare soil for seedlings by mixing fertile soil, humus, peat, and sand in equal proportions. A few days before planting, sprinkle the prepared soil with a solution of potassium permanganate. After that, use a medication that facilitates the growth of microorganisms.
If you plan to sow a small number of seeds, it may be easier to buy a small bag of seedling soil. It does not need preliminary disinfection.
PLANTING WATERMELON SEEDLINGS
In areas with short summers, it is best to plant a watermelon on seedlings. Planting of watermelon seedlings begins in May by sowing the seeds in individual containers of at least 0.3 liters to avoid intermediate transplanting or picking that pumpkin seeds can hardly tolerate.
Plant watermelons for seedlings in soil that is equally distributed between peat, sod, and sand. For five liters of this soil mixture, you will need to add 50 grams of potassium sulfate, ammonium nitrate, and dolomite powder, and 100 grams of calcium double superphosphate.
A few days before planting the watermelon, the seeds are heated in water at 55ºC (131°F) for half an hour and then germinated in wet sand at 25ºC (77°F).
Only after the seeds have fine shoots, sow them in 2-3 pieces in individual pots on the surface of the soil mixture described earlier, sprinkle sand on top, cover the cups with foil or glass, and transfer them to a warm place at a temperature of not less than 30ºC (86°F).
When new shoots appear within a week, remove the film and lower the temperature to 16-18ºC (60.8-64.4°F) for 9 days.
Caring for watermelon seedlings requires feeding, watering, and arranging for additional artificial lighting if necessary, as watermelons need 12 hours of daylight. Water in several steps to absorb water, but be careful not to leave water on the leaves of the seedlings.
Feed the seedlings at the developmental stage of 3 true leaves with a solution of mineral fertilizer complex or liquid hair protein.
GROWING WATERMELONS IN OPEN SPACES

When to plant watermelon in the ground
When to plant watermelon seedlings in the garden? Plant watermelons in the ground four weeks after sowing seeds at the stage of development of the fifth or sixth true leaf, i.e. in late May or early June.
Choose for watermelons an area in the south or southeast that is not exposed to wind, well-lit and well-lit, where they are to be grown in perennial grasses (alfalfa, clover, Saponaria), winter wheat, cabbage, onions, or annual legumes.
It is not recommended to plant watermelons after plants of the genus Solanum (potatoes, tomatoes, eggplants, peppers) and pumpkins (squash, pumpkins, pumpkins, and watermelons). After harvesting watermelons, pumpkin seeds can be planted in the area only after 6-8 years.
Soil
The best soil for watermelon is sandy or sandy loam with a pH of 6.5-7. The preparation of the site is carried out in the fall: for the excavation, 4-5 kg of rotten manure per square meter is introduced, as well as 40-45 g of calcium superphosphate, 15-25 g of potash, and 24 kg of 35 g of ammonium sulfate for the same unit area.
In heavy soils, one or two buckets of sand per square meter are added. Fresh fertilizer is not used for soil fertilization.
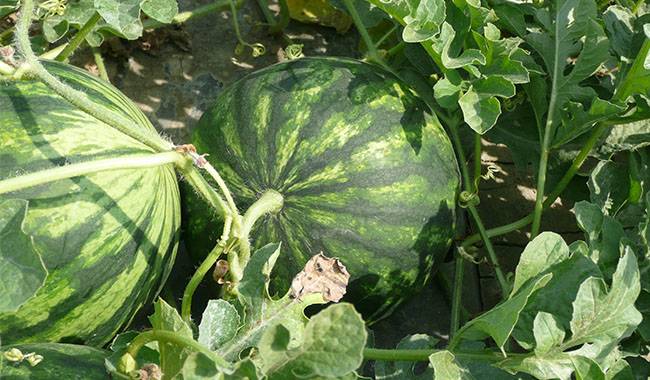
How to grow watermelons in open spaces
Form checkerboard-shaped holes in the garden bed at a distance of 1-1.5m (3.28-4.92foot), keeping the rows 2m (6.56foot) wide, and pour 1.5-2 liters of water into each hole.
Seedlings were buried in the holes with cotyledons and the soil was tamped down after sowing, and then sand with a radius of 10 cm (3.93inch) was spread on the surface of the area around the seedlings to prevent root rot.
Water the seedlings with warm water and protect them from direct sunlight until the leaves of the seedlings regain their vigor.
Growing watermelons in a greenhouse
Grow watermelons in greenhouses in areas with cold, short summers, where the growing season sometimes lasts about 150 days, and in northern areas where there are far fewer really warm days.
To speed up the process, first, grow watermelon seedlings at home and then plant them in a garden bed in a greenhouse under a double film cover. You already know how to plant watermelon seedlings.
You need to start planting it in the third decade of April and start growing watermelons in the greenhouse only when the soil temperature in the greenhouse rises to 12-14ºC (53.6-57.2°F).
The soil in the bed is prepared in advance: a week before planting, a layer of soil is removed from the bed deep in the spade bayonet, hay of humus is spread in the rotting trenches, and nitrogen is sprinkled.
The top is sprinkled with fertilizer and watered with hot water. The removed soil layer is placed on a hay pillow and the bed is covered with a black mulching material that can be removed before planting.
Seedlings are planted in holes arranged in rows at a distance of 70 cm (27.5inch) to a depth of 10 cm (3.93inch). As the vines develop, they will be tied to a pre-fixed grid.
For proper fruiting, you need to let a few bees into the greenhouse.
However, since the male flowers only survive for a few hours, there is no need to risk future harvests by doing the pollination work yourself: pick a few male flowers, carefully remove the petals from them and apply their anthers to the stigmas of the female flowers. Hopefully, each female flower will be pollinated by several males.
You need to hand-pollinate in the morning when the temperature in the greenhouse will be 18-20ºC (64.4-68°F). It is very important that the nighttime temperature on the eve of this important event should be at least 12ºC (53.6°F).
To accelerate the growth of the vine, pinch it so that there are no more than 3-5 leaves above the fruit and remove weak shoots completely. No more than 5 ovaries on each bush and remove the rest.
For the first time, apply watermelon fertilizer in a groove dug 20 cm (7.87inch) from the bush, when the vines reach 25-50 cm (9.84-19.6inch) long when it is advisable to add mullein solution (1:10) or liquid fermented chicken manure (1:20) to the plants.
A second trimming was done before the start of the emergence process and a third trimming was done after oviposition formation, but both times grooves were already made at 40 cm (15.7inch) from the bush.
Like the first time, watermelons were fed with gross protein or liquid chicken manure, since organic matter is the best fertilizer for watermelons.
TAKING CARE OF WATERMELON

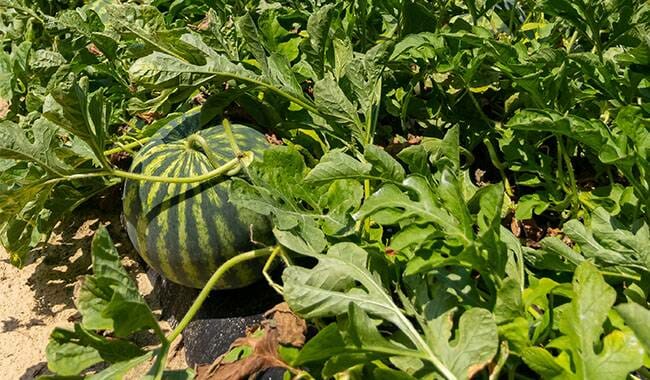
Sunlight
Watermelon is a southern culture that needs a lot of light. During plant darkening (due to thickening of fields, weeds increasing fields, or in case of prolonged cloudy weather) the development of germination and inverted fruit becomes poor compared to sufficient light.
It is especially important to provide good lighting during the 4-5 stage of true leaves and during the fruiting period. The fruits of plants that do not receive enough light ripen later. They are smaller and sweeter.
Temperature
Watermelons are loving and heat-tolerant plants. The optimum ripening temperature is 25-30°C (77-86°F).
When sowing seeds in open ground, the soil temperature at the base of the seedlings should be no lower than 12°C (53.6°F), but good seed germination can be observed at 15°C (53.6°F).
Lower temperatures result in weaker root development and poor harvests. In addition, such temperature conditions (especially freezing conditions) usually contribute to the development of blight.
At the time of seeding, the temperature should be 23-27°C (73.4-80.6°F) from the time of sowing to the emergence of hepatica above the soil. At the same time, friendly and fair results were obtained.
Then the temperature drops to 18-22°C (64.4-71.6°F). Before planting, it is very important to perform hardening: three days before planting plants in permanent locations, the same temperature as on the street should be maintained, only at night, with low temperatures or at least 10°C (50°F) or not at all.
At high humidity (for example, under a film cover), young watermelon plants can withstand large temperature fluctuations from 2-50°C (35.6-122°F) in a short period of time. However, long-term effects of temperatures below 5-7°C (41-44.6°F) can lead to quality losses.
In order to bind the fruit well during the flowering period, the temperature should be 18-20°C (64.4-68°F).
Soil
Sand or sandy loam soil with a pH of 6.5-7.0. Watermelon prefers sandy, well-aerated soils.
On dense soils, qualitative preparation plays an important role in increasing crop yield, which includes mandatory deep clods. It is necessary to avoid clay, clogged, and poorly heated areas.
Watermelon is moderately sensitive to salinity. Figure 1 shows the average crop yield according to soil salinity. In order to develop an appropriate nutrient system and to initially identify soil-related problems, soil analysis in a good laboratory is recommended.
Watering
Watermelon is a drought-tolerant plant. The uniqueness of the watermelon root system is its strong absorptive capacity, which is able to use water with a moisture content of 6 %. The absorptive power at this point reaches 10 atmospheres.
The main root penetrates the soil over 1 m. It forms a strong root system around it, covering 7-10 m3 of soil at a depth of 15 to 30 cm (5.9-11.8inch).
Despite its drought resistance, watermelon is known for its high water consumption. In order to obtain 5 kg of fruit per 1 m2, 160 liters of available water are required per 1 m2 of watermelon.
The consumption of watermelon in soil water depends on the stage of cultural development. The greatest amount of water is needed during flowering and fruit formation.
Fertilization
After 2 weeks of planting in the ground, fertilize the seedlings with a solution of ammonium nitrate (20 g per 10 liters), spending 2 liters per bush. You can replace nitrate with a solution of wool protein (1:10) or chicken manure (1:20) by adding 30 g of calcium superphosphate and 15 g of potassium chloride to the bucket.
Make another fertilization at the budding stage: one plant should contain 6 g of calcium superphosphate, 4 g of ammonium nitrate, and an equal amount of calcium chloride.
How to fertilize watermelon outdoors?
For the first time, it is best to apply ammonium nitrate by dissolving 20 g of fertilizer in a bucket of water, using 2 liters of solution per bush.
By adding 30 g of calcium superphosphate and 15 g of calcium chloride to the bucket of this solution, a solution of gross protein (1:10) or chicken manure (1:20) can be used instead of nitrate.
The lower shoot fertilizer is applied at the shooting stage and consists of 4 g of calcium chloride, 4 g of ammonium nitrate, and 6 g of calcium superphosphate per plant. The area was watered before and after the application of dry fertilizer.