Gloxinia or sinningia is a close relative of the indoor violet. It is a valuable windowsill decoration: it blooms from early summer to winter without much difficulty, and it can be grown at home for many years. Many people think that gibberellic acid is a rather capricious plant, but this is not the case. It does not have many requirements and is easy to propagate. You will learn how to grow gloxinia flowers at home in the www.thumbgarden.com article.
History of the Gloxinia Plant
As early as the late 18th century, the South American plant Gloxinia, named after the famous naturalist Peter Grohin, captured the hearts of European collectors. Later, Brazilian specimens were thoroughly studied in England, listed as part of the Gesneria family, and officially named Sinningia, after the scientist Wilhelm Sinning. Since then it has been known as Sinningia in scientific circles and Gloxinia among the general public.
Characteristics of Planting Gloxinia (Sinningia)

Gloxinia (Sinningia) is native to Brazil. A natural species, Sinningia speciosa, grows on the sunny slopes of tropical mountains. The soil there is rich in humus and the average temperature is 68 °F (20 °C), but sometimes it reaches 86 °F (30 °C) These places have dry periods – during the winter months. This is what causes the plants to retire by storing water in the tubers.
Gloxinia Species
A. Classification by size – Gloxinia species
- Standard Gloxinia: rosettes of 10-16 inches (25-40.5 cm) in diameter. One of the largest Gloxinia plants is about 24 inches (60 cm) in diameter and has about 100 flowers blooming at the same time! The pots are 4-8 inches (10-20 cm) in diameter.
- Compact Gloxinia: The rosettes are 6-10 inches (15-25 cm) in diameter and can produce up to 50 buds per plant. Pots are 4-6 inches (10-15 cm) in diameter.
- Micro and Microminiature Gloxinia: 2-6 inches (5-15 cm) in diameter (Colorado Sunset). The pots are 2-4 inches (5-10 cm) in diameter.
In the catalog, you may see the definition of “semi-miniature” Gloxinia: this is probably to emphasize the compactness of the rosette by analogy with cyclamen.
B. Classification by color – Gloxinia species
- The colors of Gloxinia are varied: the flowers are white, lavender, red, and purple, with overtones and transitions. Species with mottled multicolored halos or light yellow throats with contrasting borders (commonly known as tiger spots) are particularly beautiful.
- There are “flannel” (one or more colors of mottling), monochromatic and bicolor varieties.
- There are plain (one row of petals, usually 5 to 8) and swollen (more than one row of petals) varieties of flower shape.
Substrates Needed to Grow Gloxinia
The soil should be permeable but also have enough nutrients. The soil should be breathable but also have enough nutrients. It is recommended to add
Calcium superphosphate – 1 teaspoon per 2.6 gals (10 liters) of soil. If the peat is fibrous and light, no loosening agent is needed.
When planting with the wick irrigation method, where the water or nutrient solution in the container rises through the rope, add more looseners to ensure that the roots get enough oxygen.
The Light Needed to Grow Gloxinia
Any side of a window, except south, and a windless location will do. You can tell if the plant is getting proper lighting by looking at it.
- If there is enough light: the plant is compact, with short petioles, leaves that do not extend upward, symmetrical rosettes, and fully open flowers.
- If there is not enough light: the trunk is elongated, the rosette is folded, the leaves are pale and unsaturated, the leaves are thinned, the pedicels are long and pendulous, and the flowers are poorly colored.
- If the light is too strong: light spots appear on the leaves, the leaves are stiff, the rosettes “thicken”, the leaves do not expand, and the flower stems cannot escape from under the leaves. Plants should be shaded with parchment paper attached to glass or blinds.
- Growing Gloxinia on a shelf requires 12-14 hours of light. If the bulbs are new, they will emit brighter light – this must be taken into account. Good results can be achieved by using special light lamps for plants. The distance from the socket to the light should be 8-12 inches (20-30.5 cm).
Humidity and Watering Needed to Grow Gloxinia
A humidity level of at least 20% is recommended. If there is not enough humidity, the rosettes and leaves will lighten, the leaf tips will dry out and the buds will not open and will dry out.
The leaves are pubescent, so they should not be sprayed but dusted under running warm water and excess water removed with paper towels. Do not expose rosettes to light until they are completely dry or direct sunlight will cause water droplets to burn the leaves.
Water the plant after the topsoil has completely dried – in the morning, avoid the leaves, and moisten the soil evenly. It is best not to water at night, as the temperature drops at night, and the roots and tubers are at risk of rotting.
You can water from above, or into the tray, but then the drainage system must direct the water. Synthetic soap is good: it is chemically neutral and conducts water and air; many people use sphagnum moss for drainage.
When planting, synthetic cores 0.1-0.2 inches (0.25-0.5 cm) thick can be placed through small holes in the bottom of the pot to allow water to rise into the soil, which can be better moistened.
Water at room temperature with evaporated water. If fertilizer is applied, the temperature should be much higher so that the nutrients can be better absorbed.
The Required Temperature for Growing Gloxinia

The optimal air temperature is 68-77 °F (20-25 °C). The plant can also tolerate 86 °F (30 °C), but this will cause a lot of stress to the plant and will result in water loss or blackening of the leaves and root rot. If this does happen, as a precaution, a leaf should be uprooted and the condition of the tuber checked: remove it from the pot, free it from the dead roots, replant it, and take care to water it.
The diameter of the pot should not be much larger than the tuber (3-4 times). A pot that is too large will stagnate, leading to poor root development and possible tuber decay. Conversely, a pot that is too small will dry out the soil quickly and slow growth. Plastic ones should be used. Do not plant more than one tuber in the same pot.
Fertilizer Needed to Grow Gloxinia
One and a half months after planting, fertilize the syngas. Mineral fertilizers with high phosphorus and potassium content will promote flowering, while nitrogen and trace elements are needed for active growth. Phosphorus fertilizers should be applied when the plants are already growing and ready to flower, otherwise, their growth will be hindered.
Fertilize every two weeks during the growing and flowering period, alternating between mineral and organic fertilizers. Foliar spraying with tincture of bio-Ulva (according to the instructions) – in the afternoon on the upper and lower surfaces of the leaves when it turns into a cooler. Fertilization with liquid organic fertilizers should be avoided if well-rotted manure is added during planting.
Winter “dormancy” and Winter Storage of Gloxinia Tubers
At the end of November, as sunlight hours decrease, Gloxinia stops flowering and gradually shrivels. After the above-ground parts wilt, dry the tubers at room temperature and store them in a cool, dark place for the winter, but not in the refrigerator. The optimal storage temperature is 50-59 °F (10-15°C); tubers may freeze at lower temperatures and “wake up” at higher temperatures. Tubers can be stored in a zipper-lock bag to save space.
All collectors have different methods of storage: wrapped in cloth, in vermiculite, in coconut substrate, peat, “seramis” pellets, or even in sawdust. Tubers can be kept in pots, but make sure that the soil does not dry out and that they are watered with room temperature water at least once a month, otherwise they will wilt and die.
Check the condition of the tubers twice a month to make sure there is no condensation on the bag. The dormancy period lasts for about 3 months, depending on the storage temperature.
Growing Gloxinia Tubers
When the tuber has germinated – no more than 0.4 inches (1 cm) – it is “awake” and ready to be planted. You can accelerate its development by placing it in a zip-lock bag with a small amount of peat and in a warm, light place. To stimulate its awakening, you can soak the tuber in a solution of a plant growth stimulant before planting.
The tubers are cleaned of dead roots and tissue, and the cuts are treated with activated charcoal and dried. Any bulb dressing can be used before planting.
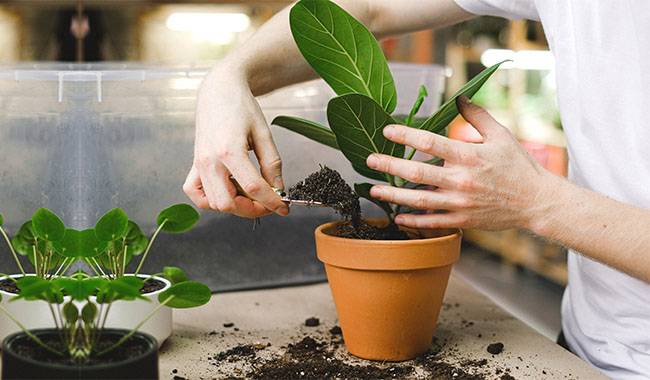
Fill the bottom of the pot with drainage (or synthetic fiber) for about 1/5 of the height of the pot, then fill it with 2/3 of the soil. Place the tuber in the middle so that a small part of it and the shoots protrude from the surface. Later, after germination, the tuber can be completely covered with soil.
Tip: If you store the tubers in dormant pots, you should replace the soil with fresh potting soil.
How to Propagate Gloxinia

A. Dividing Gloxinia tubers
Depending on the size of the tuber and the number of dormant shoots, you can grow about three fully mature plants from a split tuber.
In the spring, use a sharp knife to cut the germinating tubers into pieces so that each tuber has 1 or 2 tough shoots. Cover the cuts with crushed charcoal and dry for 10-15 minutes. Plant the seedlings shallowly so that the shoots are on the outside. This is a risky method – it is best to use the shot separation method.
B. Propagation of Gloxinia by stem cuttings
If Gloxinia wakes up early, the shoots can be cut when the tubers are 1-2 inches (2.5-5 cm) tall and planted into individual pots covered with plastic bags. They can also be rooted in water and planted in the ground after the roots have taken hold. Such plants will bloom profusely in mid-summer.
Valuable cultivars can be propagated by cutting off the top shoots, but it is best to leave a tuber and at least two pairs of leaves in the ground. Root the top shoots in water or directly in the soil. Root the part of the shoot with at least two pairs of leaves, leaving the tops untouched.
C. Propagation of Gloxinia by cuttings of whole leaves or parts of leaves
Leaf cuttings can be rooted in ice-cold boiling water until a tuber is formed or directly in the soil, similar to cactus cuttings. If propagation is carried out in autumn, the planted plugs should not be set aside.
If a gloxinia leaf is so large that it can be divided into two pieces like a leaf cutting, then one gloxinia leaf will produce two or more tubers.
Gloxinia leaf fragments are best planted in peat and perlite-based soil and placed in a greenhouse for rooting. 1.5 to 3 months later, the planted leaf fragments will form “babies” that can be propagated when at least three pairs of leaves have emerged. Some will have tubers by this time, while others will form tubers after planting. Carefully separate the offspring from the leaves to avoid damaging the tubercles, if any. If a gibberellic acid plant does detach from the tuber, it is best to discard it and keep the tuber – it will produce another specimen.
After separating the progeny, the Gloxinia leaves can be allowed to re-root. Leaves usually wilt after 3 to 4 months. Do not leave plants in the greenhouse/package in direct sunlight – they will be cooked!
D. Propagation of Gloxinia by flowering stems
When Gloxinia has wilted, remove the flowering stem and place it in a container of water. after 3 to 5 weeks, it will grow a root system and a small tuber. It is planted in a sterile soil mixture (perlite, perlite + vermiculite, moss) and after a month the leaves of the seedling will emerge from the soil.
E. Propagation of Gloxinia by seeds
Gloxinia seed boxes can self-pollinate only the simple varieties because the terry varieties lack stamens. gloxinia can self-pollinate. This is best done on the morning of the 5th-7th day after the flowers have fully bloomed. If pollinated, the fruit will form and ripen within 2 to 3 months.
Sow mature Gloxinia seeds in a plastic container in moist peat soil, not covered with soil. The seedlings will germinate quickly. Seedlings will germinate fairly quickly and will be picked out when they have grown two pairs of true leaves.
When the Gloxinia flower seedlings are large enough, they can be planted in individual pots about 2-4 inches (5-10 cm) in diameter. Under the right conditions, they will bloom in 3 to 5 months.