
In the early days of my floriculture hobby, I couldn’t pinpoint the cause of death of some plants at the seedling stage. I assumed that the small yellow ripples on the leaves were a sign of some unknown disease and that the spider webs were the result of a spider deciding to take a look at the affected plant.
Today, I am able to identify spider mites in the earliest stages of their infestation. And I have accumulated several effective techniques to help control this dangerous pest. I will tell you about them in this article.
A FEW FACTS ABOUT SPIDER MITES
Spider mites are not true insects but are a type of spider and a close relative of spiders and scorpions. Adults are dark brown, oval in shape, and very small (average length 0.4 mm). Young spider mites look like adults, but they are much smaller.
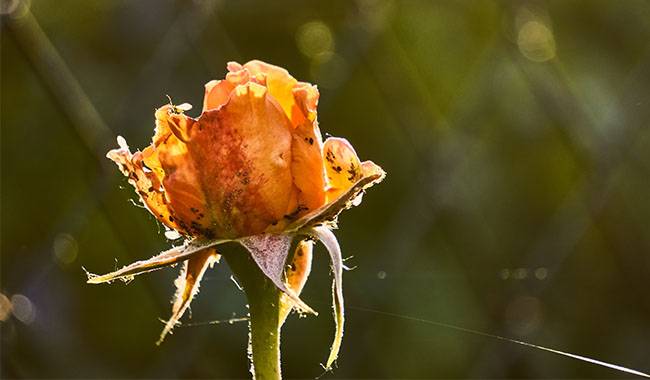
Spider mites live mainly as colonies on the underside of leaves and feed by piercing the leaf tissue and sucking the sap. Feeding marks appear as faint dots on the leaves. As the number of punctures increases, the leaves turn yellow, wilt, and may fall off.
To protect their colonies, spider mites secrete cobwebs with which they cover infested plants. In addition, they travel on the cobwebs with the help of the wind to occupy larger and larger areas.
PREVENTIVE MEASURES
First of all, it is very important to make adequate preparations before the seedling stage starts, which includes the following steps
Treat all houseplants
Treat absolutely all available flowers indoors for spider mites at least two weeks prior to the start of the “seeding” season. This is necessary even if the flowers do not show any signs of spider mite infestation, as the damage may be so slight that they are difficult to see with the naked eye.
However, when spider mites find something tasty such as young shoots, they quickly migrate to the seedlings and begin to multiply rapidly. It is imperative to treat twice, strictly following the instructions of the medication (for more information on what is the best way to control spider mites on plants, continue reading below).
General cleaning of the house
If you plant seedlings in only one room, you can limit the room where the seedlings stand. However, since there were plants on every window during this period, I had to do a general cleaning of the whole apartment.
The importance of these procedures can hardly be overestimated, considering that spider mite eggs can remain on surfaces for a long time. This is especially necessary if spider mites were ravaging the sprouts last season.
First, I took down all the curtains and cleaned them. After that, I start treating the windows: I treat all surfaces with a special flea and spider mite resistant spray and leave them for two hours.
Then I thoroughly cleaned the sills and glass, treating all cracks and cavities in the window frames with special care. Such a procedure not only eliminates spider mites but also improves the light level of the seedlings, as the windows may be dirty in winter. Carpets should also be vacuumed afterward.
Preparing the soil
Even in store-bought soil, spider mites and their nests can be present, so frosting helps to kill live spider mites, but not necessarily nests. Therefore, before sowing, it is best to sprinkle the substrate with a preparation that will not only kill the adult mites but also destroy their egg-laying.
Timely watering
Unfortunately, these procedures are effective only “before the first open window”. After all, when it’s warm enough outside, the little spider mites will start to travel with the wind and will probably land on your seedlings while they are drying out. So you can’t guarantee that your plants are completely safe from spider mites, and you should always be aware of the need to fight this enemy effectively.
The stress caused by lack of moisture makes plants more susceptible to spider mite infestation. Try to make sure that your plants are always watered on time. Take precautions during prolonged hot weather, spray your seedlings with warm water and take good care of them in general.
New plant quarantine
When planting seedlings, don’t forget to quarantine your new “green pets”. The insidious spider mite can even transfer from a bunch of flowers to a seedling. Therefore, every time a new plant appears in your home, whether it is a cutting or a live one, spray the seedling with a solution of essential oils for protection. It has been observed that the smell of rosemary and neem incense is most displeasing to spider mites.
Add 6-8 drops of neem or rosemary oil to 1 liter of water and spray the seedlings with this solution. The unpleasant aroma will scare away the spider mites and it will not dare to migrate. However, this spraying is best avoided when the air temperature is above 90°F (32°C) and the sun is bright. It is best to spray sprouts with such a composition at night.
Special control methods for “favorite” spider mites
The spider mite has a few special favorites, but after finishing the “delicacy” (if you miss this attack), it will start to affect more and more plants. For example, once in my start from flower buds, spider mites even moved on tomato buds, which, in principle, rarely happens.
The most delicate summers for spider mites: Cape Viola, balsam fir, morning glory, Nemesia. These plants need to be handled with special care, as it is from their most frequent start of an infestation.
Correct treatment
Be sure to alternate preparations, as spider mites are easily immune to any acaricide. Foliage should necessarily be sprayed on both sides. Spray the soil surface, the container, and the nearest adjacent surface while treating the plant.
How can I detect spider mites on sprouts in time?
Although spider mite is a very dangerous pest that can cause serious damage to plants until death, it is not difficult to deal with it in the early stages of infection. It follows that the main rule for all seed growers is to turn the leaves regularly to check the seedlings, as it lives mainly on the underside of the leaves.
If you find suspicious black spots, it is best to take a magnifying glass and look carefully, are they stationary or slow-moving? If your suspicions are confirmed, you should start fighting it immediately.
PREPARATION FOR SPIDER MITE CONTROL ON YOUNG SEEDLINGS

Before choosing a drug for spider mite control, it is important to remember that this pest is not an insect, which means that insecticides do not work on it. A special group of preparations – acaricides – is used to control spider mites.
Previously, I used one of the most popular and perhaps the only acaricide, which is available everywhere in the market. And in principle, I was satisfied with the effectiveness of the drug. But the spider mite invasion recurred year after year, with several outbreaks during the cultivation of seedlings. The efficiency of the preparations is greatly reduced, which is related to the development of resistance of spider mites.
So now I prefer to use the new generation of acaricides. I would say that these drugs are very expensive, nevertheless, most of them have a huge advantage: they kill spider mites at all stages of their development, and some of them even act on oviposition.
HOW CAN I CONTROL SPIDER MITES ON SEEDLINGS?
Unfortunately, most of even the most modern acaricides are not systemic, but have a contact action, (at best, an intestinal contact action). In other words, in order to kill an egg or an individual, the solution must be allowed to reach its surface.
This fact greatly increases the complexity of plant treatments. When the number of seedlings is very high, and if this is a flowering seedling with very shallow leaves, treatment takes a lot of time. And the purely physical lifting of each leaf is inconvenient.
Personally, for sprouts, I prefer bathing to spray. That is, instead of using a sprayer to apply the medication, I use a bucket to prepare it. Depending on the height of the taller seedlings, I choose containers of 5 to 10 liters. So that the plants can soak “with their heads held high”.
To treat, I simply take a pot of seedlings, dip them into the container and rinse gently. Alternatively, if necessary, the curled leaves can additionally be rinsed with the fingers so that the solution can reach all the hard-to-reach places. I always work with only gloves on!
Of course, this method increases the consumption of acaricide exponentially, but I prefer not to save. First of all, there is more chance of inhaling the drug when spraying. Secondly, this method is technically faster and simpler. In addition, spraying a large number of plants can be tiring and make your hands sore.
CONSIDER TEMPERATURE WHEN TREATING PLANTS
The instructions for some acaricides talk about the need for their double treatment. If you are using an acaricide that does not work on the eggs, you cannot ignore this advice. It is important to kill not only the adults but also the offspring that are about to emerge from the eggs.
Also, the interval between treatments in the instruction is conditional, and it depends directly on the air temperature.
The rate of emergence of offspring can vary at different temperatures:
- At 68°F (20°C), the interval between treatments is 10 days.
- At 77°F (25°C), the interval is 5 days.
- At 86°F (30°C), the interval is 3 days.
At temperatures below 64°F (18°C), spraying is ineffective because the active life cycle of the pests is suspended and they go into hibernation to avoid the cover.


you are actually a just right webmaster. The web site loading speed
is incredible. It sort of feels that you are doing any distinctive
trick. Moreover, The contents are masterwork. you have done a excellent process in this
matter!
Its such as you read my mind! You seem to understand a lot about this, like you wrote
the guide in it or something. I believe that you just can do with a few p.c.
to power the message home a bit, but other than that,
this is magnificent blog. A fantastic read. I will certainly be back.
Hello There. I found your blog using msn. This is a very well written article.
I’ll be sure to bookmark it and return to read more of your useful info.
Thanks for the post. I’ll definitely return.
Does your website have a contact page? I’m having problems locating it but,
I’ve got some ideas for your blog you might be interested in hearing.
Either way, great website and I look forward to seeing it develop over time.
Now I am going to do my breakfast, once having my breakfast coming yet again to read additional news.
Howdy just wanted to give you a quick heads up and
let you know a few of the images aren’t loading correctly.
I’m not sure why but I think its a linking issue. I’ve tried it in two different web browsers and both
show the same results.
Thanks for the marvelous posting! I seriously enjoyed reading it, you will be a great author.I will remember to bookmark your blog and definitely will come
back from now on. I want to encourage you to definitely continue your great work, have a nice afternoon!
Heya i’m for the primary time here. I found this board and I
in finding It really useful & it helped me out a lot.
I am hoping to provide one thing back and aid others such as
you helped me.