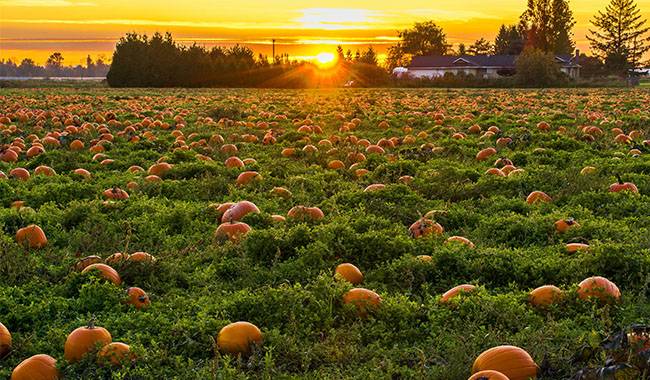
Usually, in the southern and central regions, there is no need to grow pumpkin through seedlings. Its seeds germinate well when grown in the open ground, grow well, and produce high yields.
If you live in a cold region or if you want to get your pumpkin crop before the deadline set by the producer (usually this deadline is 120-140 days from sowing to harvest), it is recommended that you plant pumpkin seedlings first and then plant them in the open ground.
We will talk about the proper cultivation of pumpkin seedlings here.
PROPER SELECTION OF PUMPKIN SEEDS
The first thing to do is to choose the “right” seeds to sow your pumpkin seedlings. If you collect your own seeds, which is most often the case, then you should be sure that you are growing exactly one variety and not a hybrid. The plants that will eventually grow in such seedlings will be completely different from the plants that grew on your plot last year.
If you are certain that you are growing a variety and not an F1 hybrid, you can and should collect seeds, as pumpkins usually have many seeds inside with plenty to choose from. Try to choose seeds that are intact, undamaged, without any signs of decay, and fully ripe.
You can check their basic condition by gently pressing the sides with your fingers: intact (mature) seeds will not be pressed through, “barren” seeds will be pressed through and you will feel that it is not a seed, but actually just a shell of it.
Next, once you have selected healthy, intact, accomplished seeds – you can do this ahead of time – check how long you have had these seeds in storage. (a) Typically, pumpkin seeds germinate over a fairly long period of time, anywhere from six to eight years.
At large retail chains, old seeds are usually discarded, but at home, you can forget about the “bag” containing the seeds and they can quickly lose their ability to germinate as the years fly by. To prevent this from happening, be sure to write the date on the seed packet when you release and store the seeds.
When buying seeds in stores, try to choose varieties from reputable manufacturers who deal in reliable, proven seed material, and always write or cover the date of the package with a sealed bag on the seed packet with them, rather than a typed picture.
Try to take fresh seeds, and if there is a year or a year and a half left before the expiration date, it is best not to take such seeds, even if there is a discount.
PUMPKIN SEEDS READY FOR SOWING
Once you have chosen your seeds, you will need to divide them into several portions. Scattering them into piles by looking at the seeds size with your eyes. It’s really simply.
Each portion of seeds, regardless of size, needs to be “awakened” initially. To do this, it is best to place the seeds in water (preferably melted water or rainwater) and heat them to 104-109°F (40-43°C) above zero for about an hour.
Once this time has elapsed, take the seeds out, do not rinse them in cold water, wrap them in a damp cloth or gauze and place them in the shade of a normal room for a few days until they are ready to germinate.
During this time, you will need to keep the rag or gauze slightly moist (with a regular sprinkling of water) to keep them moist. If you plan to plant a large number of seeds, you should not put all of them in one large rag or gauze. It is better to divide them into several smaller pieces. For example, ten pieces.
Also, gardeners have noticed that when growing through germination, pumpkins are less likely to get sick and be affected by pests, and apparently, it preserves immunity better and does not waste it in the early stages of growth when sown in open spaces against unfavorable external environmental factors.
If you live in an area where night frosts, temperature fluctuations, and cold returns are frequent, you should harden your pumpkin seeds in addition to soaking them and dividing them into portions. Such a simple process will improve or strengthen the immunity of the seedlings, increase the plant’s resistance to cold and slightly increase its resistance to pests and diseases.
In order to perform the hardening of pumpkin seeds, it is necessary to germinate the seeds gently, without removing them from the cloth or gauze in order not to damage their germination, but simply unfold them and keep them for more than a day directly on the lowest shelf of the usual household refrigerator.
In addition, to increase the growth activity of the seeds, they are often sprinkled with “Indole-3-acetic acid (the most common natural plant hormone of the growth hormone group)” or similar preparations.
For further hardening, the incubated seeds are placed on the bottom shelf of a household refrigerator for two days. As an additional fertilizer, it is acceptable to cover the charcoal with a damp cloth, one teaspoon per 25-30 seeds.
PREPARING CONTAINERS FOR GROWING PUMPKIN SEEDLINGS
Along with the preparation of seeds, you can also prepare containers for seedlings. These can be ordinary seedling crates, preferably new and dry, preferably pretreated with a 2% manganese solution and well dried afterward, or plastic containers with the obligatory hole in the bottom for draining excess water, which can be easily and simply made with a hot cone, or individual plastic cups, also with a hole in the bottom, also made with a hot cone.
If you do not want to risk reseeding the seedlings and you want to plant them immediately in the open ground without damaging the roots, you can sow the seeds in peat cups.
In such a cup, you can sow a few seeds, then choose the best plant, remove the second seed, or transplant it carefully and plant the cup in the soil without touching the roots of the seedlings. The peat cups will act as nutrients and the seedlings will not receive additional stress as the roots recover from damage.
When choosing peat cups, it is best to start with a pumpkin size of 2.5×2.5inch (6×6 cm), you can have a little more, but not less.
PREPARING THE SOIL FOR GROWING PUMPKIN SEEDLINGS
When the container is ready and the seeds are soaked, you can start preparing the soil for planting pumpkin seedlings. Of course, you can buy soil at the store – read its composition carefully and if everything is fine and the soil is neither acidic nor alkaline, then sow the seeds in it, but you can always prepare the soil yourself.
As a rule, the ideal soil for growing pumpkin seedlings is a mixture of two parts of transitional peat, one part of well-decomposed sawdust and one part of humus. The resulting mixture is best made by adding one teaspoon of nitroglycerin for every five kilograms of soil.
Once the soil is prepared, it should be filled tightly into an available container and then well watered with melted water or rainwater at room temperature, and you can proceed to sow the seeds. Normally, pumpkin seeds should be sown at a depth of 1-1.5inch (3-4 cm) and no more.
When planting pumpkin seedlings not in individual containers but in large boxes, vegetable growers recommend pouring in a little clay for drainage before putting the soil into the box, usually one to 0.8inch (2 cm) thick.
Incidentally, the best time to sow seeds is 18-22 days before planting seedlings in the soil. This depends a lot on the weather outside, in terms of the area where you live – you need to calculate the period according to the climate characteristics.
If you take the middle of the United States as an example, it is better to plant seedlings in mid-May. Of course, it is impossible to exclude frost, but at this time the soil and air will be warm enough to accept pumpkin seedlings.
CARING FOR PUMPKIN SEEDLINGS
But we have gotten a head start and have quite a bit of time before we can sow seedlings in the clearing since so far we have only sown seeds. You will need to cover the container with cling film or glass to create a greenhouse effect until sprouts appear on the soil surface.
If you are sowing pumpkin seeds in different cups, it is recommended to place them in a large container with high sides while covering them with food wrap or glass. It is important to keep the soil slightly moist by opening the foil for at least a few minutes each day to let in the fresh air and spraying the soil with a sprayer.
As for the optimal temperature, keeping it at 66-75°F (19-24°C) above zero during the day is ideal, while at night, lowering it to 57-60°F (14-16°C).
Once new shoots appear on the soil surface, remove the film and place the seedlings on a south-facing windowsill, turning them to the other side of the light every three days so they do not lean to one side.
In addition, gardeners have noticed that pumpkin seedlings often elongate. To minimize this unpleasant phenomenon, you should lower the temperature to 60-62°F (16-17°C) above zero during the day and 50-57°F (11-14°C) above zero at night for about a week immediately after germination. After the specified time, the temperature should return to the standard temperature for pumpkin sprouts.
WATERING PUMPKIN SEEDLINGS
You must be very careful with watering; under no circumstances should you overwater the soil, but you should not allow it to dry out excessively either. It is not advisable to water the leaves of pumpkins. Watering should be done strictly in accordance with the dryness of the root ball, which depends to a large extent on the humidity of the apartment or house.
It should be noted that in rooms with large aquariums, where the humidity is higher and the earth dries out more slowly, it is possible to waterless, and vice versa. Sprayer – the most reliable way of watering, but you need, to use it, try not to wet only the surface of the soil, but to soak to a depth of 1-1.5inch (3-4 cm). Regular and small doses of water are the best advice for watering pumpkin seedlings.
FERTILIZING PUMPKIN SEEDLINGS
In addition to watering, nutrition is needed. Before proceeding, the soil should be slightly loosened (literally you can use a toothpick) and then watered, after which the shoots can be fertilized, usually a week after they appear on the soil surface.
In this case, the best choice is nitrocellulose, you need 7-8 grams per bucket of water, this amount is enough for one square meter of seedlings, if the seedlings are growing in different containers, you can pour a teaspoon of the solution under each plant.
If you are against chemistry, you can use cowpea solution, which should be poured with water at 113°F (45°C), diluted at 1:10, and left overnight, after which diluted five times, you can nourish the plants. One tablespoon of the solution under each seedling, or one liter of solution per square meter, is sufficient.
THE BEST LOCATION FOR PUMPKIN SEEDLINGS
The container for raising seedlings should be placed on a southern windowsill, where there is maximum good light. At noon, from about 12:30 to 1:30, the seedlings can be shaded from the sun’s burning rays by newspapers.
Once the seedlings reach a height of 7-8.5inch (18-22 cm), become stronger and have two or more bright green true leaves, allow them to transplant freely into the soil if it and the temperature outside the window are warm enough.
PLANTING PUMPKIN SEEDLINGS INTO THE OPEN SOIL
First, prepare the soil, dig to the full bayonet of the shovel, remove weeds, add a tablespoon of nitroglycerin per square meter, water, spend a bucket per square meter of soil, let her “rest” for a few days, then you can proceed to plant seedlings, drilling a well in advance, the bottom of which is best to pour a few tablespoons of wood ash.
When planting pumpkin seedlings choose a location that is conducive to pumpkin growth, such as potatoes, beans, nitrogen-rich soil, various root crops, onions, etc. Bad predecessors are small huckleberries, cucumbers, and melons, the “relatives”.
The beds for planting seedlings should be level so that meltwater or irrigation water does not run over them and cause puddles, and the beds can move freely between them without stepping on the stalks.
Before planting, the seedlings need to be hardened, taken out, and left on the open terrace for a few hours, then for another 10-12 hours the next day, then overnight, and then they are ready to be planted in the ground.
The planting scheme between wells is about 40inch (1 meter), and between rows can also be done 40inch (1 meter), and it can be increased to 60inch (1.5 meters).
When transplanting from a large container, try to wet the soil first and then try to “dig out” the roots of the seedlings with a spoon so as not to damage them, this is done with soil blocks. You can also water the soil in the holes, 0.5 liters of water in each hole is enough.
After planting, you should compact the soil with your fingers so that there are no gaps between the roots, and this is the end of the pumpkin seedling planting, so to speak.
If you want to keep the sun’s burning rays from damaging the sensitive seedling leaves during the first few days, you can shade them with the newspaper at midday.
That’s all the subtleties of growing pumpkin seedlings.


