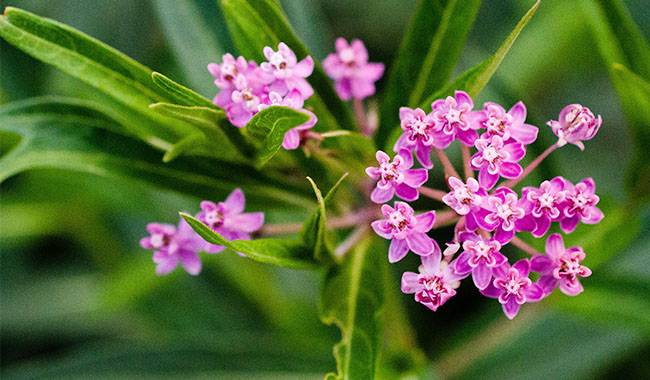
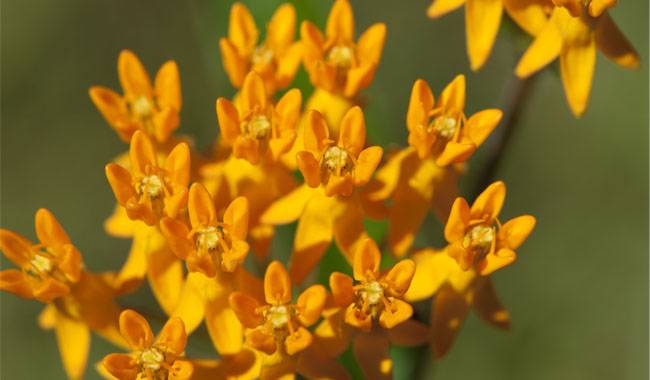
How to sprout milkweed seeds? Follow our instructions for growing Asclepias from seed, including Asclepias syriaca、Asclepias incarnata, and Asclepias verticillata. we have found these techniques to give the best results for good growth.
Asclepias is one of the easiest large herbaceous perennials to grow, with equally beautiful foliage and flowers. This plant is versatile and can be rooted in almost any garden.
However, the possibility of using Asclepias in landscape design is greatly limited by the large size of Asclepias and the tendency of the plant itself to spread.
Why plant Asclepias? Asclepias is a host plant for monarch butterflies: the leaves of Asclepias plants are the only food for monarch caterpillars, and the nectar-rich plants are an important food source for adult butterflies.
Over the past decade, Asclepias populations have declined by as much as 90% (especially in the Midwest) due to the loss of grasslands and habitat. Help support these amazing North American butterflies by planting Asclepias in your garden.
UNDERSTANDING ASCLEPIAS SEEDS AND GERMINATION
Asclepias seeds can be cryogenically stratified.
What does this mean? In the wild, Asclepias plants disperse their seeds fairly late in the season, when the impending cold will kill any seedlings that germinate immediately.
However, the seeds of Asclepias (and other late-season flowering plants) are cleverly programmed to delay germination until they are exposed to the winter cold, and then temperatures gradually rise in the spring.
This adaptation is known as stratification. Cold stratification helps to break the natural dormancy cycle of seeds. Exposure to winter temperatures helps to soften or crack the hard outer shell of the seeds.
LOW-TEMPERATURE STRATIFICATION IS IMPORTANT FOR THE GERMINATION AND GROWTH OF ASCLEPIAS.
It is impossible for your Asclepias seeds to germinate without prolonged exposure to cold temperatures.
In most areas, seeds can naturally undergo the process of cold stratification when you sow them outdoors in the fall. If you are sowing outdoors, we recommend sowing in late fall so that Asclepias seeds can lie in the ground over the winter.
This will give your Asclepias seeds a long winter dormancy period. Once the sun comes out in the spring and the ground is warm, the seeds will germinate on their own.
In warmer areas where there are no winter frosts, or if you are starting seeds in the spring, you can chill your seeds in the refrigerator.
At-home cold-chaining summary: Put your Asclepias seeds inside a wet paper towel or some wet sand in a zip-lock bag and put them inside the refrigerator for 3-6 weeks (30 days).
Label your seeds and be sure to choose a low traffic area inside the fridge where they will not be damaged.
TIPS FOR ASCLEPIAS SEEDLINGS
- If you are using a grow light, make sure to lower the bulb closer to the pot, otherwise, your seedlings may grow in vain as they stretch out in search of light.
- Asclepias need lots of sunlight and warmth to grow.
- Ideally, sturdier stems are better. Some people wish them luck and point a slow-cycling fan at the growing seedlings to strengthen them.
- If you grow dry/unstratified plants in seed starting soil and under grow lights or in peat pots in a greenhouse to germinate the seeds, success will be low and difficult to achieve. Without cold stratification, seed germination may take several months.
Remember, it can take over 40 days from stratification time in the refrigerator to the first germination, so be patient!