Why growing hops in containers at home? Many of us enjoy home-brewed beer because of the control and satisfaction it provides.
The opportunity to grow hops independently is truly another extension of an ever-expanding hobby. In addition, it allows for an element of personalization and authenticity to be added to each homebrew batch.
Unfortunately, not every craft beer enthusiast has access to a lot of arable lands or even a backyard.
Then it’s time to get creative and embrace the urban jungle. In other words, turn your one-bedroom apartment into a green oasis and do it with hops.
Whether you want to grow hops on your apartment balcony on a small balcony or you want to share your living space with hops plants.
CHOOSING THE IDEAL LOCATION
Whether you choose to grow your rhizomes indoors or outdoors, location is the deciding factor.
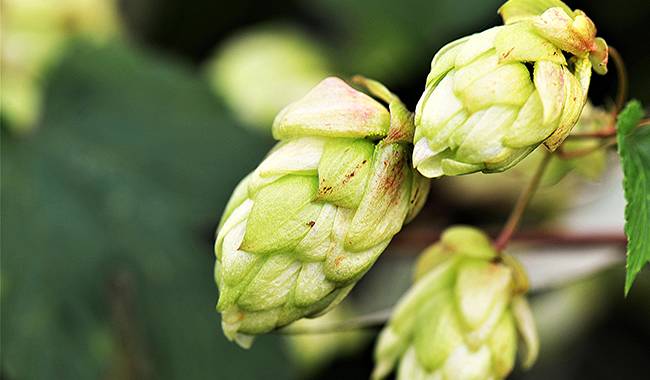
Your hops plants will need a place to climb and they will flourish in 6-8 hours (or more) of direct sunlight. Less sunlight means less crop if the optic cone cells are fully grown.
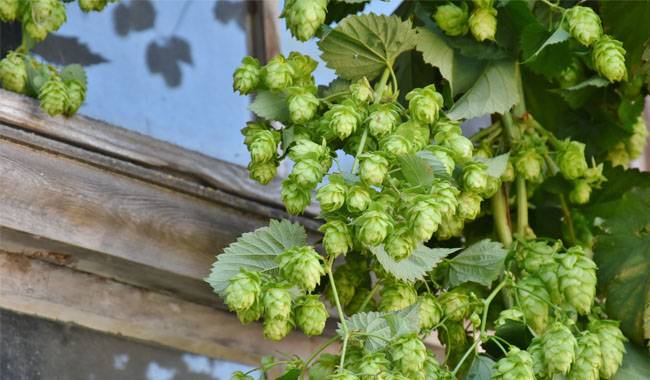
With this in mind, choose a spot by a window where you can see a lot of sunlight, or try planting your hops on the side of the house.
They’ll spread upward, not outward, so if you have little space between you and your neighbors, that’s no problem! If possible, it’s best to choose a south-facing location.
CREATE A CLIMBING PLACE FOR HOPS
Snakeweed is known to grow incredibly fast, which is part of the reason it’s so satisfying to let yourself grow plants for yourself!
Few types of greenery can give you the satisfaction of seeing as much as 12 inches (30.48cm) of growth in a day, but hops plants are not just any plant.
That said, it’s important to provide your plants with an opportunity to climb their inner content.
If you’re growing indoors or on an apartment balcony, you’ve probably wondered how to handle 20-30 feet (6.096-9.144m) of firm growth.
But fear not! Hops plants can be trained to grow upward and then horizontally, so you may be able to arch over windows or garden paths in the future.
If all else fails, they will topple over and hang down again after reaching the highest point – if you choose this route, you may need to guide them by installing some hooks in the ceiling.

PLANTING STEPS
- Grow hops in full sun or in partial shade in hot, dry inland areas. Provide shelter against strong winds because of the vines become dehydrated, they will produce fewer flowers and fruit.
- Obtain a half-barrel seeder or another container that is at least 20 inches (50.8 cm) in diameter and depth. Make sure there are several holes in the bottom of the container to allow for adequate drainage.
- Move the half-bucket seeder to its growing site and then fill it with soil. Fill with a mixture of 4 parts potting soil and 1 part perlite. Do not firm or tamp the soil, as it will not drain either.
- Insert two 8-foot (2.4384m) long stakes into the potting soil along the north edge of the planter. Place the stakes 5 inches (12.7 cm) apart. Screw 1/3-inch (0.84cm) eyebolts into the top of each stake.
- Tie coconut fiber yarn (also called hops twine) to the eyebolt at the top of each stake. Wrap the coir yarn in a crosswise pattern between the two stakes. Once the coconut husk yarn reaches the surface of the potting soil, cut it off. Tie the two ends together.
- Dig a 2-3 inch (5.08-7.62 cm) deep hole in the bottom of each stake. Place the hops rhizomes in the hole and cover them with potting soil. Water them to a depth of 4 inches (10.16cm). If too much settles after watering, add additional soil.
- When the soil dries out at the top 2 inches (5.08cm), water the hops rhizomes. Allow the soil to dry out slightly between waterings, but do not allow the soil to dry out completely while the rhizomes are rooting. Watch for two to three weeks of growth at a temperature of about 68°F (20°C).
- Add water to the vines once they have emerged. Pour water into the planter until it drips freely from the drainage holes. Check the top 3 inches of soil twice a week in cool weather or daily in very hot weather. Water only when the top 3 inches (7.62 cm) is completely dry.
- Once the vine stands are high enough to reach the bottom of the vine stand, train them. Carefully slip the end of the vine over the coconut fiber and wrap it around the stake. Adjust the vines every 15 days until the vines grow reliably along the lattice.
- Feed container-grown hops plants with a liquid fertilizer diluted to one-quarter strength. Apply fertilizer every four weeks from vine growth to fruit set. Water heavily after feeding the grapes to prevent root burn.
- Prune the hop vines as they grow. Remove leaves from the bottom 1 foot of the vine to increase air circulation and reduce the possibility of pests and disease. Once the main stem has produced several branches, remove the tops of the vines. Use clean, sharp pruning shears.
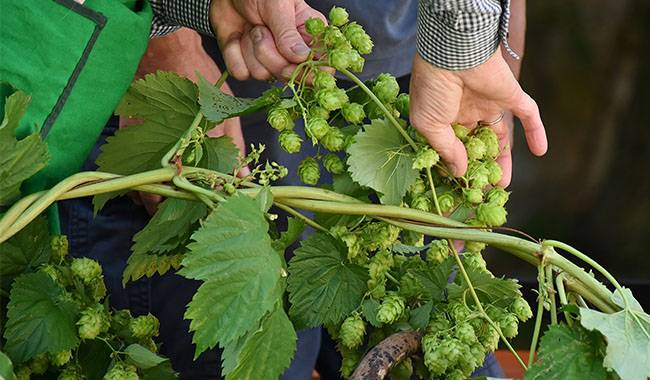
HARVESTING HOPS
Everyone’s picking time is different depending on your variety, location, climate, and maybe even on your intended use.
For more information, check out our How to Grow Hops FAQ. There are rules of thumb for harvesting based on appearance, texture, muppet protein content, and aroma.
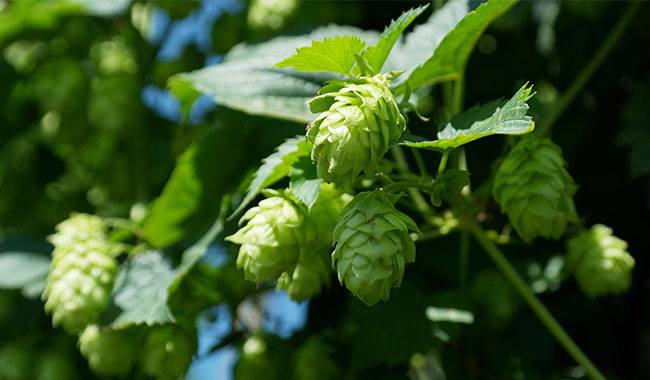
As my first batch, I was increasingly concerned that I was waiting too long and harvesting early (mid-August).
From the dozen or so hops I left as an experiment, I found that waiting almost a month would be better. The bulbs got bigger, and my goodness, the aroma got even stronger!
I carefully plucked the green beauty from the vine. Although I don’t have a formal method of weight measurement, I can tell you that the hops took a year and a half to fill a one-gallon tank of water. When they were laid out dry, filled two large wine barrel.
DRYING HOPS
My first plan was to dry the hops in the garage, but it turned out to be too wet like the porch next door.
I ended up putting the screen in the basement with a fan on the floor blowing on the screen while the dehumidifier ran nearby.
So, I kind of sacrificed heat for dryness, and it worked well. After three days, the optic cone cells were papery and did not bounce back when squeezed, both signs that moisture had been wicked out of them.