Despite the abundance of colorful vegetable seed packages, their contents do not always satisfy customers. When one cherishes the hope of obtaining miraculous cucumbers or extraordinary peppers and eggplants, one can reap an unprecedented miracle, just not the vegetable the gardener had hoped for. Great resentment settles in the soul against the deceiver and his own gullible. To avoid these troubles, you can collect the necessary seeds from your own garden. Of course, there are certain rules for cultivating and storing planting material, but if these rules are not observed, the result will be the same as if you had bought them from a fraudulent store in the market. In this article, we will explain how to collect seeds and save vegetable seeds.
GENERAL TIPS FOR GETTING GOOD SEEDS
It is best to have a plot of land for growing vegetable seeds. In these (relatively small) plots, you should plant 1-3 plants whose fruits will turn into seeds at their biologically mature stage. But it is also possible to select the most biologically typical plants in a field and mark them for future seed varieties (e.g., bow ties). In long-lived crops (cucumbers, zucchini, squash, peas, etc.), one can isolate many wicker plants for later use.
To obtain seeds of varieties, the plot should be in optimal conditions as follows.
- In a bright place, away from wind rises and draughts
- With enough space, especially important for cross-pollinated crops.
- Plant only 1 variety of crops. If there is more than one variety of the same crop, please see the previous section.
- Plots must be kept absolutely clean, as weeds can choke cultivated plants, over-pollinate (single-seeded crops such as crucifers), become a source of disease and a temporary shelter for pests.
- Seedlings must be completely healthy.
- Special care should be taken in the care and handling of the seed patch: timely watering, feeding, prevention of pests and diseases, the timing of harvesting the fruits, and further processing.
CHARACTERISTICS OF HARVESTED VEGETABLE SEEDS
Harvesting seeds of cucumbers, gherkins, and pumpkins
For cucumber seeds, cucumbers of lower order are left on first order stems until they are fully mature. Fully mature seedlings have thick, brown, or light brown skin in a fine grid. The stems, dry to blackened. Cucumbers are left in the bush or harvested and stored until soft.
To prepare the seeds, cut 1-2inch (2.5-5 cm) from each end of the fruit, leaving only the middle part, where the seeds are of the highest quality. Cut the cucumber in half and remove the seeds and pulp (mash). Ferment the liquid mixture in a wide container (deep bowl, jar, or other containers) for 3-4 days. Never add water during the fermentation process. During this time, keep the room temperature at 71-77°F (22-25°C). When the foam rises, fermentation has occurred, and the seeds are easily separated from the pulp.
After fermentation is complete, rinse the seeds from the pulp under running water, dry them with paper towels and allow them to dry completely. At home, the heaviest and best quality seeds can be selected immediately. To do this, place the seeds in a salt solution. Remove the light, floating seeds, wash the heavier ones that have settled at the bottom of the container under running water, and dry them at room temperature until ready. When properly dried, the seeds will tingle when squeezed in the palm of the hand.
In zucchini and pumpkin, select seeds from ripe or even slightly immature fruits. Overripe pumpkin seeds can be used as an anti-insect remedy or as a nice fried dessert in front of the TV in the evening. Incidentally, so do overripe pumpkin fruit and watermelon, which have low germination and sprouting capacity while still in the fruit. All other processes (excluding digestion) take place, like in cucumbers. The best seeds are considered to be the large ones located in the center of the mature fruit.
Frozen cucumber, squash, and zucchini fruits are moved into the room, gradually warmed up, and the seeds released. Seeds must be released by January, or they will germinate within the fruit.
How to collect tomato seeds?
Begin planting by noting the typical varieties of the most developed tomato bushes. On the selected healthy bush, tie a bow on the 2nd-3rd stem on the marked seedling. The fruit is on the bush until it is fully biologically mature but not rotten or overripe, i.e., the color is typical of red, burgundy, pink, and shades of the variety. They are soft to the touch but not rotten.
If the bush begins to develop phylloxera, the fruit in its early stages of biological maturity should be removed, although it is not recommended to remove such fruit. Immature fruits should be ripened on a windowsill or other suitable place.
Ripe seeds are separated from the rind, placed in a suitable container, and given the same fermentation conditions as for cucumbers. Tomato fermentation lasts 4-5 days in cool weather and 2-3 days in hot weather. The fermented seed solution was rinsed under running water. Clean seeds are dried in the sun. As with cucumber seeds, they can be immediately divided into light and heavy seeds using brine.
Bell pepper, bitter pepper, and gogoshary seeds
Peppers tend to over-pollinate, so sweet, semi-spicy, and spicy varieties should be kept within 330 feet (100 m). The best seed-bearing plants are those with fruit harvested at biological maturity (brown fruit can also be harvested) and are located on 1-2 level branches in peppers and on the main stem in gogoshary. The bolls crunch when they are squeezed. Coloring is typical of the variety (yellow, red, orange, crimson to maroon gogoshares).
The harvested fruits can be kept indoors for 7 days, but make sure that the capsules do not soften. Seeds of softened, overripe fruits subsequently lose some positive qualities (germination energy, seedling quality).
When the seeds are released, the cap and stalk of the capsule are cut off in a circular pattern. The seeds are separated into prepared containers. They are spread out on a drying rack or towel in the sun. The dried seeds are ground to separate from each other, hulled, and placed in paper bags. Seeds will continue to germinate for 2 to 3 years.
Harvesting eggplant seeds
Eggplant is actually a self-pollinated plant, but cross-pollination can be seen in the south. In the south, variety isolation is at least 1000 feet (300 m); in the northern and central regions, the distance can be reduced to 330 feet (100 m). For this reason, it is best to plant seedlings of only one variety.
The best quality eggplant seedlings are the first 3 fruits (the best being the 2nd). The rest should be removed so as not to take away the nutrients for their growth and development. After harvesting, leave them in a closed room at a temperature of 50-53°F (10-12°C) for 7-10 days to allow the flesh to soften. Ripe fruits turn gray, brown, tan, and other colors. The seeds in the seed capsule become hard (important!). To ripen the fruits, they are kept at a moderate temperature of 53-59°F (12-15°C) for 15-12 days.
To extract the seeds, crush the fruit: cut them into small pieces and grind with a coarse grater (ripe seeds are not affected) or use a sieve. In a bowl of water, separate the seeds from the pulp by crushing and rinsing them. When stirred, the pulp and lighter seeds will float while the heavier, better seeds settle to the bottom. Do not leave the seeds in the water, but rinse them immediately and spread them on a linen or smooth, damp cloth towel. If the seeds are allowed to stay wet, they will begin to swell and germinate. Dry under a canopy or in the sun, constantly stirring until loose.
Carrots and other umbels
All umbrella plants (carrots, celery, dill, parsley, parsley, etc.) begin to flower, thus producing the seeds of the central and first-order umbrella plants. The rest should be pulled out. To obtain high-quality seeds, leave 8-12-15 umbels on the plant. For umbels of root crops, large, medium, and mature root crops should be allowed to produce seeds. Their seeds will form a more branched branch on the ground with large umbels and seeds.
Cut off the yellowed inflorescences, bundle them into a loose bundle to prevent them from rotting and mold due to fungal infection, and hang them in a gauze bag to dry. The cut inflorescences could then be spread out on paper and allowed to dry. Fully matured umbels are stored until spring, or the seeds are crushed and separated from the seed fragments with a swab. The cleaned seeds are stored in canvas bags under indoor conditions.
Onions and other types of onions
Select mature and well-preserved bulbs for onion seeds. The parent plant should be firm to the touch and free of sprouts (green kernels are allowed). Cross-pollination of varieties is possible, so considerable variety isolation is required – up to 2000 feet (600 m) or cultivation of one of the varieties.
Seedpods can be removed when onion buds are fully formed, and the umbels of some buds have opened. If the weather is wet and the temperature is cool, the seedpods can be pulled out by the roots and dried indoors in the sun. If the weather is warm and dry, cut off the mature umbels along with the stem (arrow part). Spread them out indoors or under a canopy on burlap and dry.
Place the umbrellas loosely to prevent them from drying out and becoming moldy. Peel the dried umbrellas of opened seed capsules by hand, inspect them and store them in canvas bags or tightly closed glass containers.
Beans, pulses, peas
The seeds of these crops are easily harvested. At the beginning of the maturing season, notice well-developed bean sprouts, bean seedlings, and curly bean and pea shoots. It is possible to wait until the pods or beans are fully mature. During the biological ripening period, white webbing will appear on the surface of the fruit, and the color of the pods will turn yellowish-brown, dark yellow light yellow, or other shades. Generally, the fruit will begin to dry out and rustle in your hands. If few seeds are needed, cut off the largest spores and pods with scissors and send them to ripen on the sack under the shed.
Peel or de-skin the spatula and pods within 1-3 weeks after they have completely dried. If seeds are harvested in whole clumps or whips, hang loose bundles indoors and peel them during free time in the fall evenings. When shelling, small, blackened, diseased grains are discarded immediately.
Mature beans come in various colors and are very hard. Harvesting mature beans and pods in dry weather are done in the first half of the day after the dew has fallen. Beans should not be harvested immediately after a rain or a fine fall rain. Grain may sprout in the pods and shovels or swell and die when they dry out again. Before maturity, check the stems and bushes and cut off any underdeveloped pods and beans (spades) so that all nutrients can get to the seeds.
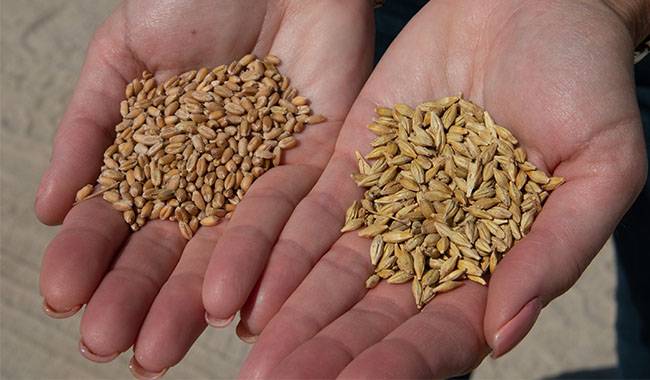
STORAGE CONDITIONS FOR SEEDS
Preserving the seeds is a very important step in the seed storage process.
Seeds are cleaned of debris and placed in paper bags or natural fabric bags. In cellophane bags and other synthetic materials, seeds often become moldy, lose their quality, and may die completely due to the moisture released.
The following information is written on or mounted on the bag: name of the crop, variety, type – early, middle, late, year of collection, storage period.
Place the prepared seeds in a box and store them in a room with a constant temperature and low humidity (not recommended in the kitchen, where humidity usually varies significantly).
The optimal storage temperature is 32-41°F (0-5°C) and the humidity should not exceed 55%. At higher temperatures-over 68°F (20°C)-the fruit will dry out. Some gardeners keep boxes of seeds on shelves in the hallway if no other room is available.
SHELF LIFE OF SEEDS
It is very important to know how long seeds can be stored. Usually 1-3 years, but some vegetable varieties retain seeds for germination for up to 10 years or more, with germination rates increasing or not decreasing from year to year. The table below is an aid to orientation. To make sure you don’t lose any data, you can enter it into your garden diary.
| Name of crop | Shelf life, years (from the year of collection) |
| Cucumbers | 7-8 |
| Zucchini, squash | 7-8 |
| Pumpkin | 4-5 |
| Tomatoes | 4-5 |
| Pepper, gogoshary | 3-4 |
| Eggplant | 3-4 |
| Carrot | 3-4 |
| Umbrella green (parsley, dill, caraway seeds, fennel, sorrel). | 2-3 |
| Onion | 2-3 |
| Wild bean | 3-4 |
| Beans | 10 |
| Vegetable peas | 3-4 |
This article does not list all vegetable crops whose seeds can be harvested on their own for several years without losing their germination.
We would appreciate your advice on how to save seeds and store them.
More related information about planting & growing vegetable


