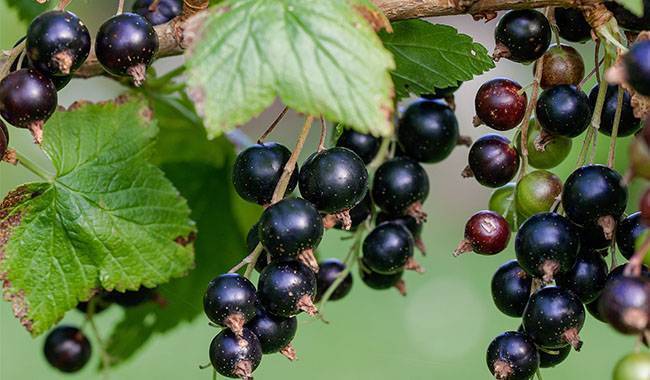
Let’s continue the conversation about currants. In the last article, we learned about the benefits and effects of currants.
Now, I want to tell you directly about the planting and care of currants.
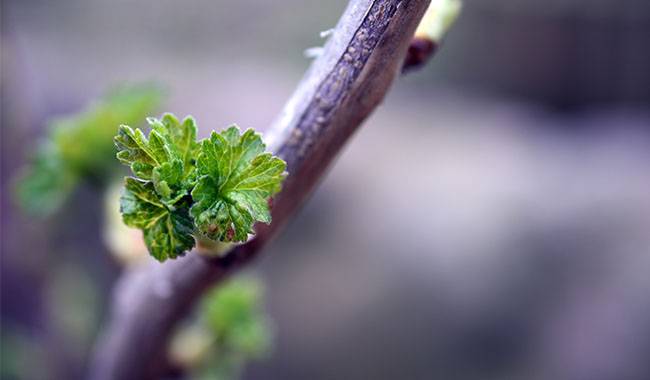
The best time to plant currants is from the end of September to the first half of October. Indeed, it must have time to take root before the soil freezes, and then in early spring the plant can take full advantage of the entire soil’s water reserves and grow significantly larger in the fall.
This applies mainly to European varieties since their buds wake up very early (around the end of April to the beginning of May). At this time, the average air temperature is above 5°C (41°F), as well as the soil has not yet heated sufficiently.
Hybrid varieties can be sown in the spring, but this must be done as early as possible because the moisture will leave the soil very quickly. Also, if we sow late, then the rooting of the currants will be poor and they will not grow for a long time.
If the summer becomes dry and some plants die and don’t have time to root, then they don’t grow at all. This is due to the fact that currant has a very early growing season, which is much earlier than root growth.
GETTING STARTED WITH PLANTING
We choose the place where to plant currants taking into account the following factors.
- Since it makes the dormancy leave early and blooms early, it is necessary to avoid low places where cold air accumulates, so it is also desirable to protect the place from low temperatures, cold winds, etc.
- Currant cannot tolerate flooded soil, in such areas it grows poorly, gets sicker, and in most cases dies. Therefore, it is best to keep the water table no more than 1.5m (4.92foot) from the surface.
- Currants are very picky about light and react negatively to the dimness and decay of shrubs. At the same time, the branches stretch and become bare, the berries become smaller and smaller, and they ripen and change color unevenly.
Selection of the planting site
Based on these requirements, we chose a location.
If we planted a variety with strong bushes, the bushes should be 1.2-1.5m (3.93-4.92foot) apart.
On fertile soils, this distance can be increased to 2.0m (6.56foot), because currants always grow better on such soils.
When planting fast-growing compact varieties, the distance between bushes can be reduced to 0.9-1.0m (2.95-3.28foot). In this case, we must try to avoid excessive humus, because fruiting is only possible in a good light.
It is best to prepare the sowing holes beforehand about 1.5-2 months before sowing (spring sowing – autumn) and they must be so wide and deep so that there is space to place the roots of the seedlings for free after we have filled them with all the necessary fertilizer.
Soil and fertilizer
The pits have a diameter of about 50 cm and a depth of 30-40 cm and we fill them with the following organic and mineral fertilizers: humus or compost (2 buckets); humus or compost peat (1-2 buckets); calcium superphosphate (200 g); potash (20-30 g). It is preferable to use potassium sulfate or wood ash (200-300 g).
Potassium chloride should be applied only in the absence of other potassium fertilizers and no later than 20-30 days before planting, as currants are poorly tolerant to excess chlorine, especially if the soil is light.
It is also important to remember that this plant is very sensitive to potassium deficiency and if it is deficient, a physiological disease – “leaf burn” – can occur.
If your soil is sandy, it is best to make the planting holes shallow and sprinkle the bottom with a mixture of fertilizer and clay. It is not recommended to use high doses of fertilizer on such soils during the sowing period, but more frequent applications should be made during the growing season.
The pit must be carefully mixed with the ground and well moisturized after filling.
How to plant
Before sowing, we cut off the unwooded tops and leaves that are damaged from seedlings or have overgrown root systems. For better rooting of the plants, the roots can be made into bolts of clay, which must be kept in water for about 1 day and night if the sapling is a bit dry.
In the planting hole, carefully and slowly spread the roots and then fill the roots with fertile soil, compacting the soil around the plant to make sure there are no gaps.
We sow the seeds at a smaller depth of 3-5cm (1.18-1.96inch). Those varieties with weak or moderate shoot regeneration (usually from Europe) are best planted at an angle, as more adventitious roots and basal shoots will form. The technique also provides good results on heavily textured soils.
If your location has a high water table, plant currants on a 1m (3.28 foot) wide hill of rubble.

Watering and daily management
After planting, water the plants and then make sure to cover the soil in the bushes. As a mulch, you can use hummus, straw, peat, chopped bark, young grass clippings.
When mulching in a fertile upper layer of soil, it creates good conditions for root formation and also preserves moisture better, and the bush does not thicken with basal shoots, thus suppressing weed growth.
The buds of the planted hybrids can be cut short, leaving only 12-15 cm (4.72-5.9inch) above the soil surface, a technique that will help the emergence of a large number of newer buds and the fastest crown formation.
For seedlings of weaker European varieties, it is sufficient to pinch only the top of the buds.
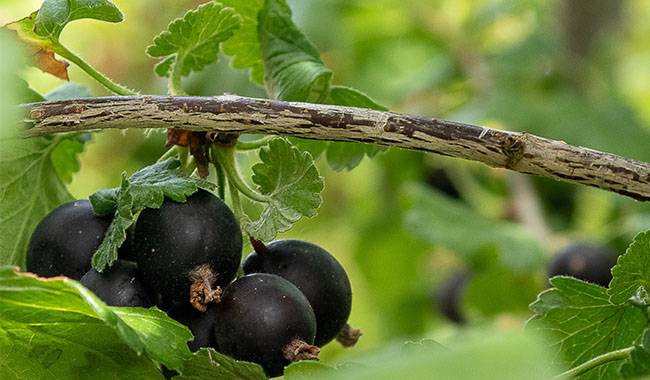
HOW TO TAKE PROPER CARE
In order for currants to grow well and produce fruitful results, they must be properly cared for. So how do we take care of currants?

- We monitor the soil around the plant. In autumn, we dig them up to avoid damage to the roots, so that they are 10-12cm (3.93-4.72inch) deep near the bushes and 15cm (5.9inch) deep between the bushes.
It is best to do this with a fork, in this case filling the soil with organic and mineral fertilizers and composting the currants in the winter.
In spring, we thin the soil near the bushes to a depth of 6-8cm (2.36-3.14inch) and thin the soil between the bushes by 10-12cm (3.93-4.72inch), in conjunction with thinning and thinning the bushes and fertilizing. - In the summer, we do 3-4 more loosening until we reach a depth of 6-8cm (inch) and of course regular weeding.
Next, we maintain the necessary soil moisture. During dry periods, water the currants regularly.
The most important periods when plants need water, in particular, are the time of active plant growth, the time of pollination formation (immediately after flowering), and two weeks before harvest.
Water currants according to the dryness of the soil and must be rooted because plants can get sick when watered by rain. - Plants need nutrition. How much and which fertilizer we need to apply during the growing season depends to a large extent on the composition of the soil in our area.
Thus, for example, fertilizer must be applied annually on poor soils, every two years on cultivated soils, and every three years on fertile soils.
In spring, we apply nitrogen fertilizer in stages: in the first year after planting, about 15-20 grams of fertilizer per square meter of diameter are required, increasing the dose to 20-25 grams in subsequent years, followed by immediate loosening of the soil.
It is best to apply phosphorus and potassium fertilizers in two stages, in spring, and after harvest. We apply them in the following amounts per bush: potassium sulfate: 20-30 grams, calcium superphosphate: 50-80 grams.
As mentioned above, when growing currants, special attention must be paid to potassium fertilization. Ash is considered a good source of potassium and a means of protection against powdery mildew and pests.
Without a doubt, the best fertilizers are organic ones, which are good for summer seed mixing.
Usually, we make the first application after flowering and the second after harvest.
For these dressings, we take hair proteins or guano and fill them with 1/4-1/5 of the volume of any container and add water.
Then, when the organic fertilizer is sufficiently filled (3-4 days), we start feeding by diluting the resulting solution with water: hairy protein – 4-5 times, bird droppings – 10-12 times.
We apply to chase fertilizers in grooves between bushes or around bushes, one bucket for each plant.
PRUNING CURRANTS
If we want to get a high yield of currants every year, then we must prune currants correctly and in time. And some methods of forming shrubs not only increase the yield of the plant but also create very effective decorative shapes of shrubs.
Currant is a rather plastic plant, so it can have the most exotic forms. In addition to the typical ways to form currants, there are others, for example glassy (single-armed) (vertical) and double-armed curtain fabric on clips.
Let’s consider from the very beginning the classical way of pruning and forming a bush. Usually, by the autumn of the first year, currants will grow several annual buds.
Among them, we need to choose 5-6 strongest shoots, which point in different directions and are relatively more convenient for each other.
We leave these shoots and cut off the rest at the soil level. Thus, each year we add no more than 3-4 new shoots and remove the redundant, sick, weak shoots lying on the ground.
Before starting to bear a lot of fruit (about 5 years), we will form a well-structured bush containing 18-20 branches of different ages.
Then, when the bush reaches 6-7 years of age, we begin to remove 3-4 old branches each year that have long since begun to bear fruit and replace them with the same number of new annual shoots.
It is best to do this pruning in the fall after harvest and after the leaves have fallen, or in the early spring before the buds swell.
We shorten the length of the replacement (zero) buds by 1 / 3-1 / 4 because they usually grow for a long time, so there is no time to prepare for winter and freeze slightly. In addition, by pruning in this way, the buds can better form buds that will mature and grow to full size.
For the same reason, we also shorten the stronger buds of the higher branching order.
And we shorten the main skeletal branches in order to stimulate the growth of lateral branches, so we make the gooseberry bushes more actively branched.
This type of shaping of gooseberry bushes as nodes is best suited for use in very harsh climatic conditions or when growing non-frost resistant varieties.
And this type of formation is certainly not interesting from the point of view of yield, because the total number of branches is very small, which means that the yield is very small.
In addition, the berries come out from the soil surface very low and are therefore likely to be contaminated by them, and the bushes take up much more space than the traditional form.
The other method of formation – the single-shouldered cordon – also does not increase productivity because it is the stem or branch that grows full of branches.
A two-armed cordon is already two buds, placed almost horizontally, and has many vertical branches. Although the bush looks very impressive and bears fruit perfectly in a very small area near the wall, this type of structure is not suitable for everyone.
However, the formation of this currant bush is very laborious and, with the regular renewal of the horizontal branches, the bush does not harvest crops.

However, forming on a grid is easier and, in terms of yield, more productive. For this form, there are several options, but the following choice is closer to the classical form.
We planted the shrubs on 1.5m (4.92foot) wide strips and then placed the strongest, most illuminated branches vertically on two grids opposite each other.
Using this method of formation, the number of branches was also limited, and they were placed only vertically, so the bush became flat. Such arrangement of branches is good because it allows growing currants on narrow soil, which is very valuable for small farmhouses in summer.
This method of shaping currants bushes still has two obvious disadvantages.
- You have to remove good horizontal branches, which for some reason cannot be oriented vertically.
- The reason is that the yield of this bush is below potential due to the limited number of branches.
Therefore, the yield of the shrubs can be increased if we combine the grid structure with the classical method, in which the branches are placed at an angle of about 45%.
This type of formation is called “grid and classical mix” and is considered to be the most suitable for currant bushes.
I will tell you some functional information about this. At the beginning of the bush development (about the first two years), we prune them in the regular classical way described above, thus creating strong branches.
In the third year, we install a temporary square around the bush, and if we have several bushes, then a rectangular fence is used, which has a height of about 30-35 cm (11.8-13.7inch) and in which the branches are evenly distributed.
In the fourth year, we installed a wooden grid with a height of 2m (6.56foot) inside the fence. If we plant ribbons on our bushes, then the grid is best made in the form of the letter ” P “, and if used alone, then we make a quadrilateral lattice, like an additional fence located inside the main body like an additional fence inside the body.
On these grids, we place a part of the branches close to the slope of the branches so that they cover as much light space as possible.
In the fifth year, when we already had a large number of long and strong branches in the bush, some of which had too low a slope, we replaced the temporary fence with a permanent one.
In addition, we made it higher than the temporary fence by about 50-60 cm (19.6-23.6inch) and a larger area.
Afterward, we redistributed all branches evenly to the fence and tied some of them to the grid if necessary.
The main advantages of this molding are as follows.
- Yield per unit area is increased about 2 times;
- increased quality of the berries since optimal lighting of the shoots can be achieved
- formation of a large number of strong shoots that are more resistant to diseases and more productive
- the impressive appearance of the bush, especially during the flowering and fruiting period.
Disadvantages of this stereotyped program include.
Firstly, it cannot be used for non-frost resistant varieties because there is no guarantee that the tall bushes will be covered with snow before the onset of frost; secondly, it will take longer to form currant bushes with this method compared to the traditional method.